Tuesday, July 26, 2011

H2H Challenge Sketch Card


I was inspired by this week's Heart 2 Heart challenge to create essentially a ribbon with paper. I realized when I was working on the last project (Journal cover), that distressing small pieces of paper is not the easiest, so for this card, I distressed the edge of an intact piece of cardstock, and then I just cut a sliver off. I cut a wider piece of black cardstock, about 3/4", and then lined it with Tombow adhesive. Then I just layered the slivers of colored cardstock on top. I did supplement with some liquid glass as needed. Then I cut the entire 12" 'ribbon' into the smaller pieces (3", 4", 5").

The clouds were hand drawn, cut out and then sponged with Heavenly Blue ink. The writing was (biting fingers) handwritten, and the sentiment on the inside of the card reads "look for the rainbows". I popped out the black frame as well as the cloud with the writing on it with 3-D tape. Finally, for the small circle, I used a circle punch, sponged the outside, and handwrote the verse reference - Jeremiah 29:11 (For I know the plans I have for you,” declares the LORD, “plans to prosper you and not to harm you, plans to give you hope and a future.)

My Creations Journal cover for Play Date Cafe


Finally getting around to doing/posting some more artwork! I've been experimenting with the My Creations Journal, which is a 5x7 size with a pocket on the front cover made from our Memory Protector material where you can slide in photos/artwork. It really allows you to customize the cover based on what you want to use the journal for, and at $7.95 is a great gift idea.

Anyway, I saw this week's Play Date Cafe challenge--incorporating a splash of color--and thought it would be perfect for a journal cover. This was really an easy project to do, great for keeping my hands busy while catching up on some TV shows. I used the edge distresser on the black and white stripes that I layered over a scrap of red paper, and ran that whole piece through the paper trimmer afterwards to make sure I got a nice clean edge on both sides.

The letters are from the 'Typewriter Keys' alphabet set, and then I used a Kraft Border sponged with black to finish up the left hand side.

I really like how the border mimics a spiral ring notebook, and the lines/stripes also kind of speak to a notebook in an abstract way.

Sunday, July 24, 2011

New Idea Book and August Promotions


Close to My Heart's Autumn/Winter Idea Book goes live in a week, August 1st! It's chock full of great ideas and new products. I've spent hours going through it...I feel like a little kid looking through a toy catalog before Christmas. If you'd like your own copy, please contact me.

I also wanted to let you know about not one, but two promotions that are running during August:


First, to celebrate a change in the Stamp of the Month program, CTMH is offering a free A-size alphabet stamp when you buys August's stamp of the month. Previously customers could earn a discount on the stamp of the month, or even earn it free depending on the size of their order. Now, all you have to do is spend $50, and you can pick it up for $5.


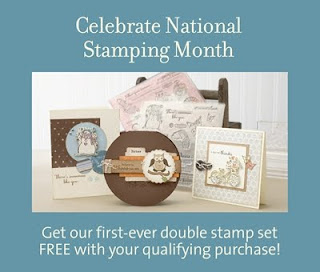
Second, to celebrate National Stamping month, CTMH is offer the Pair-a-Phrase double stamp set free when you place a $75 order between August 15th and September 30th. This set is actually two D-sized stamp sets that include images and cute phrases/quotes you can use to make cards or add seasonal touches to your scrapbook layouts all year.


Let's break it down. If you spend $75 dollars between August 15th and 31st you can take advantage of both offers! This means that you would save $12.95 on the August stamp of the month, and get $42.85 in free stamps!


If you want to take advantage of any of these offers, please let me know, or click on the 'Shop With Me' link to the right of your screen.


Tuesday, July 19, 2011

Open House


I wanted to share with you some of the projects that I completed for my first Open House last week. I made the little picks above for fruit 'stabbing' purposes. I got these picks from Target and they were perfect because they are flat at the top, perfect for using the Tombow, and very easy to do...this was a good TV watching project, and a great way to feature other uses for my CTMH stuff.


Another, 'other use' for CTMH projects. Kind of a birth announcement in a dual frame. This would be a great baby gift, and so easy to do do!


Finally, saving the best for the last. Flip Flaps! I'm currently finishing up some albums that are not the drop-in style, but I just HAD to showcase a page with Flip Flaps at the Open House. I love these things! I seriously think that the first thought that went through my head when I saw Flip Flaps for the first time was, "where have you been my whole life?" How versatile, and how easy to use. How many times have I sat and debated and debated which pictures to leave out because I didn't have enough for two whole layouts? Never again. I love how easy these are to use, how you can hide journaling, and how you can layer similar pictures to make a kind of flip book. So much fun!


CTMH Products Used:


Picks - Strawberry from 'Summer Days' Stamp Set, Fireworks stamp from 'Jubilation'; Bamboo/White Daisy/Twilight Cardstock; Black/Cranberry Ink


Frame - Small Friendship Alphabet stamp set; Bamboo/White Daisy cardstock; Bamboo and Desert Sand (sponged on edges) ink; Edge Distresser


Flip Flap Page - Cocktail Alphabet stamp set; Garnet ink (second generation); Flip Flaps, Memory Protector


Thursday, July 14, 2011

Exciting Changes

I've only been a consultant for about a month and a half, but I continue to be so impressed by this company. The Close to My Heart convention is currently going on in Anaheim, California, and I've been a little mesmerized by all the goings on out there, and the new products being revealed. I'll get to see the new idea book tomorrow morning (it'll go live to customers August 1st). There are a lot of changes; for those who are Cricut fans, there is a new Cricut bundle that includes coodinating stamps and embellishments. But the change that resonates most with me is that the company is dropping the price of their stamp sets. They currently run from $7.95-$34.95, and the new prices will be from $6.95-$29.95. This translates to a $5 decrease for most of the sets (the more expensive ones). Don't get me wrong, there are some price increases, mostly to the papers. I believe that this is in part due to the fact that the patterned papers (B&T papers) are going to be heavier quality, but generally speaking I think the cost of paper (not just in the scrapbooking industry) has gone up. But acrylic stamps are CTMH's bread and butter, I believe this is one of the main things that sets them apart in the industry, and it's a big deal to cut prices on your main staple 14-26% (for the larger stamp sizes). There are also some big changes coming in terms of hostess rewards that directly benefit customers/hostesses. What fun to be part of such a wonderful company!

Sunday, July 10, 2011

Moxie Fab World Beautiful Borders Challenge Card


I saw this challenge last week (http://www.moxiefabworld.com/2011/06/next-moxie-fab-world-challenge.html) and knew exactly what I wanted to do. I've seen a bunch of quilted cards, mostly based on the Log Cabin quilt, and I thought that type of card was perfect for this challenge. I wanted to do a different pattern, and remembered that I have Carol Doak's 300 Paper-Pieced Quilt Blocks. The book comes with a CD with all the quilt block patterns and allows you to create whatever size block you want. For this challenge, I changed the black (normally 4") to 2 1/2". Then I made four and put them together to form the pattern.


Then I just played around with my Kraft Borders leaving some plain, some sponged but placed right on the quilt square base, and adhering some to another strip of paper and sponging over both. I really like the graphic nature of the card. The beauty of this design, and using quilt blocks as inspiration is that you could have taken the four blocks and put them together in different ways to make a number of different cards with different focal points, but I like the pinwheel pattern this creates. Hope the folks over at Moxie Fab World like it too!


CTMH Products Used:

Accessories: Kraft Borders

Exclusive Inks: Outdoor Denim, Ponderosa Pine, Garnet, Chocolate

Papers: Smokey Plum, Ponderosa Pine, Twilight, Outdoor Denim, Colonial White, Bamboo

Tuesday, July 5, 2011

Completed Filmstrip from Magic


The big white CTMH box arrived last week, and you may have noticed I've been pretty busy since. I just wanted to share the completed filmstrip from Magic. Putting it together was a snap (all the hard work happened a couple weeks ago, see previous post)!

And that's my last post for tonight....nothing like batch processing!

Creative Rhythm Layout Using Cherish


I wanted to share with you a recent layout because it shows how adaptable Jeanette Lynton’s how-to books are to whatever your scrapbooking style may be as well as the products you have already invested in.

I talked a little about my scrapbooking style in a previous post, but I should also share that until I learned about CTMH, I was basically a Creative Memories girl. That’s what I ‘cut my teeth’ on in terms of scrapbooking. I have a lot of their products, like them, and regularly use them. I think it’s foolish to believe that one company can meet all your scrapbooking/papercrafting needs. There are so many unique and different products out there and limiting oneself limits your creativity. That said, I do believe that CTMH brings something unique to the scrapbooking world, and the quality of their products is top-notch (or I wouldn't have gotten involved with the company).

Most of this layout uses my stash of CM products. The paper/pages are all CM. But, I used the Creative Rhythm pattern from Cherish (pg 37) to put this layout together, and I really like the results. Now, you can follow the directions in the book to a tee and get a GREAT looking page, no question. But, as I have mentioned in the past, I’m still getting used to the whole idea of patterned paper, and am just more comfortable with solids. This layout calls for three different patterned papers as well as two different colors of cardstock. So, what I did was alter it a little. I used a yellow and brown cardstock and counted the white from the page as a third ‘color’. Some of the paper/cardstock was used sparingly, so I ended up combining some of them to stick with the three color scheme. Then, as a substitute for a patterned paper that was basically cut to resemble a ribbon, I used one of my all-time favorite CTMH products: Kraft Borders. And, to add some pizzazz, I stamped little circles from the Enjoy Life My Acrylix set using chocolate ink.

I’m really happy with how this layout turned out. It demonstrates how functional/adaptable the CTMH line is with whatever products you know and love already, and shows how any one layout can be very simple or more intricate based on your personal style.

CTMH Products Used:
My Acrylix: Typewriter Alphabet, Enjoy Life
Ink Colors: Chocolate
Embellishments: Kraft Borders
Layout: Creative Rhythm, from Cherish

My current scrapbooking projects

I thought I would share with you the current scrapbooking projects I am working on and my process/method for trying to stay up-to-date since you’ll be seeing photos on the blog.

1) Carina's First Year Book. I did this for Ellie also. In a nutshell I do two layouts for each month. The first has a calendar on the left side. That’s pretty much the format. Sometimes if I have a lot of pictures of a particular event (Christmas/Easter/starting solid foods etc.), I will dedicate ½ a layout to said theme. Apart from that, I try and hit the highlights of what happened in the month. Often they are not my most favorite pictures, but pictures that show something new happening. I keep a journal for Carina(and did for Ellie also) that talks about the different things she’s doing, what we’ve been up to, and that’s how I fill in the calendar. I know a lot of folks who just use a regular hanging calendar and write in what happened that day for the first year. You could absolutely cut out those sheets, mat them and use them in a scrapbook, or make a color copy at your local photocopy store – which would allow you to resize if you want.
2) Ellie's Baby Book. Instead of doing the traditional baby book, I have been scrapping one. This is, in part, because I just couldn’t find a book that I really liked and thought I would be able to fill in. There are lots out there, but I knew I’d do a pretty good job documenting the first year and a not so good job after that, and a lot of the info in those books spans many years. Plus, there were a lot of questions I didn’t really care for/see myself answering and I didn’t want to have a book with a bunch of blanks in it. I have a book that I use as the basis for Ellie's book, supplementing/deleting content as I wish. The only bad thing about this is that it takes much longer than just buying a book in the store.

My current process (although this seems to constantly be evolving) is to do things two months at a time. So, for example, at the end of May, I ordered pictures for April and May. While I’m waiting for the pictures to arrive, I fill in the calendars. Then I have about 6 weeks (depending on how quick I was to order and how long it took to ship) to do four layouts. I am usually done within 3-4 weeks depending on what else is going on in life. In the remaining time, I work on the Baby Book and other projects. So far, this has been working really well and even helps to get me re-focused. For example, if I have slacked off and I know I’ll be ordering pictures again soon, I am more likely to get moving on the prior two months so things don’t get stacked up.

This is good for now, but Carina is already 9 months old, so I’ll have to figure out what I want to scrapbook after this (family albums, or separate albums for each of the girls), but I really like the two month delay and whatever I decide to do, I think this process will work.

Saturday, July 2, 2011

Mojo Monday with a Spin on the Magic Spinner


This is another spin on one of the Magic interactive elements. In Magic, which is a scrapbooking how-to book vice a card how-to book, the top element spins to reveal different pictures underneath (in the scrapbooking version there are three openings, so you can see three pictures at a time). I wanted to try this technique out, but my current scrapbooking projects don't lend themselves to this technique, so I decided to adapt it to a card.

Coincidentally, the Mojo Monday challenge for this week was really well suited to what I wanted to do, and only required a little bit of adjustment in sizing. This is a 6x6 card, so I used two of the Magic spinner templates, the 4 1/2" and 4". I adapted the top layer and only cut out one triangle shape. Also, since I wanted the bottom element to move, I ended up creating a bottom layer and used 3-D foam tape (only using it single sided) against the bottom of the middle circle to create some space so you could spin it. I did the same thing on the top layer putting the foam tape in the middle part of the circle. Then I stacked two very small pieces and stuck the top and bottom layers of the spinner together so that only the middle layer spins.

Because the spinner is pretty thick, and I'm very unorganized and couldn't locate my brads, I ended up using a button and hemp to secure it. This was a little bit tricky and had to be done before all the layers were secure.

I had a lot of fun creating the card and working with the Magic technique. This one was a LOT easier than the last one (filmstrip), and am already thinking of other possibilities/ideas that I could apply this to.

CTMH Supplies Used:
Magic Scrapbooking How-to book
Cardstock: Bamboo, Twilight, Colonial White
B&T Paper: Bliss
Exclusive Inks: Chocolate, Outdoor Denim
My Acrylix Stamps: Friendship small alphabet, A Tulip, Lucky Workshop on the Go set, Jubilation, Something Splendid, A Little Everything
Embellishments: Lucky Level II Assortment, Wooden Designer Buttons, Hemp