Wednesday, February 27, 2013

Can you feel the noise?


I've missed the last few Elle's Studio sketches, but I knew exactly which photo I wanted to use when I saw this week's sketch.

This photo just cracks me up every time I see it.  It's from this past Christmas.  When we're at my parent's house for dinner, we usually bathe the girls there before we head home so we can put them straight to bed.  This time, their cousin Collin joined them.  It was SO loud!  Bathrooms in newer houses have those high ceilings and just echo, but boy were they having fun!


I used a fun mish mash of products.  There's some October Afternoon, My Mind's Eye, CTMH, Punky Sprouts, and of course Elle's Studio.  Sometimes it's just fun to surround yourself with a bunch of stuff and see what happens. 

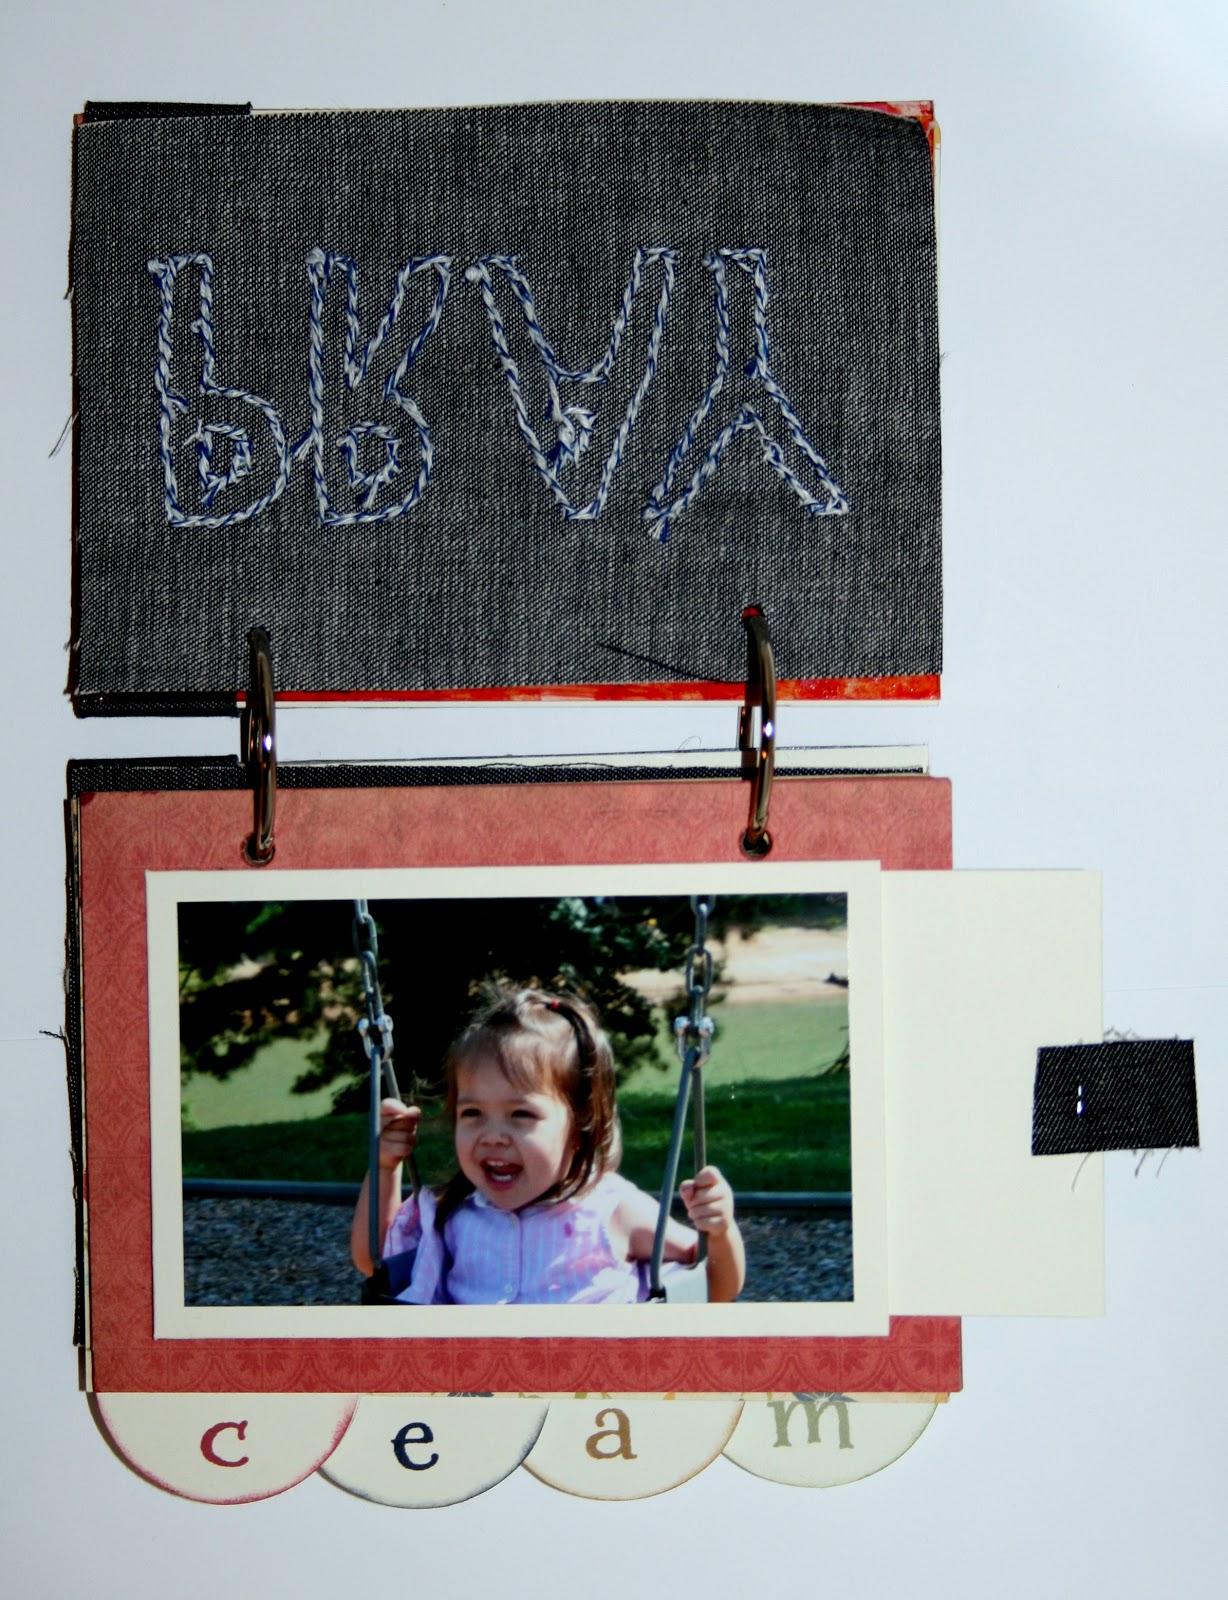
I added some hand drawn lines around the edges.  It's an easy, quick, low-tech way to anchor your page.  There's also a bit of machine stitching on that blue patterned piece.  The title was cut using the Cricut Artiste cartridge.  It's funny because my last layout had no title, and I seem to have over compensated a bit with this giant one.


Hope you are having a great day....half way to the weekend!

Supplies Used
Paper/Cardstock:  October Afternoon - Farm Girl and Sidewalks papers; CTMH - Colonial White and Outdoor Denim Cardstock
Other:  Elle's Studio - Collected Large Journaling Tag, Collected Cutouts, Handmade Layers Cutouts; Punky Sprouts - Lil' Parchment Blossom; CTMH - Cricut Artiste Cartridge, Antiqued Copper Brads; My Mind's Eye - The Sweetest Thing Label Stickers and Wood & Chip Buttons; Tim Holtz Tiny Attacher; Tombow - Mono Adhesive; Zots Dimensional Adhesive; Sewing Machine

Tuesday, February 26, 2013

Who says you need a title?


It's like a card without a sentiment....usually you need one, but not always.

I'm still on my quilted scrapbooking kick.  Last week I saw this post at Basic Grey, part of the Moda Friendship Quilt Along, and immediately thought that it would make a perfect layout.

I pulled out my Little Yellow Bicycle Once Upon a Christmas papers (Thanks Lisa!) and picked three of the more subtle/tone on tone patterns.  Each of the squares is 2 1/2" square, so the center portion is 5" square.  I just cut the squares diagonally using my paper trimmer, inked all the edges, and laid the pattern out.

Normally I would run all the pieces through my Xyron, but since I knew I wanted to do some stitching, I used my Tombow so I  could avoid the outer edges.....keeps my sewing machine needle in better shape.


I did manage to goof on the journaling (possibly because it was about 11 PM and my brain was kind of fried.....I started of saying that Xiao Ayi (my younger sister) took us to lunch, but then remembered that it was my parents who treated.  Since everything was adhered/sewn already, I just amended my journaling to correct it.  Doesn't make a mess, still tells the story, and you would never have known had I not told you right?  A couple years ago I would have obsessed about it, but I like to think I'm a bit older and wiser now.  The point is that I got the memory/photo scrapped, and the facts are there...eventually.


That's all for me today.  Hope yours is wonderful!

Supplies Used
Paper/Cardstock:  Little Yellow Bicycle - Once Upon a Christmas Collection; CTMH - White Daisy Cardstock
Ink:  CTMH - Black
Other:  CTMH - Sponge Dauber; Tombow - Mono Adhesive; Sewing Machine; Pigma - Black Micron Pen; Gelly - White Gel Pen

Monday, February 25, 2013

Guest Blogging for Market Street Stamps (Part 1)


I'm so excited to be guest blogging at Market Street Stamps today!  I've got two cards to share with you today, and I'll have some more projects next month too.

My first card uses the Baby Basics set.  I embossed the little boat on kraft cardstock, colored it using watercolor pencils.  My method was to color it in pretty heavily, and then use my blending pen, dipped in water to smooth/soften the color.  The boat was then fussy cut and adhered to the card base. 

The waves were also colored with the watercolor pencil/blending pen, but more coarsely to add some texture.

My second card uses another sentiment from Baby Basics and as well as those fabulous arrows from the Hit the Mark set.


I lightly created guidelines in pencil before I stamped the arrows.  Pencil is easily erased after stamping, and helps a lot when you want to be precise with your stamping.  I then added color to the background with a foam tool.

I wanted to add some dimension, so I used a craft knife to cut around portions of the large arrow ends and the arrowheads closest to the sentiment.  It takes a little time, but I think it really makes an impact.  The arrowheads were also pieced with a paper from Glitz's Yours Truly collection.


That's all for me today.  As I mentioned, I'll be back with some more MSS projects next month.  Thanks for coming by!

Supplies Used:
Congratulations Card
Paper/Cardstock:  Papertrey Ink - Kraft Cardstock; CTMH - Pacifica cardstock; DCWV - The Green Stack mat stack
Stamps:  Market Street Stamps - Baby Basics
Ink:  Versamark
Other:  CTMH - White embossing powder, Watercolor Pencils (Crystal Blue, Ocean, Grey Wool and Holiday Red); Blending Pen; Tombow - Mono Adhesive; May Arts - Burlap Twine
Thank You Card
Paper/Cardstock:  CTMH - White Daisy and Black Cardstock; Glitz - Yours Truly
Stamps:  Market Street Stamps - Baby Basics, Hit the Mark
Ink:  Memento - Tuxedo Black; CTMH - Sunkiss Yellow, Honey, and Goldrush
Other:  CTMH - Foam tool, craft knife; Kuretake - Glue Pen; Tombow - Mono Adhesive

Saturday, February 23, 2013

Soar


Busy weekend for us, but I thought I would share a card I made a while back that wasn't picked up for publication.

For the background, I used a technique I learned way back when my parents sent me to watercolor painting classes (which I loved BTW).  Basically, you saturate your paper, then brush/spray/drop color onto the paper and immediately place saran wrap on top and kind of crumple it up.  Leave the saran wrap on the paper until it is totally dry.  What you end up with is kind of a stained glass window effect.  This paper was really porous, so the lines are quite subtle, but for less absorbant papers the lines wll be more crisp. 

For this card I used only two colors:  Topiary and Twilight reinker (which were watered down in spray pens).  Pretty cool how the color separates isn't it?

The sentiment is from an old CTMH stamp of the month.  I first stamped it in black.  Then I added highlights using a Faber-Castell metallic marker.  I initially painted it on the stamp itself and then stamped it onto the card.  Since the watercolor paper was so absorbant, I went back and retouched directly on the paper to get good coverage.

That's all for today!  Hope you are enjoying the weekend!

Supplies Used
Paper/Cardstock:  Baszzill Card Shoppe - Jaw Breaker; Water Color Paper
Stamps:  CTMH - Live Out Loud
Ink:  CTMH - Topiary, Twilight, and Black
 
Other:  Faber-Castell - Gold Metallic Pitt Marker. Tombow - Mono Adhesive

Friday, February 22, 2013

Drumroll please!

Hey everyone, just popping in quickly to share my Made with Love Blog Hop winners. 

Via Random.org (sorry I can't figure out how to get the photo in my post), the winner of the Punky Sprouts Hunk Punky is:  

Houses Built of Cards!

And the winner of three spools of her choice from the Twinery is:

Donna Mikasa!

AND, the grand prize winner - who will receive a $90 gift certificate to the Ribbon Carousel is:

Kelly Booth!

Congrats ladies!  Please send me your info and I'll pass it along to our wonderful sponsor, and thanks so much to everyone who hopped through, we had a great time and hope you did too!

If you didn't win, never fear, my sidebar tells me that I hit 200 followers, so I'm working on a little prize for you guys....stay tuned.

Have a great Friday!

Thursday, February 21, 2013

Little Tangles Challenge #7 - A Sketch!


Welcome to Little Tangles Challenge #7!

I love a good sketch, and I think you guys are going to enjoy creating for this one. 

I got to use some of my newest Neat & Tangled stamps today:  Party Dots and On the Strip.  Here's my card: 


I embossed the large circle image from Party Dots in black on some Glitz Cashmere Dame paper.  I also used that paper to create some faux washi by stamping the circle borders from both sets on it.  When I stamped the strips, the black came out a little lighter than I wanted, so I just went back in with a black marker to add some shading.


I masked off the 'let's' from the sentiment and embossed it on the pennant.  To add some dimension,  the sentiment piece is curled, and the center sits up on two layers of dimensional foam tape. 


I'm linking this up at Simon Says Stamp Challenge this Week too on account of that fun BossyJoscie flair arrow.

I really hope that you'll play along.  There are free stamps at stake!  For a second chance to win, today is your last day to complete the Made with Love blog hop - Neat & Tangled is one of the sponsors.  Click here for my post.


Suppleis Used
Paper/Cardstock:  Glitz - Cashmere Dame 6x6 paper pad; CTMH - White Daisy cardstock
Stamps:  Neat & Tangled -
Ink:  Versamark; Memento - Tuxedo Black
Other:  CTMH - Black embossing powder, Dimensional foam tape; BossyJoscie flair; EKSuccess - Black Zig marker; Tombow - Mono Adhesive; Helmar - Black Zap Dots.

Wednesday, February 20, 2013

Ellie & Ella

***For the Made with Love Blog Hop click here - just a couple more days to hop!


I've been wanting to scrap this photo for a long time, and finally got around to it this week. 

Ella is Ellie's bestie from preschool.  The girls are always so excited to see one another, and I know Ellie misses Ella.  Ellie's class is doing a Post Office unit at school right now, and Ellie came home with some 'mail' that we need to send Ella yesterday.


For this layout I did a little digging through my supplies to come up with just the right mix of products/embellishments.  The squares are patterns from CTMH's new Chantilly collection, my favorite from the new idea book.  I stitched just inside each one to give it a quilted look.  I also stitched around the vellum mat, and to attach the brad which is from the AC Chap collection.


I added some doilies from Curtsey Boutique and my other current crush, enamel dots which are holding up a bit of vellum banner from Crate's Acorn Avenue collection.  The Friends decorative brad is from the Chantilly workshop on the go, and I used one of the periods from the thickers used for the title as a bookend for the decorative brad.


I'm going to link this up to the current Studio Calico challenge (create a project with a quilted look) and Cocoa daisy challenge (use 5 or more different patterns). 

Thanks for coming by, hope your week is going well!

Supplies Used
Paper/Cardstock:  CTMH - Chantilly collection; Studio Calico - Tim and Beck; Recollections - Vellum
Other:  American Crafts - Leaf Hugs and Togetherness Thickers, Chap Decorative Brads; My Mind's Eye - The Sweetest Thing Tangerine Enamel Dots; Crate - Acorn Avenue Vellum Garlands; CTMH - Chantilly Workshop on the Go decorative assortment; Curtsey Boutique - Doilies; Tombow - Mono Adhesive; Pigma - Brown Micron Pen; Sewing Machine

Monday, February 18, 2013

Be Joyful Always


Happy President's Day!

It's my turn to share over at the Punky Sprouts blog today.

This month we are all working with the newest Punky Sprouts album, the Hunk Punky.  I really love this album.  If you are intimidated by minis, it's the perfect size.  The pages are 4 1/2" x 6 1/2", so you could literally just fill it up with 4x6 photos and not have to worry too much about extras.

I chose to create a prayer mini.  I've realized that while I'm pretty good about praying for things, I don't often record the answers or when a prayer was answered.

You'll see that the album kind of follows 1 Thessalonians 5:16-18:  Be joyful always, pray continually, give thanks in all circumstances.

On the back of the cover I wrote out one of my favorite prayer passages:  Phillippians 4:4-9


There are some additional sheets in the album, including a clear piece.  I chose to use this like an overlay.  I used alcohol inks to add some color/texture.   There are also two denim sheets.  On this first one I used Lil' Denim Twiney for the stitching.


There are four tabbed pieces in the mini - perfect for a our family of four. I've dedicated one to each of us. On the front of each section is a photo/pocket for that family member. There's a tag that slips in behind where I can record current requests.  Here's Carina's page. 


Here's Ellie's page.  You can also see the back of Carina's page.  On the backside of each tabbed page is another pocket that holds a tag where I can record answers/praises.  All the papers are from Carta Bella's Traditions collection, and I used some Hero Arts background stamps to add some pattern to the pockets/backsides of the tabbed pages.


I'm skipping Andrew's and my pages since I need to order some photos for those pages still...it's amazing how few solo photos we have of one another!

For the second denim page I stitched the word 'continually' with my sewing machine.  I actually wrote the word onto a piece of parchment paper.  I pinned this to the denim pieces and sewed over it.  Then I ripped the parchment paper off to reveal the word.  I went over it one more time to give it a little more definition.


And here's the final page - with the final portion of the Thessalonians passage.  Hope you like the mini and that this gives you some ideas on how you might use it.  AND, if you want to win one of your own, Punky Sprouts is giving one away right here on my blog as part of the Made with Love blog hop....click here to leave a comment, and while you're at it, check out the other stops on the hop - there's candy at every stop! 


We're enjoying a three day weekend here in the states.  Hoping to get caught up on some projects and paperwork and have some fun too.  Hope you are enjoying the start to your week!

Supplies Used
Punky Sprouts:  Hunk Punky, Denim Funky Punky Fiber Pack,
Other:  Carta Bella - Traditions collection; CTMH - Colonial White, Outdoor Denim, Ruby, and Bamboo cardstock, Ruby, Garden Green, Bamboo, and Outdoor Denim inks, Giggle lowercase alpha, Cricut Art Philosophy cartridge; Ranger - Adirondack Alcohol Inks in Butterscotch and Wild Plum; Hero Arts - Large Fabric Design and Lotus Background stamps; Tim Holtz Tiny Attacher; Sewing Machine; Tombow Mono Adhesive

Saturday, February 16, 2013

Castles in the Sand

***For the Made with Love Blog Hop click here


As you all know, I love the quilted look, and today I applied it to a layout as opposed to a card.  These photos are from our vacation this past summer.

The photos are 3" x 3" and the strips of paper are 3/8" wide.  I inked the edges of each, and I ran them all through my Xyron 5" Creative Station - this makes assembly much easier since you can assemble all at once, without having to stop to add adhesive. 

I assembled the quilted portion on a piece of white cardstock, trimmed the edges, and then adhered the entire piece to the layout base.  It looks complicated, but it's actually pretty simple to put together.  It's also a great technique to use with scraps.

Oh and a quick update for you guys on our Chinese New Year shopping. I took Carina on Wednesday.  I thought we would wander around for hours with no rhyme or reason, but when I asked her what she wanted to get, she said very specifically "puzzles and colors".  So, we went straight to the puzzles.  She got a set of Minnie puzzles and a set of Doc McStuffins ones. Then to the Crayola section with a small detour to the cars so she could get an orange hot wheel "like Ellie".  She picked out some pipsqueak markers and a Hello Kitty coloring book....not a bad haul for her $25.

When we got home Ellie looked at it all and said "How come Carina got so much stuff?" It was a good opportunity to discuss how some things are more expensive and some less.....wonder if she will still go for the expensive next time....

Hope your weekend is off to a great start!

Supplies Used
Paper/Cardstock:  American Crafts - Amy Tangerine Sketchbook; CTMH - White Cardstock
Ink:  CTMH - Black
Other:  American Crafts - Black Amy Tangerine Sketchbook Journal Foam Thickers; Doodlebug Designs - Beetle Black Teensy Type Cardstock Stickers; Xyron - 5" Creative Station; Pigma - Black Micron Pen; Tombow - Mono Adhesive

Thursday, February 14, 2013

Made with Love Blog Hop


Hey everyone!  I'm so excited about today's blog hop!  My Gallery Girl buddies and I are playing along with this month's Paper Crafts Connection Gallery challenge - to make Valentine's cards.  You should have gotten here from Jocelyn's blog, but I have the full hop list below if you need it.

Let me tell you this event has taken off!  There are so many generous sponsors offering FANTASTIC prizes!  There is candy to be won at every single spot, and a grand prize too:  $90 to spend at the Ribbon Carousel (that's an actual Ribbon Carousel folks)!

There are two prizes here at my stop.

This first one is near and dear to my heart.  It's one of the new Hunk Punky albums from Punky Sprouts


This is such a fun little album, and I actually have one in the works as we speak.  I'll be sharing it on my blog and over at Punky Sprouts on the 18th, but here's a picture of one in action - the cover of my teammate Erica's Hunk Punky:


The second prize is from another great company - The Twinery


One of you lucky folks will get three spools - your choice (look at all these great colors)!  That's a retail value of $60!  


Now, onto my projects.

I made two cards to share today using a new stamp that I carved.  Here's Card #1:
I went a little embossing crazy.  I think I embossed every item on this card!  With the exception of the sentiment, everything is clear embossed. 

For the red hearts I went direct to paper with my ink pad to color the white cardstock, and then direct to paper Versamark and clear embossing.  I used that same technique for the card base (I only embossed the edges, not the whole base).


My second card is also for the Paper Sweeties' February Challenge.  Another one of the Gallery Girls, Debbie Marcinkiewicz, who wasn't able to participate in the hop this time around, is the owner of Paper Sweeties' stamps.  They have a sketch challenge every month, and they are also gearing up for their February release, so please go check them out!


More embossing here, although not as much.  The hearts on either side are white (which looks kind of off-white) embossed on vellum, the center one is identical to the one on the first card. 


The hearts are hung from the diecut doily.  I didn't cut the doily, just folded it over the back side of the card, and I added a little bit of dimensional foam tape underneath it so that it's adhered, but doesn't lay flat.  The sentiment actually combines two sentiments from Paper Sweeties' Occasions set:  "Hello Baby!"  and  "Sweet Treats". 


That's all from me.  Hope you are having a great time on the hop, remember to leave comments all along the way because each comment qualifies you for the prize(s) at that particular stop, and you never know where that Grand Prize might be lurking!  You have until February 21st to leave comments. 

Your next stop is Anita, but here's the whole list in case you get turned around:

Taheerah Atchia
JJ Bolton
Joscelyne Cutchens
Jennifer Ingle
Amy Kolling 
Agnieszka Malyszek
Wida Miller
Jocelyn Olson
Miriam Prantner 
Anita Recksiedler
Elena Roussakis
Jennifer Rzasa
Erin Lee Schreiner
Dana Warren
Laurie Willison
Tessa Wise
Nina Yang

Finally a huge thanks to ALL the amazing sponsors who stepped up to make this hop even more fun for everyone! 

Avery Elle | BasicGrey | Becky Oehlers stamps | Bossy Joscie | CAS-ual Fridays Stamps | Fresh Squeezed Stamps | Gel-a-tins | Great Impressions Stamps | I {Heart} Papers | Lil' Inkers Designs | Mama Elephant | Neat & Tangled Stamps | Punky Sprouts | Ribbon Carousel | Simon Says Stamp | SRM Stickers | Sweet and Sassy Stamps | Sweet Stamp Shop | The Crafter's Companion | The Craft’s Meow | The Twinery | Timeless Twine | Unity | Uniko Stamps | Viva Las VegaStamps

Supplies Used
Card 1
Paper/Cardstock:  CTMH - black and White Daisy Cardstock; Reflections - Vellum
Stamps:  Handcarved heart stamp; CTMH - Whoooo Loves You
Ink:  Ranger - Festive Berries Distress Ink, Versamark
Other: CTMH - Clear and Black Embossing Powder, Dimensional foam tape; Helmar-Black Zapdots; Tombow - Mono Adhesive and Vellum adhesive

Card 2
Paper/Cardstock:  Core'dinations - Vintage collection Cardstock; CTMH - Black, Colonial White and White Daisy Cardstock; Recollections - Vellum
Stamps:  Paper Sweeties - Occasions Sentiment set; Handcarved heart stamp
Ink: Ranger - Festive Berries Distress Ink; Versamark
Other: Lifestyle Crafts - Nice Doily Die; Trendy Twine - Peppermint Stick; CTMH - Dimensional Foam Tape, Clear and White embossing powders; Tombow - Mono Adhesive

Tuesday, February 12, 2013

Hoppy Hoppy Birthday!


This is one of the tags that I submitted to the recent PC call that didn't get picked up, but I kind of love it.  I mean, it has three of my favorite things:  googly eyes, glitter tape, and a spring!

That adorable frog is from Jane's Doodle's Garden Friends set.  I stamped him on Amy Tangerine Sketchbook paper and added a little extra color to the spots and around his edges using Faber Castell Pitt markers.

I also used the markers to color the green glitter tape because it was a little lighter than I wanted it to be.  Never be aftraid to alter your supplies!  The white glitter tape is also altered - I cut it in half lengthwise to get a skinnier piece.  Some Twinery Peapod twine finishes off the tag.


Hope your week is going well, and for those of you who also participated in the Chinese New Year blog hop (and if you haven't, you really need to because there are fantastic prizes at stake...click here for my post), Ellie did get enough money for a Barbie.  I took her to Target yesterday so she could spend her new-found wealth


She picked not one, but TWO Barbies.

I'm planning to take Carina out for her shopping expedition tomorrow...which will be significantly less predictable, but likely much more dynamic.  Have a great day!

Supplies Used
Paper/Cardstock:  American Crafts - Amy Tangerine Sketchbook 6x6 paper pad; CTMH - Desert Sand cardstock
Stamps:  Jane's Doodles - Garden Friends
Ink:  Memento - Tuxedo Black
Other:  American Crafts - Glitter Tape; The Twinery - Peapod twine; Faber-Castell - Pitt markers; CTMH - Cricut Art Philosophy Cartridge; Adhesive Spring, Liquid Glass; Googly Eyes

Monday, February 11, 2013

My Artiste


I pulled out my Everyday Eclectic collection the other day to scrap some photos of Ellie from this past summer.  The colors in this collection are perfect for summer.  Ellie's hair had gotten pretty long, and she just looked like a big kid coloring on the driveway at her grandparents....I had a moment where I felt like I had a glimpse of what she'd look like in ten years.

This was a really easy layout to put together.  I created a basic four quadrant grid using 5" x 5" squares of the collection papers.  Even if you're not going to use those quadrants to center your pictures, this can anchor your page.  Then I added my photos on top, kind of a grid over a grid. 

I added a little fussy cutting using the papers in the top left and bottom right quadrants, to extend the patterns past the grid that I created and add a little dimension too. 


Then a few easy embellishments, the sticker at the bottom is from the Everyday Eclectic collection, and the two elements in the upper right quadrant are from Pink Paislee's Porfolio collection.  And that's it.  I love it when layouts come together this quickly!

I hope that you had a great weekend, ours was busy, not much time for crafting, but I'm planning to fix that tonight.

Supplies Used
Paper/Cardstock:  Echo Park - Everyday Eclectic collection; CTMH - White Daisy cardstock
Ink:  CTMH - Black (for edging)
Other:  Echo Park - Everyday Eclectic collection stickers; Pink Paislee - Portfolio Ephemera; American Crafts - Dear Lizzy Puffy Letter Stickers - Berry; CTMH - Dimensional Foam Tape; Tombow - Mono Adhesive


Saturday, February 9, 2013

This Year's Valentines


Thought I would quickly pop in to show you guys the Valentines the girls will be sharing with their friends on Thursday.  My goal for Valentines is not to spend a ton of time on them, but to make something that they (or at least Ellie) can help with and be excited about taking in.  I think these fit the bill.

You've probably seen the one on the left on the web/pinterest already, but since Ellie's Kindergarten class is the Goldfish, it just didn't seem right not to make those.

To create the fishbowl, I used the free printable found here, and then added some text in Powerpoint.  I cut them out, and Ellie colored them.  She also addressed them on the backside.  The little bags I found at Tuesday Morning, and I added just a bit of twine to seal it off.

The valentine on the right is for Carina's class.  Carina is always wanting to glue things, so I thought it would be a great idea for her friends.  I created them in Powerpoint, and the JPEG version is below if you want to use it.  The glue stick is held on with a glue dot, and I added some twine that is strung through the back of the valentine just for show.


Hope that your Valentine preparations are going smoothly!

Friday, February 8, 2013

Celebrate! Make some Noise!

***This is my second post of the day, for my Chinese New Year Blog Hop post, please scroll down***

My friend Melissa Shea is celebrating 100 blog followers and invited some of us to party along with her.  She's got a fantastic giveaway going on, so you definitely want to go over there and check it out.

Melissa is a ton of fun and makes some great stuff, so while you're over there, follow along, it's well worth it!

Here's the card I made for Melissa:


Fun huh?  I actually got the idea when I saw this post over at my friend Elena's blog.  It was a really easy card to put together.  The noisemaker is from Target and had a Hello Kitty thing on it.  I took that off and used some Amy Tangerine Sketchbook paper around the body of it and added a little AC glitter tape (that I had cut in half lengthwise to make it skinnier) on the ends of the paper.

After stamping the sentiments on the card, I used a piercing tool to thread the twine through the card front.  It's tied around the noisemaker, but it's not holding it in place.  There are a couple Zots that are holding it in place, the twine is just for show.

Some fun sparkles finish off the look

Huge congrats to Melissa on such a fun crafty achievement!  Now head on over there!

Supplies Used
Paper/Cardstock:  American Crafts - Amy Tangerine Sketchbook 6x6 pad; CTMH - White Daisy cardstock
Stamps:  CTMH - Trinity and Extreme Caps alphas; TPC - Cupcakes
Ink: 

CTMH - Black ink
Other:  American Crafts - Glitter Tape; The Twinery - Charcoal Twine; Zots - Adhesive dots; Polka Dot Whimsy - Sequins; CTMH - Liquid Glass; Tombow - Mono Adhesive; Noisemaker - Target

Chinese New Year Blog Hop, the year of the Snake


Welcome to the Chinese New Year Blog Hop! I'm so glad you could join us. The Year of the Snake officially begins on Sunday, February 10th so be sure to wish all your Chinese friends longevity, happiness, wealth and good fortune during this two-week festival!
  
My traditions involve eating a lot of good food, and usually getting some new clothes.  Chinese New Year was a lot more fun when I was a kid because I would get money in little red envelopes from my parents/aunts/uncles/grandparents, etc.  You could make quite a lot of money on that day, and the great thing was that you were allowed to spend it on whatever you wanted.
 
Unfortunately, I am now married, and have to return the favor by giving red envelopes to my kids and parents/grandparents. Ellie has already asked me several times how much money she is going to get for Chinese New Year because she wants to make sure she has enough to buy a Barbie.  (SUPER!)

Anyway, back to the hop:  how 'bout a few cards using the free digis created especially for this occasion?  If you're not an expert in digis, never fear.  I'm not either.  My cards are very low-tech.  I used Powerpoint for each of my cards.

First, a couple of cards made with the free digi from Dalhouse Designs.  I love quilts, and when I was looking at the image it kind of reminded me of a quilt block.  The actual image has 2013 on it.  I just imported the image into Powerpoint and covered that up.  Then I printed a whole bunch of the blocks on red cardstock and cut them out.


Then the fun part - embossing!  Each of the red squares was embossed with clear embossing powder.  It was interesting to see the effect on the printed image...the embossing powder embossed differently on the printed image vice plain cardstock.  It's hard to see in the photo, but it added some extra texture.  That gold piece is also embossed.


I couldn't decide if I like the snakes pointed in our out, so I made one card in each style.  I used a sentiment from CTMH's Say it In Style set to finish it off.  
My final card uses the digi from Fresh Squeezed Stamps.

The image is printed on vellum, and then I used alcohol inks (my first time using these....it's so easy and so fun!) to add that blue color to the vellum.  The lanterns were colored in using a Faber-Castell big brush marker and Spectrum Noir markers.  Using a tip from my friend JJ, all of the color was added to the backside of the vellum.


I was a little concerned about tihs one - I might get in trouble with my mom since blue is not a color associated with happiness/blessings in Chinese culture (it's a funeral color), but I only have a few colors of alcohol ink right now, and I'm just going to pretend that it's sky.


Here's who you'll be hopping with this week for a chance to win one of five fabulous prizes listed below:  

Designers

Artists/Sponsors


You have until Friday, February 15th at 11:59 p.m. EST to comment or enter your digital project for a chance to win one of the five fabulous prizes. The winners will be chosen via Random.org and announced on Emily's blog  Saturday, February 16th. Winners will have until Friday, February 22nd at 11:59 p.m. to claim their prize. Second chance winners, if any, will be redrawn and announced on Saturday, February 23rd.

Many thanks to our digi artists and sponsors for their contribution to this blog hop. We loved using the artists' drawings and we know you will, too. Thanks to our generous sponsors, we have so many amazing prizes to give away. And thanks to Emily for organizing this fun hop!

Thank you so much for stopping by to celebrate with us! Now it's time to head on over to Pamela Ho's blog!!

Supplies Used
Cards 1&2
Paper/Cardstock - Recollections - Red Cardstock; CTMH - Black cardstock
Stamps:  Dalhouse Designs Digital; CTMH - Say it in Style
Ink:  Versamark
Other:  CTMH - Gold and Clear embossing Powder; Tombow - Mono Adhesive
Card 3
Paper/Cardstock - CTMH - White Daisy and Black cardstock; Recollections - Vellum
Stamps - Fresh Squeezed Stamps digi
Ink:  Ranger - Adirondack Alcohol Inks Butterscotch and Stream, Blending Solution; Faber-Castell - Scarlet Red Stamper's Big Brush Pen; Spectrum Noir Markers - CR11; CTMH - Cranberry Grosgrain ribbon; Tombow - Mono Adhesive and Vellum Adhesive