Friday, November 4, 2011

Family Recipe Book - My Creations Display Album


I've got another holiday gift idea for you today.

Close to My Heart sells something called the My Creations Display Album. This is a cute little stand up album with 6x6" page protectors.

You can easily add paper, photos, and embellishments to make this a desktop calendar, or mini album feature family photos, baby's first year, etc.

Here's another idea. How about a mini recipe book? We all want to make the holidays special for the ones we love. I know I've had to ask my mother-in-law for her Swedish Meatball receipe because Christmas Eve wouldn't be Christmas Eve for Andrew without them. Include all those family/traditional recipes. You can print them up on the computer, or handwrite them.


Since there are page protectors, your receipe cards are protected from splatter/flour/ingredients. What a great gift for a newlywed, a soon to be married couple, or for one of those kids who has just moved out. You can also print up some easy measurement equivalents/substitutions and put them in the back - easy reference for when you're flipping through. (I'm seriously considering making one for myself too!)


This is one recipe book that your kids will want a copy of when they leave home!

CTMH Products Used:
Stamps: Friendship Alphabet Large, Friendship Alphabet Small, Pair a Phrase
Ink: Holiday Red, Topiary
Paper: Chocolate, Holiday Red, Topiary, Bamboo, White Daisy, Believe Level 2 Paper Pack
Other: My Creations Display Album

Wednesday, November 2, 2011

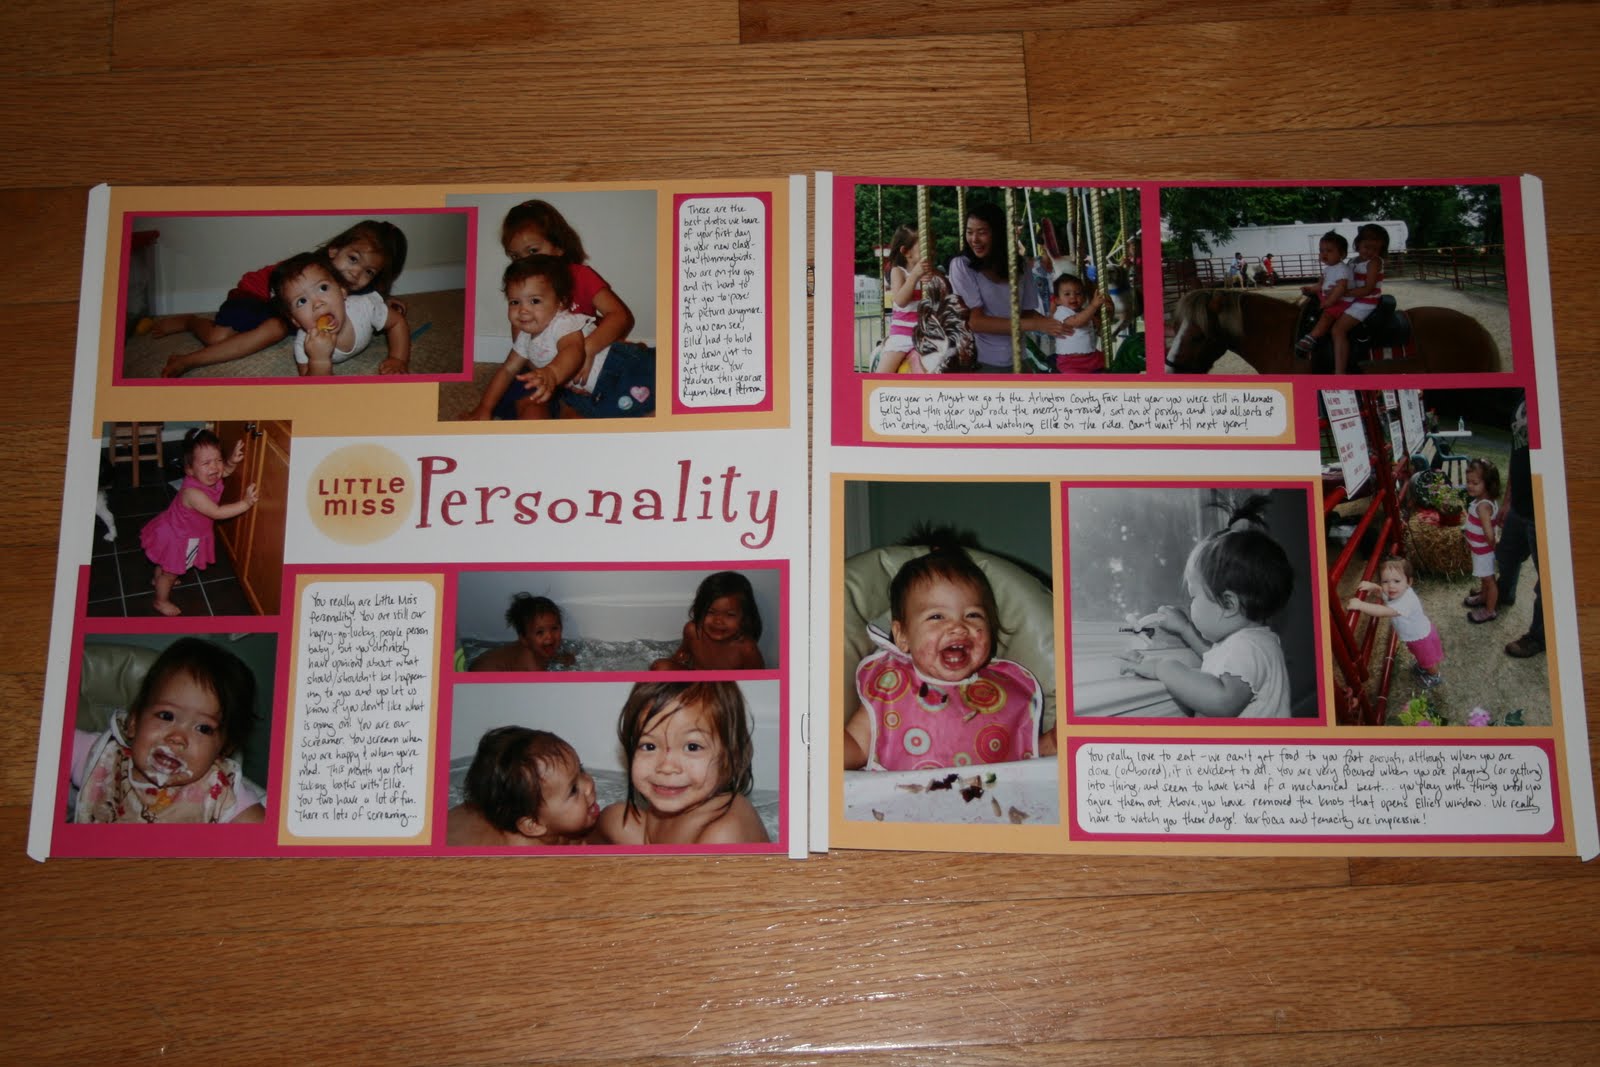
Second August Layout


Quick post to share the second August layout for Carina's first year book. This one is pretty simple. I did a lot of journaling, but you could easily convert one or more of those spaces into a tag, embellishment, or title.


Once I got the main title in, I thought there was a little too much white, so I cut a circle out of a piece of cardstock and used the cardstock piece as a mask, sponging some creme brulee ink over the 'Little Miss'.


Now on to September, the last month!

CTMH Products Used:
Stamps: Cocktail Alphabet, A Typeface
Ink: Tulip, Creme Brulee
Paper: Creme Brulee, White Daisy

Monday, October 31, 2011

Fall card for SSD, Create, and H2H


Due to technical difficulties at work today (strange electical outage), I find myself home with time to blog and craft (yay!).

I was originally going to submit this card for the H2H challenge and Skipping Stones Design Sketch, but it turns out I should pay more attention to deadlines, and I had to have posted the card to the H2H site by Saturday night.

Oops. (This has happened to me a couple of times recently, also a product of waiting to the last minute, I guess).

Anyway, I really enjoy the Skipping Stones Design sketches. For any who have not tried them out, take a look....you might even win something (I did!). They are very basic, which means you get to be very creative. I often feel a little tied down by sketches, but never over at SSD.

I am also submitting this for the Create Blog challenge this week which is 'no sentiments'.

So let's get down to the creative process. I am a huge fan of this blog: http://stampingmathilda.blogspot.com/. If you've never visited, you must. Godelieve does great work, and must just stamp all the time. I'm no mathematician, but if you are posting 500ish times a year, you are posting more than once a day. While I'd love to be that prolific, I'd also love to have some of her stamping chops.

Godelieve has a weekly post called Sunday Scraps where she uses the scrap materials from her projects for the week to create a new creation. I love that idea, and since I have LOTS of scraps, wanted to try that on this card.

This is what I started with (some of the scraps from my card for last week's CAS-ual Friday and Play Date Cafe card, which incidentally got posted too late to make the PDC cutoff....told you it had been happening a lot lately):


I cut the top and bottom of the frame down to make them even, then I used a tissue (since I need to get some more sponges) to add some Autumn Terracotta ink to the Honey cardstock to give it a richer color. I wanted the edges to stand out a bit more, so I started swipe/sponging Chocolate ink on them, but it gave it a kind of greenish tone, so I went back and did the same with Cranberry ink to balance the colors.

For the center portion, I cut the rectangular piece down 1/2" on both the width and height, rounded the corners, and used it as a mask. First I sponged chocolate, and then added some Autumn Terracotta. Lest you think I am a neater stamper than I actually am, I cut that masked piece out and adhered it to my white background piece hiding the edges beneath the frame.

The leaf is cut out of Kraft paper using the Cricut AP cartridge and stamped with the coordinating stamp set in Autumn Terracotta. I swiped a tiny bit of Chocolate ink on the edges for contrast.

I wanted the frame to stand out a lot, so it's adhered with a double layer of 3-D Foam tape, the leaf has a single layer, and I added a bit of Cocoa grosgrain ribbon to complete the look.

Thanks for visiting and have a great Halloween!

CTMH Supplies Used:
Stamps: Cricut AP cartridge coordinating stamp set
Ink: Autumn Terracotta, Chocolate, Cranberry
Paper: Autumn Terracotta, White Daisy, Honey, Kraft
Other: Cricut AP cartridge, Cocoa Grosgrain Ribbon, 3D Foam Tape

Sunday, October 30, 2011

August Layout #1: First attempt at a banner


Banners have been all the rage in the papercrafting world for some time now, and I've been wanting to try my hand at them. With so many different stamp options, dimensional elements, etc., they can easily be adapted to whatever type of project/theme/medium you are using.

This layout uses the stamp set from the Elemental Workshop on the Go (WOTG). This is a great workshop kit, and is worth considering even if you don't want to complete the suggested layouts (see pg. 31 of the Idea Book). Each WOTG kit includes a D-size stamp set, Level 2 paper packet, instructions for the featured project, and some embellishments. In this case you are getting the Antiqued Copper Designer Brads and Just Blooms Flutter Paper Shapes. I think that the stamp sets that come with the WOTG kits are some of the best we have!

The Elemental stamp set includes four half round shapes that can be used to create banners/borders. To save myself some time, I stamped each half round back to back, so I could use a circle punch to cut both out, and then all I needed to do was cut them in half.

I used the Piercing Tool to create a hole in the corners. Since I used hemp to string the banner together, after making the initial hole, I slid it most of the way down the piercing tool to create a wider hole. I also put a little bit of liquid glass on the end of the hemp to make it easier to thread through the holes.


When working with hemp, you need to be careful. It's a little bulkier, and you need to take care in stringing and moving around the banner pieces. Twine, floss, or waxy flax might have worked better, but I don't have any of that on hand at the moment.


Also, hemp is a little more dimensional that the other choices I mentioned, so I decided to use the 3D-foam tape to mount the banner. It took a little bit of working through the drape/angles, but I like how this came out.

I wanted to tie the banner theme through the rest of the layout, so I added some banner elements on the left side and below the original banner, but I just adhered those with tombow since I wanted them to be more background elements.


Creating a banner is definitely a litle more labor intensive than a lot of the embellishment choices out there, but it adds a fun, whimsical touch to the layout. I enjoyed the process and am looking forward to trying out some different shapes, materials, and methods with this decorative element!

CTMH Products Used
Stamps: Set from Elemental Workshop on the Go
Ink: Cocoa, Tulip
Paper: Tulip, White Daisy
Other: Hemp, 3-D Foam Tape, Piercing Tool

Saturday, October 29, 2011

Cricut 3-D Items


There are so many great shapes, cards, tags, and frames on the the Cricut Art Philosphy cartridge, but one of my favorite items are the 3-D boxes. There are eight of them in total, and I put together a sampling of them for my Open House last week.

These little boxes/bags are the perfect packaging for your holiday treats/gifts, and are so easy to put together and decorate. What a great personal touch for those teachers/neighbors/friends on your list!

Pair them with some of the Cricut AP shapes and coordinating stamps (the blue, square Merry Christmas box, the You Are Special bag, and the Thanks pillow box) for easy embellishments. There are so many different ways you can decorate these items, and if you want to involve the kids, let them decorate a piece of cardstock, and then cut the box/bag from that sheet for a really personal touch.

CTMH Supplies Used:
Square Box: Believe paper, Holiday Red and White Daisy cardstock, Holiday Red ink, Cricut celebration stamp set, Say it in Style stamp set.
Take-out Box: Desert Sand cardstock, Chocolate ink, Glory to God stamp set
Bag: Typeset paper, Vineyard berry and Colonial White cardstock, Cricut collection stamp set
Noel Treat box: Colonial White and Cranberry cardstock, Cranberry Ink, Cranberry Grosgrain Ribbon, Holiday Magic (Oct SOTM) stamp set, Say it in Style stamp set
Pillow Box: Dreamin Paper, Bamboo and Pacifica cardstock, Autumn Terracotta Ink, Cricut collection stamp set

Thursday, October 27, 2011

Cheap, Easy, Fast, and Fabulous


If you have young kids, then you have stacks of artwork laying around your house that you don't know what to do with. I mean, the refrigerator/message board only holds so much artwork, and geez, they come home with more everyday!

I'm constantly gathering up little piles of it, hiding it between stacks of newspaper, and sticking it in the recycling bin. And heaven forbid if Ellie happens to see something poking out...."Hey, who put this in here?!!!!"....ahhhh the righteous indignation of a four year old.....

Sound familiar? Well then have I got the perfect idea for you!

CTMH sells a Monthly Calendar ($7.95). It's generally meant to be decorated with photos/layouts which you can display during the appropriate month and transfer directly into your scrapbook (it's acid free/lignin free/buffered), and that is a great use for the calendar.


BUT, if you have the artwork issues that I have described above, you can easily turn this into a personalized art portfolio calendar for gift giving purposes. The instructions are very simple.

1) Pick out 12 pieces of artwork.
2) Adhere them to the calendar.
3) Label the months/dates.

That's it.

Oh, did I mention that this is the perfect gift for your kids to make? It's true. Let them pick out the pictures to include. Have them write or color in the letters for the months (the Posterboard Alpha is PERFECT for this), and they can write the numbers too. Seriously, get rid of artwork, let your kids craft with you, and end up with a great, personalized, holiday gift for only $8. Doesn't get much better.

Of course, you can also decorate the calendar the traditional way, and below are a couple examples of how you could use the calendar: do the whole shebang, pictures and all, or just create the layout for a crafty/scrappy friend to add photos to, but I have a feeling I'm more likely to go with Option 1 this year....


Wednesday, October 26, 2011

Card for CAS-ual Friday and Play Date Cafe


I had so much fun putting this card together (probably because it involved getting to use the Cricut and my AP cartridge)!

Most of my projects of late have involved fall/Christmas colors, so it was nice to break out of the box a bit and think in a different color palatte -- thanks Play Date Cafe!

The CAS-ual Friday challenge for this week involved adding color to a stamped image. I chose to use my trusty blending pen. I just LOVE the blending pen! It's such an inexpensive way to have the whole rainbow at your fingertips (or at least the part of the rainbow that you own in ink pads).

Hope you enjoy it!

CTMH Products Used:
Stamps: Celebration stamp set that came with the AP cartridge, Solos '9'
Ink: Smokey Plum, Honey, Olive
Paper: Smokey Plum, Honey, Olive, White Daisy
Other: AP Cartridge, Blending Pen