Sunday, November 13, 2011

SSD Sketch #101


I won a free stamp set from Skipping Stones Design a couple weeks back for this card: http://mprantner.blogspot.com/2011/10/fall-card-for-ssd-create-and-h2h.html.

I chose Gray Hares, which is a great versatile set for Easter, Birthday, and Get Well Soon cards, and decided to go with the Get Well Soon theme for this card.

The bunny and balloons are stamped in second generation black ink, and then paper pieced. I added a touch of pink to the bunny with my blending pen.

The borders are Kraft borders that I covered with black ink. Rather than sponging the ink on the borders, I think it's faster to just take your inkpad and swipe it over the border. You can very quickly get a very saturated color this way.

One more thing, the sentiment is not normally curved. This is one of my favorite things about acrylic stamps, you can bend them, curve them, etc. In this instance, I shaped the sentiment to follow the line of the bunny.

Even with the paper piecing, this card came together very quickly. Hope you like that little bunny as much as I do!

CTMH Supplies Used:
Paper: White Daisy, Olive, Lucky Level 2, Fanfare Level 2, Smoothie
Ink: Black, Sorbet
Other: Kraft Borders, Blending Pen

Other Supplies:
Skipping Stones Design - Gray Hares

Saturday, November 12, 2011

Heart 2 Heart Color Challenge


I'm getting caught up this week, and wanted to go back and work the Heart 2 Heart color challenge from last week, because I like the color combo so much: Autumn Terracotta, Juniper, and Bamboo.

To create the background, I took a piece of White Daisy cardstock, and then swiped my Autumn Terracotta ink pad across it. I started from the corners because I wanted to create a diagonal pattern/texture.

The two large hearts are from the Elemental Workshop on the Go set, and the small one is from Happy Clusters. The large heart is Goldrush cardstock stamped with Autumn Terracotta. The medium heart is paper from the Typeset Level 2 kit, and the small heart was rock and roll stamped with second generation Chocolate ink.

I edge distressed the longs sides of the pieces of Juniper and Bamboo cardstock and then lightly sponged with Autumn Terracotta. Then I swiped the short sides with the Autumn Terracotta stamp pad, much like on the background piece.

The sentiment is also from the Elemental Workshop on the Go stamp set.

This was a quick and easy card to put together, and one that you could recreate in many different color schemes. Hope you are having a great long weekend!

CTMH Supplies Used:
Stamps: Elemental Workshop on the Go Set, Happy Clusters
Ink: Autumn Terracotta, Chocolate
Paper: Juniper, Bamboo, Goldrush, Typeset Workshop on the Go, White Daisy
Other: Edge distresser, sponge

Wednesday, November 9, 2011

The Craft's Meow October Sketch Card


I was fortunate enough to win one of The Craft's Meow's new stamp sets, The Merry Best, last week during their new release. The set came this week and I decided to ink it up and participate in their monthly sketch challenge. All the stamps on this card are from The Merry Best stamp set.

Instead of using a border on the left side of the card, I stamped one of the ornaments from the set, and then cut the edge to create the border. I decided I wanted to see the entire ornament, so I cut the front of the card away as well....that part was a little tricky, but I like the result.

The Ho Ho Ho is actually the last line of one of the sentiments: Merry Christmas! Ho Ho Ho. I stamped just the Ho Ho Ho portion on a thin piece of Kraft to create a ribbon effect.

The tag was cut using the Cricut Art Philosphy cartridge. I added the to/from, and then paper pieced the other two ornaments and adhered them to the tag, and then fastened it to the Ho Ho Ho piece with some hemp.

This was a fun sketch to play along with, wide open for interpretation, the way I like them. Hope you enjoy the card!

CTMH Supplies Used:
Paper: Kraft
Ink: Holiday Red, Topiary, Chocolate (for distressing)
Other: Cricut Art Philosphy cartridge, hemp

Monday, November 7, 2011

Embellish Die Cut and CAS Over the Edge Card


I've been mulling this card over in my brain for some time, and finally had the opportunity to create it this week. In addition to shapes, letters, borders, cards, envelopes, and boxes, the Cricut Art Philosphy cartridge has a number of rolled flowers you can make.

I haven't actually made any of those yet, but I just love the shape of the die cut before it's rolled. There's something very graphic and beautiful about the swirls, and I wanted to showcase those in this card.

To create the background, I loaded some Petal paper into the Expression, and moved the blade in from the edge to cut the first spiral shape. I cut three of these shapes out, moved the blade a little each time to get a random pattern, and I varied the size from 1 1/2" to 2".

I then cut three corresponding spirals from White Daisy cardstock. These were adhered to the petal cardstock. The large 2" spiral I actually used three times since each time I only used a portion of it since it was on the edge/corners.


It's hard to tell from the photo, and you can see it a little better here, but the play between negative and positive cut outs makes for some interesting texture/dimension to the card.

Then I just added a little flag/pennant with sentiment and a little twine. This is the first card I've made that's 'over the edge' and I do like the look of it.

I'm really pleased with the abstract pattern that I was able to create using this shape, and encourage you to take a look at the different shapes on your cartridges and consider out of the box ways to use them too.

CTMH Supplies Used:
Stamps: Pair a Phrase
Paper: Petal, White Daisy, Desert Sand, Topiary
Ink: Topiary
Other: Hemp, Cricut Art Philosphy Cartridge

Saturday, November 5, 2011

No Christmas Stamps? No Problem!


Times are tough these days, budgets are a little tighter, and if you haven't been able to spend as much as you'd like on crafting, you're not alone.

The good news is that even if you haven't been able to go out and pick up those Christmas stamps/papers you wanted to get, you can still make some beautiful, and fun cards.

I wanted to share three cards with you today that were made without any Christmas stamps or paper. (OK, I'll admit that two of them have a Christmas sentiment, but it's from the Say it in Style stamp set which technically isn't a holiday stamp set.)

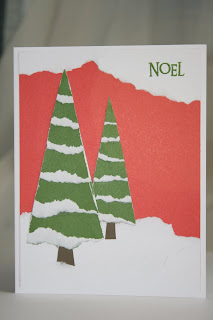
The first (above) has almost no stamping. For this card, I cut (freehand) a tall triangle (and you can use any scrap of paper you have - even one that's already been stamped on because it's just going to be covered up). Then I took a skinny strip (about 2") of Topiary card stock and tore small (about 1/2" wide) strips off of it. I adhered the strips to the triangle piece, and then trimmed the sides down when I was done. I very lightly ran the edge distresser along the sides as well.

The snow banks/sky were made the same way, just tearing strips from a longer piece of paper. You really don't need a lot of paper for this at all. In fact, the snow drifts are actually the same: the piece I tore off, and the piece I tore it from - just one tear required. I freehand cut some tree trunks, adhered it all to some Holiday Red cardstock, stamped the sentiment, and Voila! This card is one that you could easily do with kids....what kid doesn't like to tear paper?

The next card is one that I made from a Paper Smooches stamp set called Hot Concoctions that I received as blog candy from Simon Says Stamp...thanks Simon! I really wanted to show that you can take something completely non-holiday, and make it work for you! You can stamp a lot of things into a Christmas tree shape!


This one was a little more time intensive because of the paper piecing, but I love how it turned out. The tree trunk is actually the 'huggie' portion of the coffee cup turned upside down. The sentiment inside came with the set and says Warm Wishes...not holiday, but it totally works.

Finally, a wreath. Most larger stamp sets have some darling little stamps that you might not use that much. But take a look at them. They are often abstract enough to use in this manner. All I did was lightly trace a small circle and then randomly stamp the green swirls around it. Then I added the little red flowers throughout.


Both of these little gems came from a retired set I have called Endless Love, but there are dozens of little images that I could have used, and in fact, as you'll see below, I have two other wreaths made up that I haven't yet gotten to. The stamps for the one with the larger images are from Cupcake Sprinkles (the little oval), and Paper Smooches Hot Concoctions (the little leaf). The stamp for the other wreath is from Pair-a-Phrase.


So take a look again at what you have on hand. Chances are you already have some stamps to make unique and affordable cards for the ones you love.

Pssst. If you are able to spend some money on stamps this season, you'll want to consider Close to My Heart. With every $25 you spend in November, you can pick up the Holiday Wishes set for only $5. It's a great stamp set that has four images that coordinate with the Cricut Art Philosphy cartridge. Take a look....

Friday, November 4, 2011

Family Recipe Book - My Creations Display Album


I've got another holiday gift idea for you today.

Close to My Heart sells something called the My Creations Display Album. This is a cute little stand up album with 6x6" page protectors.

You can easily add paper, photos, and embellishments to make this a desktop calendar, or mini album feature family photos, baby's first year, etc.

Here's another idea. How about a mini recipe book? We all want to make the holidays special for the ones we love. I know I've had to ask my mother-in-law for her Swedish Meatball receipe because Christmas Eve wouldn't be Christmas Eve for Andrew without them. Include all those family/traditional recipes. You can print them up on the computer, or handwrite them.


Since there are page protectors, your receipe cards are protected from splatter/flour/ingredients. What a great gift for a newlywed, a soon to be married couple, or for one of those kids who has just moved out. You can also print up some easy measurement equivalents/substitutions and put them in the back - easy reference for when you're flipping through. (I'm seriously considering making one for myself too!)


This is one recipe book that your kids will want a copy of when they leave home!

CTMH Products Used:
Stamps: Friendship Alphabet Large, Friendship Alphabet Small, Pair a Phrase
Ink: Holiday Red, Topiary
Paper: Chocolate, Holiday Red, Topiary, Bamboo, White Daisy, Believe Level 2 Paper Pack
Other: My Creations Display Album

Wednesday, November 2, 2011

Second August Layout


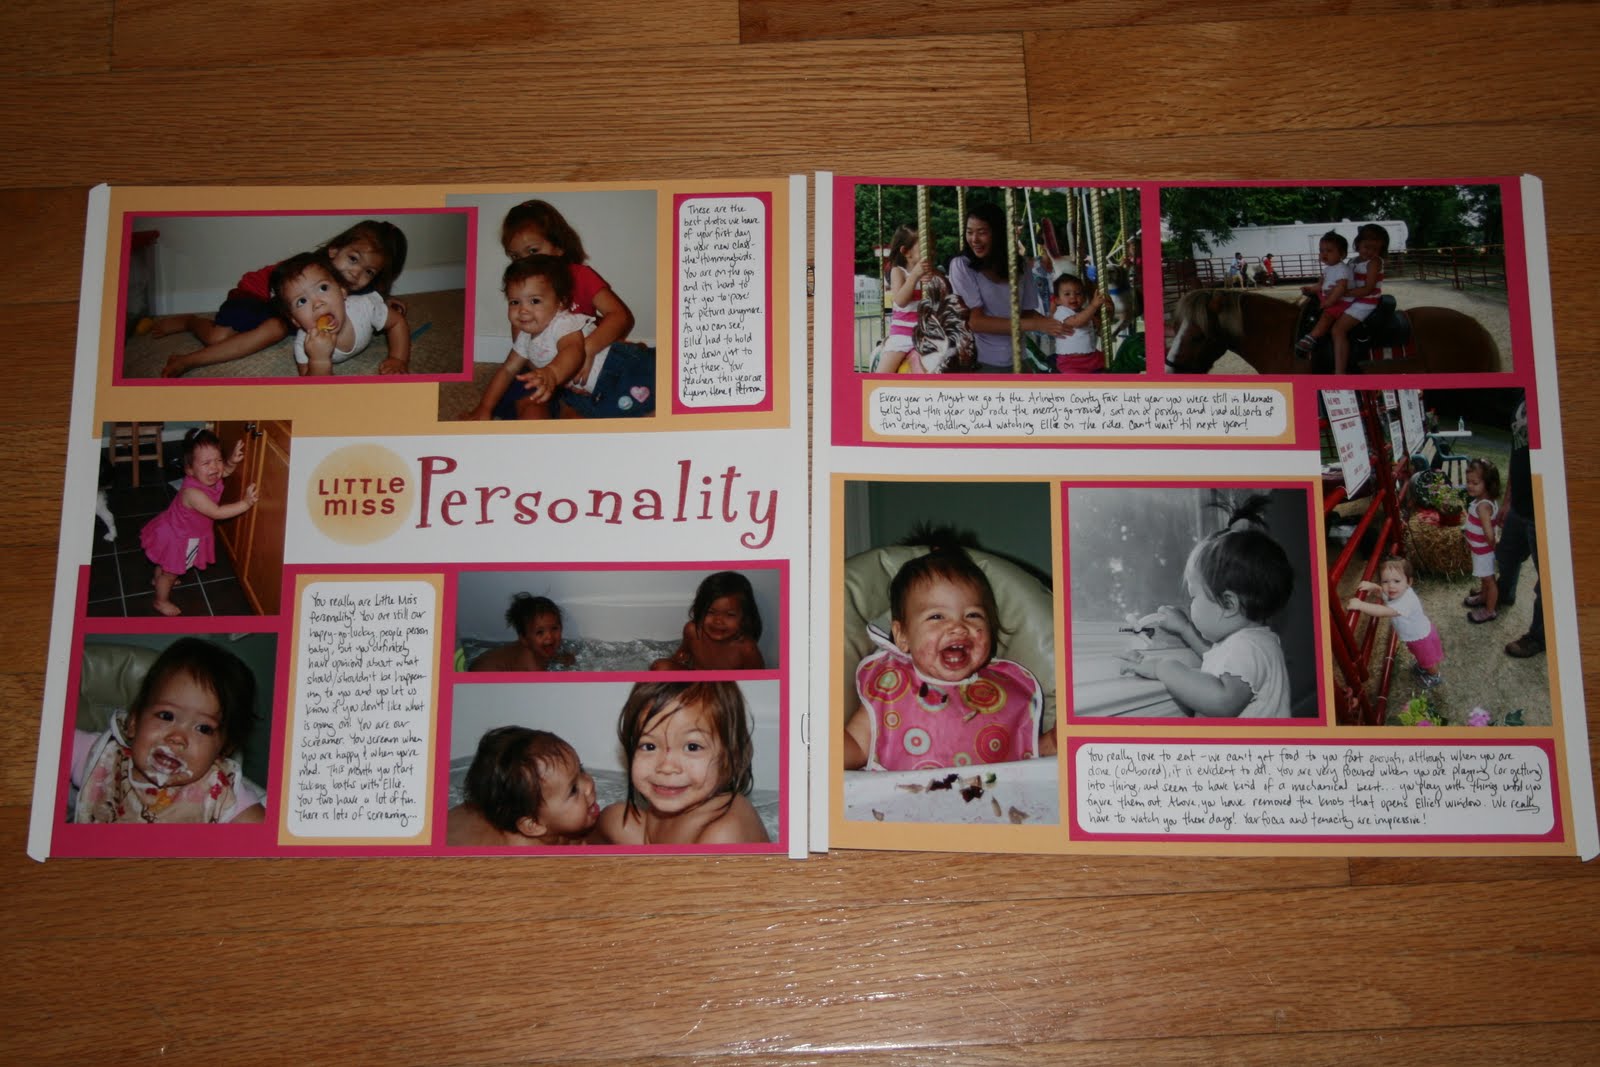
Quick post to share the second August layout for Carina's first year book. This one is pretty simple. I did a lot of journaling, but you could easily convert one or more of those spaces into a tag, embellishment, or title.


Once I got the main title in, I thought there was a little too much white, so I cut a circle out of a piece of cardstock and used the cardstock piece as a mask, sponging some creme brulee ink over the 'Little Miss'.


Now on to September, the last month!

CTMH Products Used:
Stamps: Cocktail Alphabet, A Typeface
Ink: Tulip, Creme Brulee
Paper: Creme Brulee, White Daisy