Friday, November 10, 2017

N&T Release Recap and Giveaway Winners

Hey everyone!  The Neat & Tangled November release is now available in the store.  Here's a recap of my projects this week:


I also have some winners to announce (with the help of random.org)!

@smilecards44 (from Instagram) wins the Tree Duo Stencil set

Karen B (from blog comments) wins the Radiating Star Stencil

mandalj (from blog comments) wins the Joyful Sentiments stamp set

@mypapercards (from Instagram) wins the Warm Winter Scene Cover Plate

Congratulations winners!  Please shoot me an email with your mailing information and I'll get your goodies out to you.

And if you must have something from the release, head on over to the store!  Have a great weekend!

Thursday, November 9, 2017

N&T November Release Week Day 4 - Giveaways


It's the last day of our November release reveals and today I'm showing off my new Warm Winter Scene Cover Plate.  I love this one because it's another of those pieces that does double duty.  It makes a great background, but there are so many things that you can do with the little houses and trees too.  There are actually five different styles of houses and two sizes of trees so it's great for creating scenes like in this first card.

This card was actually inspired by this image I pinned over a year ago.  I thought it would be so much fun to recreate it in a card.


I cut the cover plate from both yellow and white cardstock, placed the houses and then inlaid the windows.  I added the snow accents using a white gel pen, and then embossed the sentiment from the Bright Baubles set on some red cardstock and popped it up to finish it off.


I had a devil of a time photographing my next card.  For this one, I dry embossed the coverplate right onto my card base.  This cover plate is actually a full A2 size so it covers the entire front of your card, no margin/mat. 


I die cut three of the happy holidays sentiments, adhered them together and applied them to the card, and then added the secondary sentiment, from the Happy Holidays stamp set, embossed on a strip of black cardstock.  Super quick and easy and one that you could definitely mass produce.

And that's a wrap!  It's our final release of the year and I really hope you like it!  Be sure to head on over to the Neat & Tangled blog to check out the rest of the team's projects for today and to enter to win today's featured products.

Remember, I'm giving away some prizes as well.  Be a follower and leave a comment here to be entered.  For extra chances head over to Instagram (@mprantner) and follow the instructions there.

I'll be back tomorrow to announce winners!

Wednesday, November 8, 2017

N&T November Release Week Day 3 - Giveaways


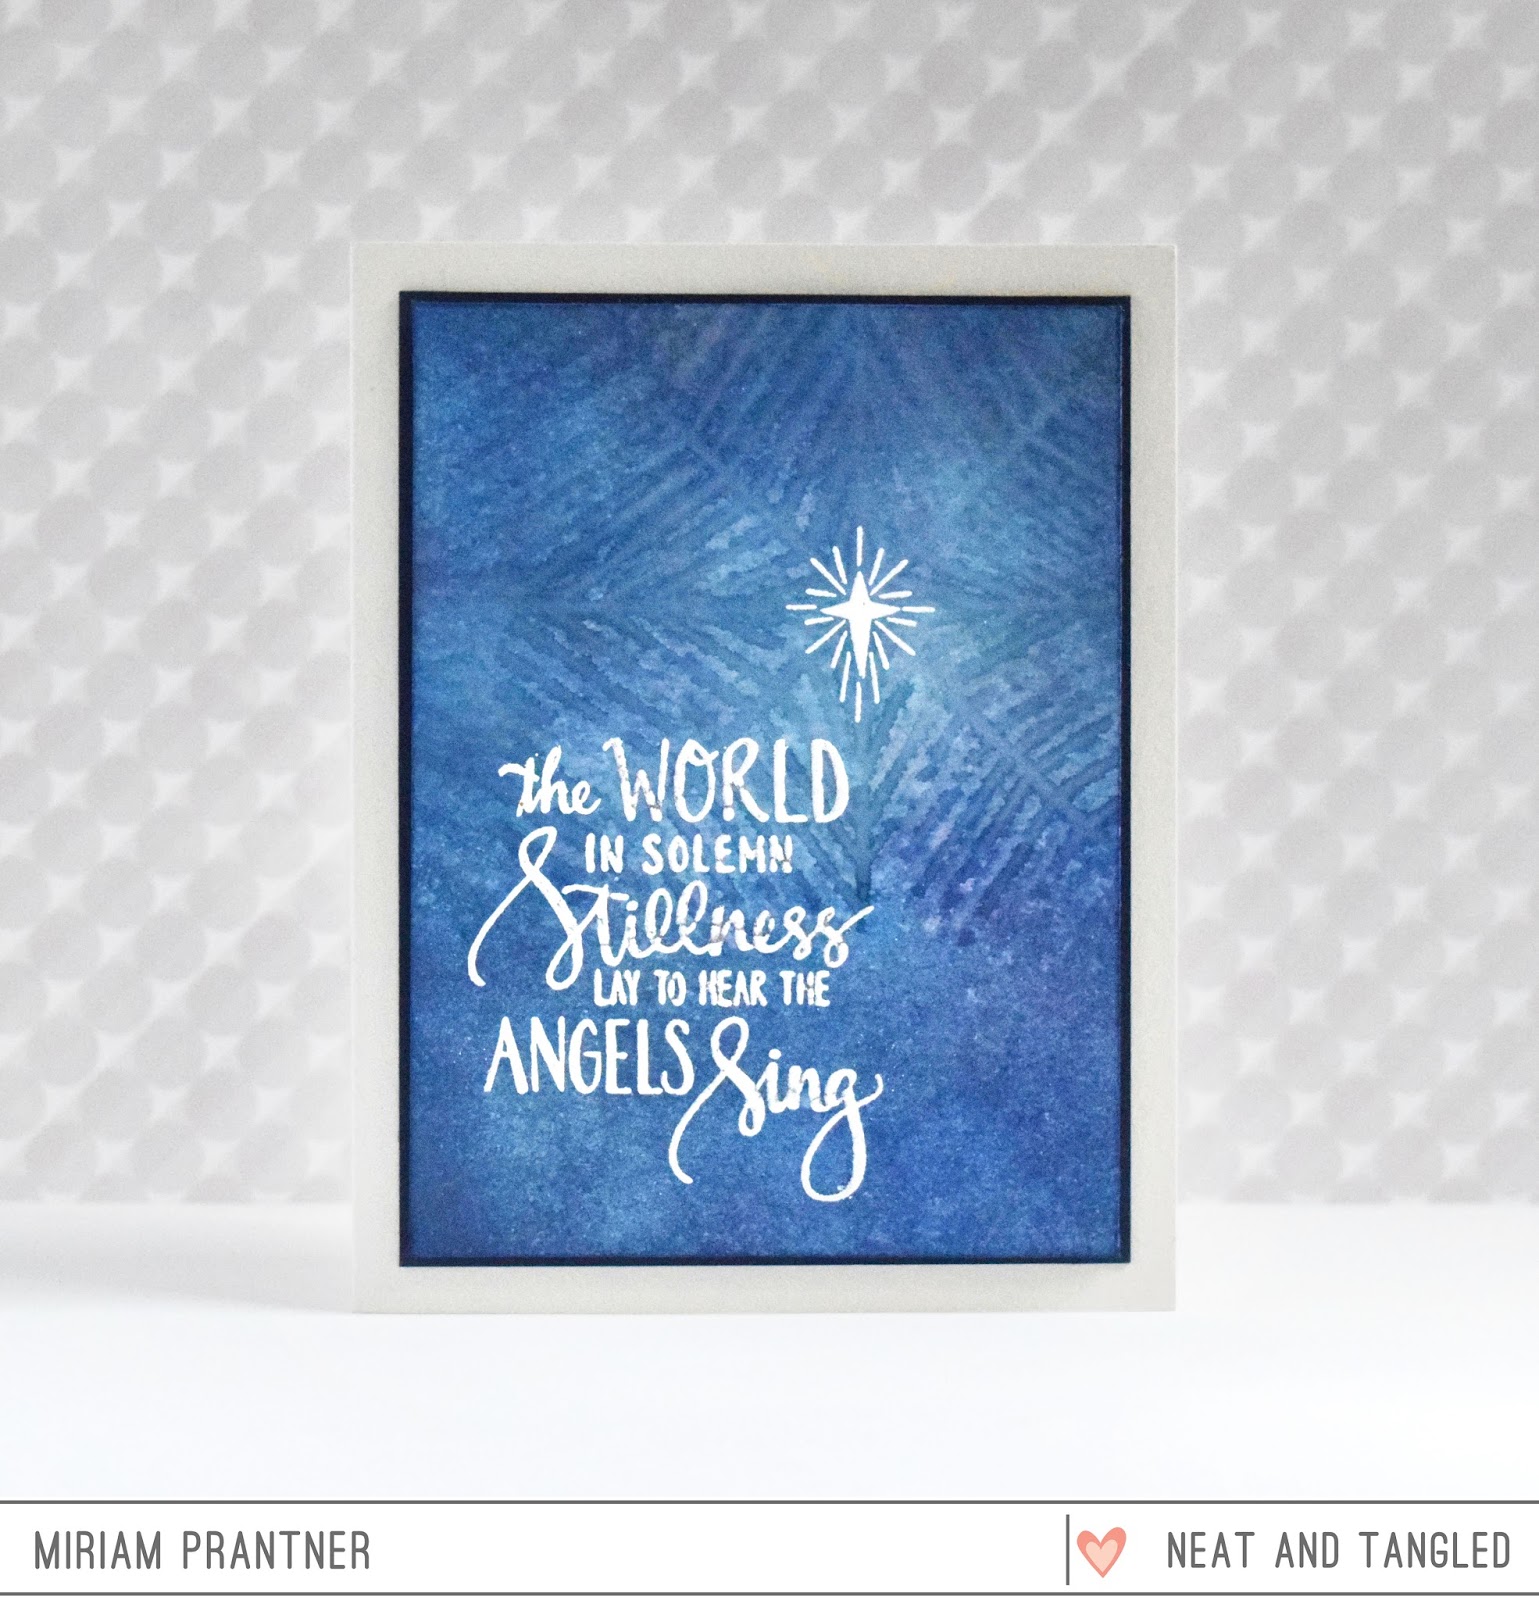
Hey everyone!  Welcome back for Day 3 of Neat & Tangled's November release week.  Today we're featuring two of my new products:  Radiating Star stencil and Joyful Sentiments.

Obviously it's the holiday season, and the Radiating Star stencil works perfectly for that, but it's a design that I think will be useful throughout the year, a fun alternative to a sunburst stamp or stencil.  I am a big fan of Christmas music and I have been known to play it year round.  Joyful sentiments features some of my favorite Christmas hymns.  There are so many beautiful lyrics in those songs, and I tried to pull some of my favorites and ones that you might not already have in your stash.

OK, so let's talk about today's cards.  For the first one, using a sponge tool, I applied Distress Inks to a watercolor panel.  Then I spritzed the top corner of the panel with water, placed the stencil over top and with a paper towel removed some of the ink.  I did this a second time, but this time, I placed a piece of paper towel over top of the wet panel/stencil placed a jar on top and let it dry that way.  I love this technique, it's subtle, but with dark colors has a great impact.


The Joyful sentiments set comes with several sizes of stars, and I stamped the largest in the center of my stencil image and embossed it.  I did this twice to get a puffier look, and then stamped and embossed the rays.  Those I only did one embossing on.

The sentiment was initially embossed in silver, but it didn't have the pop I wanted, so I went ahead and embossed it twice more in white (thank goodness for the MISTI!).  There are a couple of areas where you can see a bit of silver beneath, I really like how this look turned out, almost like a hurricane glass look and I'll be experimenting with it a bit more I think.


The second card is quite similar in layout, but for this one, I used gelatos on plain white cardstock.  I basically colored the gelatos over the stencil (using a couple shades of yellow), and then rubbed it into all the nooks and crannies of the stencil with my finger, repeating as necessary.  If you have Distress Crayons this technique works with those as well.  For the outer parts off the stencil I mostly wanted color and not necessarily the texture you get towards the center of the star as there is a lot of product there since I knew I was going to be stamping the sentiment and didn't want too uneven a surface for that.

The sentiment was stamped in Versafine and then clear embossed.

You can see the texture/dimension you can achieve using gelatos in this close up.


Please head over to the Neat & Tangled blog to see what the rest of the team created.  You'll be able to enter to win today's featured products there.

I also have some giveaways.  For a chance to win one of my new release products, be a follower and leave me a comment with your favorite Christmas song.  There are also extra chances to win on instagram (@mprantner), so you'll want to check that out too.

Come back tomorrow for our final day of reveals!

Tuesday, November 7, 2017

N&T November Release Week Day 2 - Giveaways


Hi all!  Today we're showing off a new set from Elena called Christmas Pageant.  It's got four of her cute kids dressed up for a Christmas pageant.  My favorite is this little boy with the star, and I thought it would be fun to make a non-Christmas card with him.

I started by cutting a star from a panel of Navy cardstock.  Then I used Versamark to stamp some stars using the cluster from the Very Merry set. 

The little boy was stamped, colored with Copics, and then die cut. 


The sentiment was created using sentiments from the Faceted set stamped on one of the banners from the Scalloped die set, and the Journaling Alpha dies that were cut using adhesive foam. 

OK, you definitely want to head over to the Neat & Tangled blog now to check out what the rest of the team made and to enter to win this set.

Don't forget to leave a comment here as well,  I'll be picking some winners for my new release products.  See you back here tomorrow!

Monday, November 6, 2017

N&T November Release Week Day 1 - Giveaways


Hey everyone!  It's a little crazy to think that we're in November and this is the last N&T release for the year!  I've got a bunch of new designs in this week's release and I can't wait for you to see them all.

Today we're showcasing a new sentiment set from Danielle as well as a new stencil set from me, Tree Duo.  Just like the Balloon Duo stencil we released in August, these are designed to work together, but you can certainly use them apart as well.  As an added bonus, they coordinate with my Scandinavian Prints Christmas set, which adds a whole other level of possibilities.

For my first project, I created some gift wrap.  I used some kraft paper (I have a big roll) and simply stenciled my trees on using a variety of Altenew green inks.  I forgot to take a good photo of the finished paper, but here's a shot I shared on IG as a sneak when I was working one evening.


I also added some stamped accents using Scandinavian Prints Christmas, but you could definitely skip that set.


To finish off the wrapping, I created a couple of thin tags using the Classic Tag 2 set and a sentiment from today's featured stamp set, Wishing You Love.


The stencil duo also creates easy CAS cards too.  This design is definitely mass producible, and nice and flat for easy mailing:


I used a combination of Altenew and Distress Inks on this one, and I was going to leave it more plain, but I couldn't resist some of those accent stamps in Scandinavian Prints Christmas.


The sentiment is from tomorrow's featured set from Elena.

Last but not least, a card featuring the main sentiment from Wishing You Love.  Danielle does such a great job constructing these large handwritten sentiments and I love how this one just commands the whole card.


For my card I added a bit of stenciling from something you'll see later in the week.  The sentiment was stamped over top with Versafine and then clear embossed.  I then added a few star and sequin accents and stitching as well as some patterned paper mats.


OK, that's all I have to share today, but you'll definitely want to head over to the Neat & Tangled blog.  Danielle is giving away all of today's featured products.

I also have some giveaways this week.  To be entered to win one of my new release products, be a follower and leave a comment.  For additional chances to win, head over to my Instagram (@mprantner) and follow the directions there.  I'll announce winners on Friday.

See you back here tomorrow for more Release Week goodness!

Thursday, November 2, 2017

Noel


I've got another Christmas card to share today.

This one features the Hero Arts Holiday Words stencil (which I've had for about a year now and am only just now using....).  I was experimenting a bit here.  I used glass bead gel.  I'd never used it before, and had thought that there would be a more opaque background to it, but I really like how translucent it is.  It's a much more subtle look, but has some fabulous texture and sparkle.

I wanted the background to be the star, so I opted for a smaller tag on which I embossed a simple sentiment from an older MFT set.


The little Santa from Mama Elephant was perfect for adding a little color and whimsy, and some Lawn Fawn lawn trimmings twine finished it off.

Thanks for visiting!

*Affiliate Links Below


Wednesday, November 1, 2017

Altenew Fantasy Florals


During my recent crafty get together I was able to take the Floral Fantasy stamp set from Altenew out for a whirl.  

Usually I shy away from these kinds of layered florals because I'm just not very good at them, but this one was much easier than I thought it would be, it's very forgiving and doesn't require great precision.

I love how showy and bold the blooms are, and the greens are lovely too.  I used my MISTI to stamp them adding some rock and roll darker accents to the edges of the leaves.


The sentiment is from Altenew's Floral Shadow set.

I used Altenew inks to create the card, but please don't make me remember which ones....

Thanks for stopping by!  Hope that you are recovered from Halloween (nothing that some candy won't fix, right?)  We were out for a couple hours last night and the girls netted a ton of candy.  Ellie counted hers...315 pieces!  Carina was too busy eating to count....

Affiliate Links Below: