Tuesday, September 27, 2011

Custom Journaling Spots for H2H


I just can't get enough of the new AP cartridge! This idea came to me while I was at work and I just had to try it out when I got home.


It's pretty easy to do, but a little complicated to explain and unfortunately I didn't think to take pictures during the creative process. Should you have any questions, please don't hesitate to ask.

- I cut a 4 1/2" pillow box from some Dreamin' paper (LOVE those prints!) and folded the box following the vertical lines so that it lay flat.

- Then I trimmed the curved ends on the side of the box that does not have the skinny flap you use to adhere it together.

- On one end I scored the remaining flap so that I could fold it over for one end of the journaling spot.

- On the other end, the open end, I cut a small piece of Pacifica cardstock to the width of the box and about 1 1/2" deep and traced the curve of the flap. Cut the piece along your traced line.

- Use this piece to trace a curve on the other side of the opening.

- Cut the box along the line you just traced and then adhere the other piece (Pacifica) to the inside of the box as a liner.

- Adhere the envelope for the journaling spot along the long end and bottom.

- Cut a 4" tag. I used White Daisy and cut a Chocolate tag also. I trimmed the top piece off for an accent and adhered it to the base tag.

- Stamp your sentiment on the tag.


- The envelopes can be decorated or left plain, it's up to you. I used the AP cartridge to cut the branch with leaves in Chocolate at 2" and White Daisy at 1 3/4". The White piece I 'painted' using the blending pen and chocolate stamp pad. These are so cute and now you can create them in whatever size you'd like to perfectly complement your layouts/cards!

CTMH Products Used:
Ink: Chocolate
Paper: Dreamin, White Daisy, Chocolate, Pacifica
Stamps: Notice the Details
Other: Blending Pen, AP Cricut Cartridge, Bonding Memories Adhesive

Monday, September 26, 2011

Four in One Card


I have another card for you today. It's for my grandfather-in-law and I'm entering it into three challenges. I love it when things come together like that!

The Heart2Heart Challenge from three weeks ago was a die-cut challenge, a perfect way to practice with my new Cricut and AP cartridge; this week's Mojo Monday challenge is a sketch challenge featuring rectangles and squares; and this week's CAS-ual Fridays challenge is to use three shades of a monochromatic color plus brown.

I knew that I wanted to use some frames cut with the Cricut, and that easily lent itself to the Mojo Monday sketch challenge. Since I'm just getting used to the Cricut, I often end up thinking that the size I'm entering is the reverse of what I end up cutting, i.e. I enter 2" because I want the rectangle to be 2" tall, and instead it is 2" wide. This ended up working out well for this card since I ended up with a number of frames/shapes that I could layer until I got the look I wanted.

It's a simple card, and one you could easily make using scraps. For the two top frames, the Cricut shape I wanted to use originally didn't have the right dimensions, so I ended up just cutting the square and rectangle with the trimmer, and using a single hole punch to round the corners, a trick I saw just today here: http://danieladobson.blogspot.com/.

Thanks for stopping by!

CTMH Products Used:
Ink: Outdoor Denim
Stamps: Say it in Style, Notice the Details
Paper: Colonial White, Indian Corn Blue, Lilac Mist, Chocolate

Sunday, September 25, 2011

Just wanted to drop you a line for H2H Challenge


I'm working on a few cards for friends/family, and I thought I would share this one as it ended up being perfect for this week's H2H challenge: use at least three shades of cardstock and no patterned paper.

I used the CM 12" cutting system wave to make the waves and the edge distresser on the edges. The little fish is from the Hot Diggity stamp set. It is stamped in Honey, and then I used the blending pen with Autumn Terracotta to do the shading. I did this in stages, letting the ink dry and going back for more color until I got the shading to where I wanted it to be.

For the hook/line I freehand drew a hook and cut it out and used a little piece of hemp secured with Liquid Glass. I also went over the hemp very lightly with a black marker to give it a more distressed look.

It was a lot of fun to put together. Hope you enjoy it!

CTMH Products Used:
Ink: Honey, Autumn Terracotta, Pacifica (second generation)
Stamps: Hot Diggity, Classmate Alphabet
Cardstock: Pacifica, Indian Corn Blue, Lilac Mist, White Daisy
Other: 3D Foam Tape, Hemp, Blending Pen

Monday, September 19, 2011

Beautiful Oops


Let me first say that I'm a rather messy scrapbooker/crafter, always have been, but now that I've added stamps to my repertoire it's a little more of an issue. I finally finished up Carina's July layouts, but in doing so, managed to have an 'oops'. I left a stray ink line from the edge of my block on the cardstock when stamping one of the letters in the title. (It's the line on the left side of the 'r'. I wish I had the presence of mind to take a picture of the oops when it happened, but no luck there.)

After venting a fair amount of frustration and annoyance, I went about trying to correct the problem. First I tried sanding, but the line was too dark to do this. Then I thought, why not make this part of a random pattern. So I proceeded to stamp a series of lines on the header using the edge of my block. I also sanded the edges of the paper so that the area around the 'r' didn't look out of place.


I really liked the effect and ended carrying it throughout the layout. I really like the subtle pattern/texture it gives the cardstock, and you really can't tell it was an oops.

And, I was reminded of Barney Saltzberg's book 'Beautiful Oops'. This is a great book for kids who get frustrated when their projects don't turn out the way they planned, but it's a wonderful lesson for the rest of us as well. You can see the book here: http://www.youtube.com/watch?v=2fZjMYdQjGM

You might also want to check out Jeanette Lynton's blog (the founder of Close to My Heart). She has a series called Weeks of Wonder, and in February did five posts on how to fix stamping mistakes. The first is here: http://www.jeanettelynton.com/2011/02/week-of-wonder-oops-stamping-flubs.html.

So, want to see how it all worked out in the end?


Not too bad, right? I also wanted to share my other July layout. No stamping, but I had a lot of fun playing with circles in putting this one together. I like my layouts to lay relatively flat, but for those of you who like the dimension, CTMH's circular dimensional elements would work perfectly with a layout like this.


Hope you enjoy these and they spark your creativity and inspire you to create your own beautiful oops. :)

CTMH Products Used:
Stamps: Friendship Alphabet Large, Happy Clusters
Inks: Tulip
Papers: Tulip, Bamboo, White Daisy

Sunday, September 18, 2011

Birthday Gift Tradition

Carina turned one yesterday, and we continued a tradition we started when Ellie turned one where we each select one of our favorite childhood books for her. Note, Ellie LOVES books, and while she gets them throughout the year for Christmas, or as prizes for an accomplishment, or a new book for a long road trip, the birthday books are special. We sit and discuss which book to get each year, and put more thought into the process.

Here are the books Ellie has received since her auspicious birth:

One: Caps for Sale (my all-time favorite), Curious George (Andrew's favorite, and you'll see that she is getting the entire set of originals, one a year from him)

Two: Tikki Tikki Tembo, Curious George Takes a Job

Three: Corduroy, Curious George Rides a Bike

Four: Sylvester and the Magic Pebble, Curious George Gets a Medal

It was a little harder to pick for Carina. She's just not that into books, and I wanted her to start collecting a 'set' like Curious George. I had a hard time thinking of one that I just LOVED that Ellie doesn't already have all or part of. I settled on Strega Nona. I do love Tomie de Paola's work, and figure when I am done getting the Strega Nona books, I can get her some of his others. Andrew picked Where the Wild Things are (which I'm kind of surprised we don't already own, and is PERFECT for our little wild one).

I'm curious if anyone else out there has some birthday gift traditions?

Tuesday, September 13, 2011

Moxie Fab Horizontal Sketch Challenge


This challenge was so much fun! I had ordered the It's a Zoo stamp set from CTMH a month or so ago for another project I'm working on, but the animals are just perfect for this card.

I stamped each of the animals on white cardstock, and then used a 1" square punch on the monkey, giraffe, and lion to get the parts I wanted for the cages. The alligator I just trimmed around.

For the cages, I used a 1" punch, and then centered that square in a 1 1/4" punch to get the frame. I cut tiny, little slivers of cardstock for the bars (I had debated painting some toothpicks or hemp, but decided this would be the easiest way to do it). Then I ran a strip of tombow mono adhesive on the top and bottom of the cage. This allowed me to reposition the bars until I got the spacing right.

The hubby and I spent a lot of time discussing what the card should say. In the end we settled on this, and the inside of the card reads "We'll Miss You!!!" I think it's a great new job/moving/retirement card.

Hope you enjoy it!

And if you want to play along, you have until September 19th to submit your version of the sketch. For all the details, follow this link: http://www.moxiefabworld.com/2011/08/horizontal-sketch-challenge-in-card.html

CTMH Products Used:
Stamps: It's a Zoo
Inks: Chocolate, Honey, Autumn Terracotta, Topiary
Papers: White Daisy, Black

Sunday, September 11, 2011

Birthday Party Thank You Cards


We celebrated the girls' birthdays last Sunday. Their birthdays are only two and a half weeks apart, and since we wanted out of town family to be able to participate, it didn't make sense to throw two parties. That said, it took me a while to come up with a party appropriate for both a one year old and a four year old.

I settled on paint your own pottery. We kept it simple just painting plain tiles. The little kids did hand/foot prints, and the big kids painted free form.

I wanted to make some personalized thank you cards for the guests, and settled on these fun and easy frame cards.

Directions:
- Cut either a 6x8 piece of cardstock, if you want the card to open on the long side, or 4x12 if you want it to open on the short side. Score so that you form a 4x6 card and set aside. (Note: If you use the same color cardstock for the frame/card, you can get two cards from a 12x12 piece of cardstock.)

- Cut one 4x6 piece of cardstock. Then create a frame by cutting out a rectangle 3/4" in from each side. This seems tricky, but is very easy when using a Fiskars (or other) trimmer with the markings on the bar.

- Decorate the frame front. I tried a couple different versions of this, originally random stamping on white cardstock, but I decided I wanted something with a little more oomph.


I settled on this distressing technique using White Daisy ink (which can get a little messy, FYI) and Pacifica and Olive cardstock. You could use Colonial White, or other light colored pigment ink as well. Use the stamp pad as the stamp, and randomly stamp your frame with it until you get the coverage you desire. Let set at least overnight, I actually let it set for two nights (you could also heat set if you are in a hurry).


Choose coordinating stamps, I like having a medium sized stamp and small stamp. (Since the frame is only 3/4" wide, it's hard to use a large stamp.) For the Pacifica cards I used Holiday Red ink and the solid stars from the Party Invitation stamp set. For the Olive cards I used hearts from the Elemental Workshop on the Go kit and the small heart from the Happy Clusters set with Tulip ink. Note that the White Daisy ink leaves a little residue on your stamp and stamp pad, so you want to blot out your stamp pad and take extra care in cleaning your stamps when you're done (I use a baby wipe to make sure I get in all the nooks and crannies).

You can dress these frames up as much or as little as you like. I think they are fine as is, but you can personalize them as I did, or even use cut outs of the stamped images. I used Playful Lowercase and white cardstock sponged with the color of the background paper to create little nametags. Have fun, and be creative!


- Once the frame is dry, adhere it to the front of your card on three sides using Liquid Glass. Insert a photo in the frame (you will have to trim about 1/2" on each side). Write your thank you note on the inside, and you're done.

CTMH Products Used:
Stamps: Party Invitation, Elemental Workshop on the Go Stampset, Happy Clusters, Playful Lowercase
Paper: White Daisy, Olive, Pacifica
Inks: White Daisy, Olive, Pacifica, Holiday Red, Tulip
Other: Liquid Glass

Thursday, September 8, 2011

Cricut on the Way!


I'm so excited! Ever since Close to My Heart came out with the exclusive Cricut Art Philosophy (AP) Collection, the hubby and I have been talking about purchasing a Cricut. I was thinking along the lines of a Christmas present, but he thought we should do it sooner. So, we decided that we would just keep watching for a good deal.

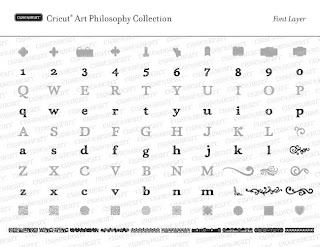
Yesterday night he won an ebay auction for an Expression with two cartridges and the tool kit for about $150, including free shipping. It's a great deal, and I'm so excited for it to get here so I can start playing with it. I think it's going to be a huge time saver, and there are so many fun things that you can make with it, including flowers, boxes, etc. Here are the images from the booklet that show all the different shapes/layers.


The AP Collection comes with the cartridge which includes 700 images/font/shapes/3-D items, three D-size stamp sets, and 3 sheets of 9x12 Dimensional elements that coordinate with the shapes/stamps in the collection. It's a $125 value, but costs only $99. If you are interested in purchasing a collection, please contact me, or click on the 'shop with me' link to your right, and stay tuned for some Cricut projects....