*This post contains affiliate links to Simon Says Stamp
Hi everyone! Today I'm showing off the Printmaking Houses products that I designed for Simon Says Stamp. I created today's cards in two batches. This first set of cards focuses on the Printmaking Houses stamp set.
This is such an easy set to use and there are lots of ways you can combine the pieces - just the outline, just the houses and roofs, add in the windows, use all of the images together, you get the idea.
For these first two cards I used the houses, roofs, and windows.
For the top card I used Altenew dye inks in more muted colors, while for the bottom I used Distress Oxides. In general I found that I liked using the Oxides better than the dye inks which is a little out of the norm for me. I'm generally a dye ink girl, but I like ethe more matte finish you get with pigment ink for these stamps. For some reason they give me more of that print type feel.
I'll also say that I didn't fully ink up my stamps, instead I used Tim Holtz inking tools to add the color to the images. This means that I usually stamped the image multiple times, but I really like that softer look.
It also allows me to pretty easily mix colors, so in these examples you can see a little bit of variation in the windows/doors. That's because for my second inking I used a slightly darker color to add a little more depth to the window/door image.
Again because I was using the inking tool, it was easy to blend colors or add different colors to different houses, and of course using a stamping platform is key as well.
This last card is actually the first one I made. I had wanted to use some softer colors, but the windows and doors were not standing out enough to me, so to fix it, I just went back with the outline image to crisp things up.
These really came together very quickly as I was able to essentially mass produce them, stamping all the panels at the same time, just varying the colors and leaving some layers out for some of the cards. If you are a fan of making card sets, this would be perfect for you.
Next I want to show you how the companion products - the Printmaking Houses Stencil and The Neighborhood dies give you even more options.
The Printmaking Houses stencil has two parts: a large rectangular opening that perfectly frames the houses, and then a series of smaller kind of wonky looking rectangles that frame each individual house.
For this first card, I went very simple to show you how that big rectangle really sets off the stamped images.
I just placed the large opening over my panel and added the softest bit of inking. It really adds a little oomph to the card and makes those houses pop.
Next I wanted to show how the two stencil sections work together.
I used the large rectangle first, again very lightly adding color, and then placed the smaller rectangles over the initial inking, adding more color with the same shade of ink. I wanted a very soft serene card, so I kept my inking light.
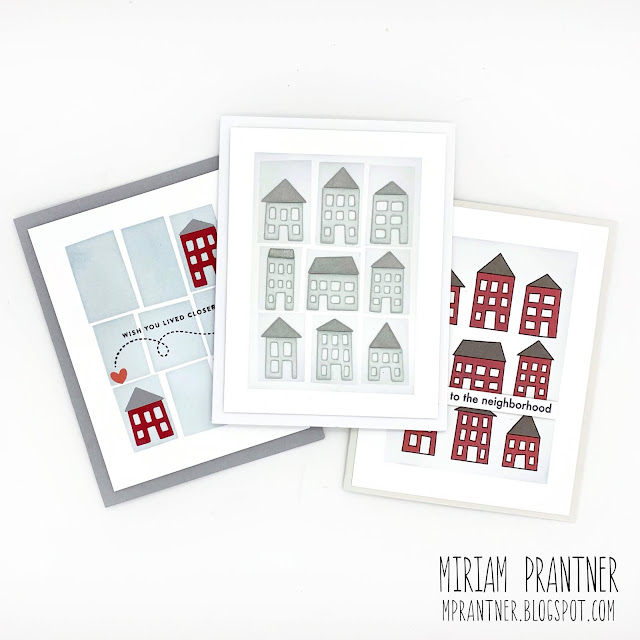
For this card I decided to put those Neighborhood dies to work instead of using the stamped images. For a little dimension I cut them out twice. I softly inked both the houses and the roofs with a blending brush and then adhered them to the second die cut. These were then adhered to my stenciled panel.
I liked this so much I didn't want to cover any of it up, so instead of adding a sentiment to the front of the card, I stamped one inside.
For this last card, I used just the group of smaller rectangles. I thought it would be fun to use just a couple of the houses.
I picked two and added them to the top right and bottom left corners. The little hearts on a string image and sentiment from the Just Miss You set were just perfect for completing the card.
While the Printmaking Houses stencil was designed specifically for the Printmaking Houses set, it really creates a perfect background for any image, so I thought I would show you another fun way to use it.
For this card I simply centered that array of rectangles over my panel and blended a few shades of Distress Ink over top.
Then I stamped the main image from Silhouette Sentiments in Versafine over top, and added one of the small sentiments from that set as well.
So quick and easy, and I love the look you get.
That's all for me today. Thanks so much for stopping by!


Love these cute houses and how you used the rectangles for the flowers.
ReplyDeleteI love the houses! That's my favorite from the release!
ReplyDeleteWow! These are amazing products
ReplyDelete