*This post contains affiliate links to Simon Says Stamp.
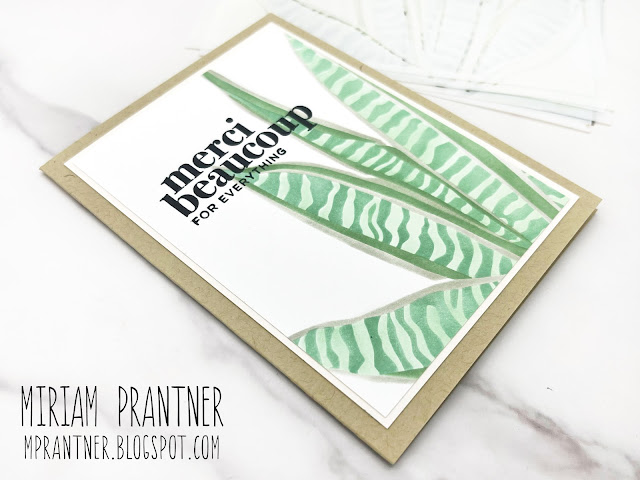
Today I'm sharing a few cards featuring my new Snake Plant stencil set. I've created several large leaf stencils, and have been wanting to do a snake plant leaf, but decided for this plant I needed more than just one leaf. This is a set of five stencils, and there is also a coordinating die available.
For my first card, I used all of the detailed stencils, not the overall stencil. I used Fawn, Aspen, Sage, and Artichoke inks. The sentiments are from the Thank You Basics set.
The completed panel was trimmed down, and I added a soft pink mat. Very easy.
For my next card, I again used just the detailed stencils inking them with Petunia, Pansy, Artichoke, and Cabbage. The completed image was then die cut with the coordinating die.
I used the A2 Rectangles Wafer Dies to create a kraft frame which was adhered over a patterned paper background with foam tape. The die cut snake plant was then trimmed down and adhered with foam tape as well, with the left and right leaves peeking out over the frame.
The relax sentiment is included with the coordinating die. I inked a piece of white cardstock with Petunia ink, and die cut the sentiment. The shadow piece was cut from white cardstock and I added just the slightest bit of Artichoke ink on the edges. I also added a secondary sentiment strip sentiment.
Finally, I needed to pull out some paste.
This time, I inked up the solid stencil with Fawn ink. I used Butter and Cabbage to created the stripes, and Gold Rush Lunar Paste for those long sections.
I mixed things up a bit by changing up the orientation of the card, and used the Thank You Basics set again for the sentiment.
The fun thing about this stencil set is that because of the size of the completed image, you can vary the portions of the stencil you use to get a variety of looks.
Hope this gives you some good ideas for how to use these stencils!


No comments:
Post a Comment