Thursday, March 28, 2013

There Are No Small Miracles


Thought I would try my hand at the current Verve Diva Dare Just Give me Stamps, Buttons, and Bling, which is to create a card that is a mashup of Laurie and Maureen's styles.

I'm not sure how successful I was since I used enamel dots as my bling....do enamel dots count as bling?  Also, the button that I used I 'blinged' up with an enamel dot.

I used the Wonderfully Made set, and all the papers are from My Mind's Eye's My Favorite Things 6x6 pad.  Lots of fussy cutting, which might be why I like it so much.  I used a strip of seafoam fabric that I had received in a Polka Dot Whimsy grab bag to mat the sentiment piece, and stitched around the entire main panel. 


That soft gingham ribbon is also from Polka Dot Whimsy.  I'm only so so about how that bow came out.  My bowmaking skills need a bit of work, but I think it adds just the right soft touch to the card.


I'm also going to link this up over at Simon Says Stamp since it's Anything Goes week. 

This is probably my last post for the month.  We're heading out of town to visit Andrew's parents, for a couple days, although we'll be home for Easter.  Hope that you guys have a wonderful rest of the week and a joyous Easter!

Supplies Used
Paper/Cardstock:  MME - Six by Six My Favorite Things pad; CTMH - White Daisy cardstock
Stamps:  Verve - Wonderfully Made
Ink:  Memento - Tuxedo Black
Other:  MME - The Sweetest Thing Enamel Dots; CTMH - Dimensional Foam Tape; Tombow - Mono Adhesive; Kuretake - Glue Pen; Ribon and Fabric - Polka Dot Whimsy grab bag

Wednesday, March 27, 2013

Guest designing for Sweet Stamp Shop


Hey everyone, I was so excited to be able to help Sweet Stamp Shop out with their release this month.  Today I'm being featured over at the Sweet Stamp Shop blog with a few more projects I created with this month's release.

I've got three projects to share with you today.

First a layout using the Calendar stamp set.


These photos are from several years ago when I took Ellie home to attend a friend's wedding.  We snapped these shots just before we left.  Ellie wasn't being cooperative with the photos, so I suggested that she and my mom clap, which worked a little better.

I used the Calendar stamp set to create my own patterned paper for this layout.  It's a pretty busy pattern, so I added a layer of vellum on the right hand side where the pictures were going to soften it a bit.  I love that I was able to highlight the month that I was scrapping with that wood veneer arrow (I added some black ink to it).  Some Studio Calico kraft heart stickers and SRM border stitch stickers finished the layout off.


My next two projects are cards that I created using Chalkboard Sign.

This first one also includes stamps from the Perfect Match set.


It doesn't come across that clearly in the photo, but added some pink/red highlights by using a Faber-Castell big brush pen.  After the initial stamping, I went over the selected portions with the pen, then stamped over top to give it that subtle color.


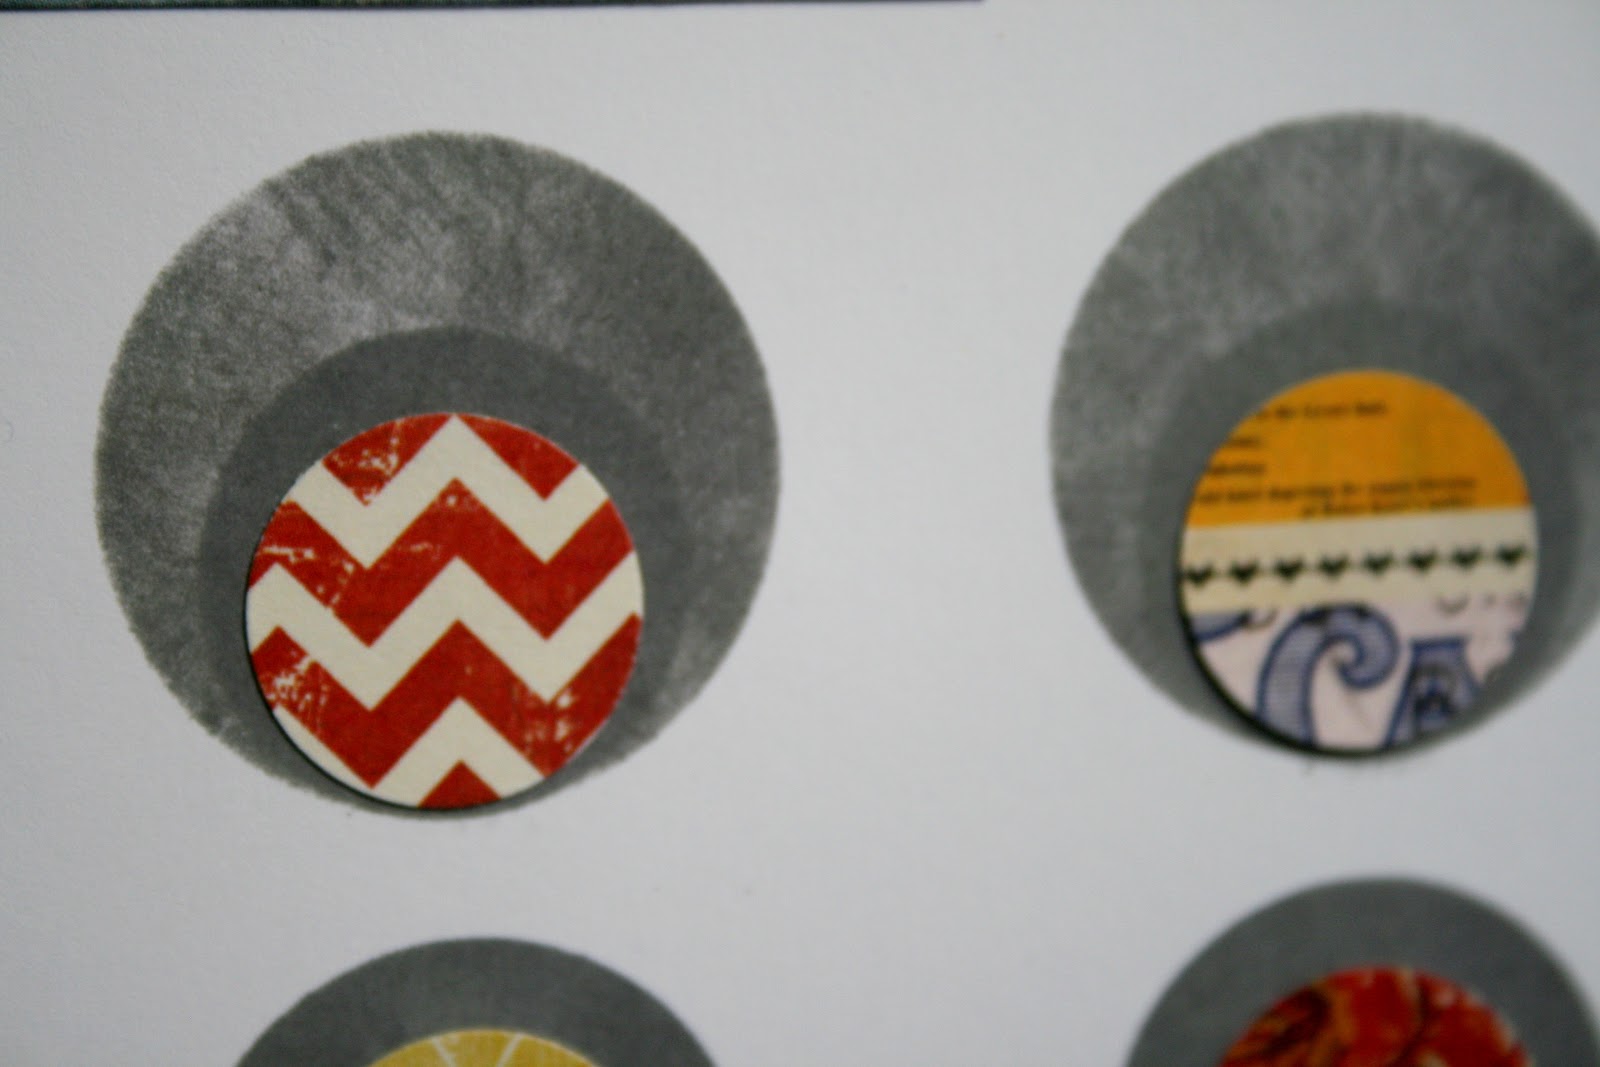
The frame for my chalkboard is a multi-step rather long process, but I think the results are worth it.

1) Cut the frame first (this one is 1/4" thick).
2) Use an embossing stylus and scoreboard to add the mitred corners on the backside of the frame.
3) On the right side of the frame, on a regular surface, use the stylus to score lines along the sides of the frame, lots of lines. 
4) Sand down the frame to reveal the lines/texture.
5) Add color back to the frame using a sponge/sponge dauber.

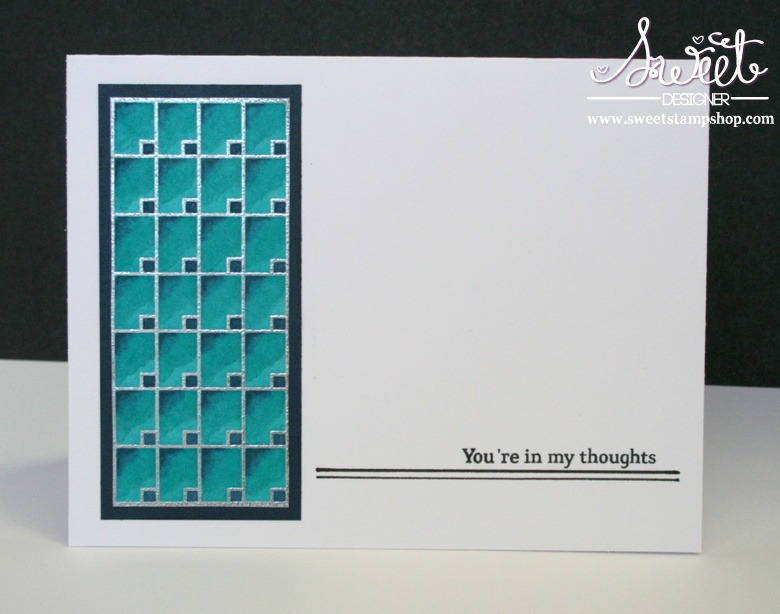
And finally another another CAS card.


For this card I created a small chalkboard sign that I could 'hang' on the card. The frame was created the same way as on the previous card, but I changed up the chalkboard technique a little bit.  After the initial stamping, Iused a Faber-Castell Stamper's Big White Pen to add some accents to the stamped imaged,  Then I stamped over top of that and added the smudging.  This is a good alternative to embossing if you want a bolder/whiter look but don't want to fiddle with embossing.

Thanks so much to Nicole for inviting me to design for Sweet Stamp Shop this month.  It was so much fun and I had a GREAT time!

Supplies Used

Layout
Paper/Cardstock:  CTMH - Black and Colonial White Cardstock; Recollections - Vellum
Stamps:  Sweet Stamp Shop - Calendar
Ink:  CTMH - Desert Sand and Black; Distress Inks:  Antique Linen and Vintage Photo
Other:  SRM - Border Stickers; Freckled Fawn - Wood Veneer Arrows; Studio Calico - Kraft Heart stickers; Pigma - Black Micron Pen; Tim Holtz Tiny Attacher; Tombow - Mono Adhesive; Doodlebug - Tiny Alpha Stickers; American Crafts - American Crafts - Black Amy Tangerine Sketchbook Journal Foam Thickers

Card 1
Paper/Cardstock:  CTMH - White Daisy, Black, and Cocoa Cardstock
Stamps:  Sweet Stamp Shop - Chalkboard Sign and Perfect Match
Ink:  CTMH - White Daisy and Chocolate
Other:  Faber-Castell - Red Stamper's Big Brush Pen; Embossing Stylus; Tombow - Mono Adhesive

Card 2
Paper/Cardstock:  CTMH - White Daisy, Black, and Cocoa Cardstock; MME - On the Bright Side One 6x6 pad
Stamps:  Sweet Stamp Shop - Chalkboard Sign
Ink:  CTMH - White Daisy and Chocolate
Other:  CTMH - Antiqued Copper brad, Dimensional Foam Tape; The Twinery - Maraschino Twine; Faber-Castell - Stamper's Big White Pen;Tombow Mono Adhesive


Monday, March 25, 2013

Punky Sprouts and Carta Bella


I was so excited when I heard that we were teaming up with Carta Bella this month.  I've been a big fan of Carta Bella's collections from the start, and I was lucky enough to get to work with the Winter Fun collection. 

I have two projects to share with you today.  The first is a layout. 


This is from Christmas Eve 2009.  We generally spend Christmas Eve with Andrew's family, and we were down at his parent's house that year.  As you can see, there was a lot of snow on the ground, and Andrew's dad volunteered to take Ellie out for a walk to see the stream at the back of their property.  They never made it all the way as Ellie was just the right size where she would put her boot down on the snow and it would hold for a few seconds, and then as she continued to walk the boot would fall through.  She did NOT like that, so back they came, but I was glad to have gotten these shots of the two of them.

I used two similar photos.  One as the main image, the other covered with vellum as kind of an echo of that image.


The layout includes both  Lil' Lacy and Lil' Parchment blossoms.  The Parchment blossoms are the medium size and were folded and adhered to the vellum mat to create a frame for the photo.  I also added a little glassine bag to hold the journaling tag. 

The strips from the bottom of the page as well as the Winter Days block were cut from the border and journaling block sheets in the Winter Fun collection.

My second project is a card.


Usually I like a sentiment on my cards, but I really wanted the flower to be the focus on this one. 

I chose two of the Winter fun papers, distressed the edges and sewed them together and then to the card.

Then I added a Lil Lacy blossom.  To create the flower, I got one of the small Lil' Parchment Blossoms, folded it in half four times, then opened it up, and kind of pinched/twisted the center and manipulated it until I was happy with it.  It's adhered with a Zot dimensional adhesive.  A button and some twine finish it off.  This was a really easy card to put together, but I think it has a big impact. 

Thanks so much for coming by today.  Be sure to head over to the Punky Sprouts blog to check out the rest of the projects that the Design Team created this month. 

Supplies Used:
Punky Sprouts:  Lil' Lacy Blossoms, Lil' Parchment Blossoms  Punky Store-http://getpunkysprouts.com/store/?page/63371/shop-punky
Carta Bella - Winter Fun Collection
Other:  American Crafts - Black Nutmeg Thickers; Trendy Twine - Peppermint Stick; Curtsey Boutique - Glassine Bag; CTMH - Cricut Art Philosophy Cartridge; Kraft Button; Thermoweb - Zots Dimensional Adhesive; Tombow - Mono Adhesive; Sewing Machine

Saturday, March 23, 2013

thanks for AEI♥U and Simon Says Stamp Vintage Challenge

I had a little free time today, and thought I would play along with a couple challenges.

This is the inspiration photo for the current AEI♥U challenge.


And this is what I created:


I haven't been this literal with a challenge in a while, but I had an idea and just ran with it.

You might think that there aren't any Avery Elle stamps in this card, but there a couple.  The first is the 'thanks'.  It's one of those sweet little freebie stamps that come with your order.  I LOVE it when companies do stuff like that for their customers.

The second is actually from the Ikat set.  I thought that the continuous border from that set would be perfect to create the water in the picture. 

To create the card, I started by using some eclipse masking tape to define the horizon line.  Then I stamped the Ikat border repeatedly (overlapping) in two ink colors (Twilight and Juniper) to create the water.  Once I was done with that, I moved the masking down, and sponged the top of the card with the same two colors as well as Iced Spruce Distress Ink.

The next step was to create the dock.  It was cut from white cardstock.  I used an embossing stylus to impress horizontal lines on it and then added color using Vintage Photo Distress Ink.  Then I went back over the piece with gesso to give it kind of that whitewashed effect.


The sentiment was stamped with Twilight ink, and then off center with White Daisy.  I wanted it to pop a little more, so I went back over it with a white gel pen. 

The challenge over at Simon Says Stamp Vintage challenge is to create a project with a water theme, and this definitely fits that category.

Hope you are enjoying your weekend! 

Supplies Used
Paper/Cardstock:  CTMH - White Daisy
Stamps:  Avery Elle - Ikat and thanks stamp
Ink:  CTMH - Twilight, Juniper, and White Daisy; Ranger Distress Inks - Iced Spruce, Vintage Photo
Other:  Claudine Hellmuth - Gesso; Eclipse - Masking Tape; Tombow - Mono Adhesive; Embossing Stylus; Uni-ball - White Signo Broad Gel Pen

Thursday, March 21, 2013

Little Tangles Challenge #9 - Shaped Cards


It's time for another Little Tangles Challenge!

This week we are tackling shaped cards.  I will be the first to admit, I tend to run screaming in the other direction when I hear 'shaped cards'.  They are not easy for me, but today's card came together in a snap.


I used one of the cards from my Cricut Artiste cartridge (and I'll admit I kind of feel like I cheated on this because I did, but that's what those shapes are for, right?).

This one is pretty CAS.  I added stripes to the tie using On The Strip in Sky and Pacifica.  I used a white gel pen to add some detail between the stamped stripes.  I'm not quite sure if it was because the ink was too wet when I did this, but they didn't turn out as crisp as I intended, however, I do like the more subtle look, so it all worked out.

The top of the tie was adhered with dimensional foam tape and I also used that to hold the collar pieces down.

To add a little interest and a subtle sentiment, I stamped the hello strip from On the Strip on the inside of the collar....kind of like the lining in the collars of fancy dress shirts.  I used some thin eclipse masking tape when I did this since the bottom of the stamp is a bit wider than what you see here.

Pretty simple, right?  Shaped cards don't have to be hard or intimidating.  They can just as easily be quick and fun (must remember this fact!). 

I really hope you'll consider playing along with us.  You'll be in the running for a free set from Neat and Tangled, and there are so many great ones to choose from!  You don't have to use Neat and Tangled stamps, but we do love to see them, and Danielle has some free digis available here.

Thanks for coming by, hope you have a great day!  Just more day until Spring Break for us!

Supplies Used
Paper/Cardstock:  CTMH - Whtie Daisy
Stamps:  Neat and Tangled - On the Strip
Ink:  CTMH - Sky and Pacifica
Other:  CTMH - Cricut Artiste Cartridge; Dimensional Foam Tape; Eclipse - Masking Tape; Tombow - Mono Adhesive

Tuesday, March 19, 2013

On your marks, GET SET


Playing along with this week's Elle's sketch.

As soon as I saw the sketch I knew I was going to pull out one of my new The Crafter's Workshop stencils, Layered Beads.  The circles graduate from the center of the stencil, so I lined it up a little lower on the page and used my sponge dauber to add color to three of the rows.  Then I turned it around, centering it over the first set of circles and repeated.  The effect is that the top and bottom rows have a smaller circle inside.


Three quarter inch circles from Glitz's Yours Truly 6x6 pad were added to the circles to add some color and emphasize the graduated look.

Glitz papers mat the photo as well as create the large pennant that the small Elle's Studio pennants sit on.  I added some MME enamel dots at the top of the Elle's pennants, I think they tie in the circle theme from the bottom of the page.


Since the photo is slightly off center, I thought it would be great to add the journaling on vellum over top of the photo.  A great trick - just put the vellum over lined paper when journaling so that it comes out straight/even.


The alphas are CTMH's canvas alphas inked with Outdoor Denim.

Hope your week is going smoothly!   

Supplies Used
Paper/Cardstock:  Glitz - Yours Truly 6x6 papd pad; CTMH - White Daisy; Recollections - Vellum
Ink:  CTMH - Slate, Outdoor Denim
Other:  Elle's Studio - Bright Pennants, Lil' Snippets Tiny Labels; The Crafter's Workshop - 12x12 Layered Beads stencil; CTMH - Canvas Alpha Stickers; MME - The Sweetest Thing Honey Enamel Dots; Tombow - Mono Adhesive

Saturday, March 16, 2013

Another Happy Spring card


Thought I would pop in and share another card that I made a while back. 

This one uses a couple Bella Blvd collections:  Flirty and Birthday Boy.

The flowers are are a combination of ones that were fussy cut from one of the Flirty papers, as well as some stamped images.  For the stamped images, the flowers were stamped numerous times so that I could fussy cut the different layers to add dimension to the card.

The alphas/Happy sticker are from the Birthday Boy collection. 

Hope that you're having a great weekend!

Supplies Used
Paper/Cardstock:  CTMH - White Daisy; Bella Blvd - Flirty
Stamps:  Bella Blvd - Flirty stamps
Ink:  Hero Arts - Butterbar and Bubble Gum
Other:  Bella Blvd - Birthday boy stickers; Tombow - Mono Adhesive; 3L - Large and Small Dodz Adhesives; CM - Corner Rounder

Wednesday, March 13, 2013

Sweet Stamp Shop Release - Introducing Calendar


I'm back to help reveal another new set for Sweet Stamp Shop today, Calendar.  This set is perfect for scrapbookers and particularly Project Lifers, but today I want to show you a way you can really stretch this set.

When I was looking at the calendar image, the center portion leapt out at me as a really fun, modern, geometric pattern. 


I embossed the image in silver and then cut out the center portion and added color with my Spectrum Noir markers. 


Since the colored image is so bold, you don't really need too much else.  I added a dark mat, a sentiment from Sweet Stamp Shop's Sentimental Birds set, and some hand drawn lines (using a ruler).


I love this design because you can customize it for pretty much any occasion or color scheme.  You could also really simplify the process, and mass produce these by embossing on colored paper.

Thanks so much for stopping by.  Be sure to head over to the Sweet Stamp Shop blog to check out some more amazing projects and find out how to win some sweet!  I'll have some more Sweet Stamp Shop projects to share with you later this month.

Supplies Used
Paper/Cardstock:  CTMH - White Daisy, Black, and Outdoor Denim cardstock
Stamps:  Sweet Stamp Shop - Calendar
Ink:  Versamark; Memento - Tuxedo Black
Other:  Spectrum Noir markers; CTMH - Silver Embossing Powder; American Crafts Marker; Tombow - Mono Adhesive


Tuesday, March 12, 2013

Sweet Stamp Shop Release - Chalkboard Signs


Hey everyone!  I'm excited to be helping out Sweet Stamp Shop this month with their March release.  Today, I'm helping reveal Chalkboard Signs.

The chalkboard crazy seems to have taken the stamping world by storm, and this new set is right on target.  Don't worry if chalkboard isn't your style, this set is SO versatile.

Here's a quick and easy card that I created using the new set:


The arrow is so easy to line up, I didn't even draw lines.  Probably could have left it as is, but a little glitter makes everything better, right?  This is just some AC glitter tape. 

Thanks so much for coming by!  Be sure to head over to Sweet Stamp Shop to check out Kiss Me, the other set that is being released, as well as all the rest of the projects from this month's designers.  There are some GORGEOUS things to be seen!

Supplies Used
Paper/Cardstock:  CTMH - White Daisy cardstock
Stamps:  Sweet Stamp Shop - Chalkboard Sign
Ink:  CTMH - Ruby; Memento - Tuxedo Black
Other:  American Crafts - Glitter Tape

Monday, March 11, 2013

Guest Blogging for Market Street Stamps Part II


Hi!  I'm back with my second guest design post for Market Street Stamps today.  Today my projects are all created with the Shine On stamp set.  I LOVE this set, it's technically a holiday set, but my projects today show you how versatile this set is.

My favorite stamp from this set is the large sun/starburst stamp, and I used it to create the card above by just stamping it once on each side of the card.  I love how modern the design is, and it can be used for any ocassion/sentiment.


I liked this effect that I got so much that I started experimenting with my neon inks creating a whole bunch of 4" x 4" squares until I ended up with this:


which I thought would be a great background for a layout.


It's such a bold pattern and I love the detail and delicacy of the rays that I didn't want to clutter it up too much.  Some washi accents and Amy Tangerine Sketchbook dimensional stickers were all that was really needed to finish this off.


Then I decided I would go back and try a second version of my first card (the color is a little more orange since I didn't fully clean my stamp after I made the pieces for the layout, so it's more of an orangy neon yellow).


For this one, I stamped the lightbulb (my second favorite image from this set) three times:  once on the card, once on a piece of cardstock that I pressed my neon pink inkpad to, and once on vellum.  I fussy cut the heart from the cardstock that was colored with the neon inkpad, and used a sponge to add neon ink to the backside of the stamped vellum image and fussy cut it.

The heart was adhered directly to the card, and then the vellum lightbulb layered on top.  I love that you can still make out the stamped rays through the vellum lightbulb.


This concludes my guest blogging stint at Market Street Stamps.  I have thoroughly enjoyed myself!  The sets are so much fun and stamp beautifully.  Thanks so much to Angelica and Jorge for having me!

Supplies Used
Paper/Cardstock:  CTMH - White Daisy, Black, and Slate cardstock; Recollections - Vellum
Stamps:  Market Street Stamps - Shine On
Ink:  Hero Arts - Neon Yellow, Neon Orange, Neon Pink; Memento - Tuxedo Black
Other:  AC - Thickers Custard Foam Letter Stickers, Amy Tangerine Sketchbook Dimensional Stickers; Target Washi Tape (Stripes); Freckled Fawn - Checkerboard washi; Tombow - Mono Adhesive and Vellum Adhesive.

Thursday, March 7, 2013

Little Tangles Challenge #8 - Anything Goes!


Am I the only one who starts singing Cole Porter when reading the phrase 'Anything Goes'?  There's gotta be someone else out there.....

I digress, it's Anything Goes week here at Little Tangles, and I pulled out the exact same sets that I used on my last card because I kind of love them.  Here's my card:


I used On the Strip to create the mat, and Party Dots for the main panel.  Stamped that big circle four times for the background, and used the banner and sentiment from the set too.  The little black mat for the banner is just free cut.  A little twine finishes it off.

Easy and quick.

Hope that you are able to join us for this challenge (you don't have to use Neat & Tangled stamps to play along, but we do love seeing them).  The winner gets a set of their choice, and it just so happens to be release week at Neat & Tangled, so head over to the blog for additional chances to win the new sets. 

Supplies Used:

Paper/Cardstock:  CTMH - White Daisy and Black cardstock
Stamps:  Neat and Tangled - Party Dots and On the Strip
Ink:  Memento - Tuxedo Black; Hero Arts - Butterbar
Other:  CTMH - Dimensional Foam Tape; The Twinery - Charcoal Twine; Tombow - Mono Adhesive

Wednesday, March 6, 2013

Winner Winner!

Just popping in to announce the winner of my giveaway from last week.

Jingle, you are the lucky lady!!!!

Please shoot me an email, and I'll get your box o fun out to you this week (but not today because it's a snow day, even if I can still see the grass.....it's Virginia after all).

Tuesday, March 5, 2013

Happy Spring!

****Today is the last day to enter my giveaway here, I'll announce the winner tomorrow****


I've been busy creating projects for the Holiday Cards and More call, kind of odd creating for Christmas in March, but I thought I would share this card with you.  It's for a call from last year that didn't get picked up, but I thought it would be more seasonally appropriate than what I've been working on lately.

The birdhouse images was stamped in Honey and then color was added (very carefully so it didn't become a blurry mess) with a blending pen. 


Contrary to this card, the weather forecasters are predicting snow for our area this week.  We'll see.  Here in Northern Virginia snow ends up being mostly talk and not a lot of real stuff.

Supplies Used
Paper/Cardstock:  Jillibean Soup - Homemad 6 Bean 6x6 pad; MME - Six by Six Two Happy Day 6x6 pad; CTMH - White Daisy cardstock
Stamps - WPlus9 - Spring Tags
Ink:  CTMH - Chocolate, Honey, Autumn Terracotta, Goldrush
Other:  Hydrangea Hippo - Crocheted Lace; Webster's Pages - Tutu Blue trim; May Arts - Burlap Twine; Le Box Boutique - Washi Tape; CTMH - Blending Pen and Dimensional Foam Tape; Tombow - Mono Adhesive

Saturday, March 2, 2013

Thank You for AEI♥U and Simon Says Stamp

***There's still time to enter my 200 follower celebration giveaway, just scroll down***

 
Taking a break from submissions and DT work to play along in Avery Elle's AEI♥U challenge today, and since it's Anything Goes week at Simon, I'm linking up over there too.

This is the inspiration photo for the Avery Elle challenge.


I used the Blooming Banner set from Avery Elle.  It's got this gorgeous flower image, and I decided to get out the old scissors, as well as my gold embossing powder/heat gun, and go to town. 

Overall there are six layers on that medallion I created.  Lots and lots of cutting, but I love how it turned out.

The one tricky layer was the second one, which is all gold.  What I ended up doing is stamping the flower twice.  I cut the first layer off of one, taking care to cut right on the inside of the edge for the second layer.  Then I taped that onto the second flower as a mask.  I applied Versamark, took off the mask, added the gold embossing powder and zapped it with the heat gun.  Because of where I trimmed the top layer, the mask left the stamped edge intact. 


There are two pennant layers.  I thought it looked a little stark with just the navy one, so I cut a second and roughly swiped versamark on the edges and embossed.  It just softens the edge a little and gives it some extra interest.


The background paper is from a MME 6x6 pad.  Since you get two of each of the patterns, this works.  You need to cut a strip from one paper straight on, and from the second rotated at 90 degrees in order to be able to create the chevron. 

The glitter at the top is some American Crafts Glitter tape that I trimmed to make thinner.  I got the idea from my friend Taheerah who made this amazing card.

What do you think?  It's a bit of a departure from the inspiration photo.  I used the flowers, colors, and chevron as a jumping off point, but mine ended up a bit more exotic. 

Hope you are having a great weekend!

Supplies Used
Paper/Cardstock:  MME - Oo La La and The Sweetest Thing Lavendar 6x6 Pads; CTMH - Outdoor Denim and White Daisy cardstock
Stamps:  Avery Elle - Blooming Banner
Ink:  CTMH - Outdoor Denim; Versamark
Other:  CTMH - Gold Embossing Powder; American Crafts - Glitter Tape; Tombow - Mono Adhesive

Friday, March 1, 2013

It's the first day of March, this calls for a giveaway!

So I teased last week that I was going to do a giveaway since I had hit (and actually exceeded) 200 followers.

Here it is.  A box full of fun for one of you guys. 


Rules are simple, leave a comment.  No need to follow, but if you do, go ahead and leave another comment.  This is a quick one.  You have until next Tuesday at midnight to enter, and I'll announce the winner on Wednesday.  There are likely to be a few other goodies that make their way into the box, but this is what I have for now.

The giveaway is open internationally, but if you are international you may be asked to help with the shipping overage.

And just for grins and giggles, here's a little taste of what goes on at our house.  This box has been a spaceship, a house, and Ellie decided this week that Geronimo needed a 'house' to eat in.....not quite sure why, but he seems to be playing along. 


TGIF!