Wednesday, April 11, 2012

The Quickest Card I've Ever Made


Just a quick card to share with you today (and by quick, I mean lightning quick). I have a few deadlines looming that I need to get stuff done for, but sometimes you need to make something not because you have to, or to try and win a challenge, or because there's a class or assignment, but just to make something, from scratch, out of your own head, just because, and that's kind of where I am today. But, of course, I'm pressed for time, so this is what I came up with: a really simple, clean, one layer card that was so easy to whip together....a set of these would be PERFECT to give as Teacher Appreciation gifts.

And, I got to try out one of my new goodies. I heard tell from some of my friends out there in blogland that there was washi tape to be had at Target! I love a trip to Target, and it just so happened that I was home with a 'sick' kid last week, so off to Target we went to get Easter stuff, and then we just 'happened' to be in the stationary aisle where I just 'happened' to see these fabulous little sets of tape.


There are four different color combinations (if I recall correctly): red/pink, yellow/orange, blue, green (although blue and green might have been a set together, I just can't remember). For $4 you get a set of four. Can't really beat that, so I got myself the red/pink and yellow/orange sets.

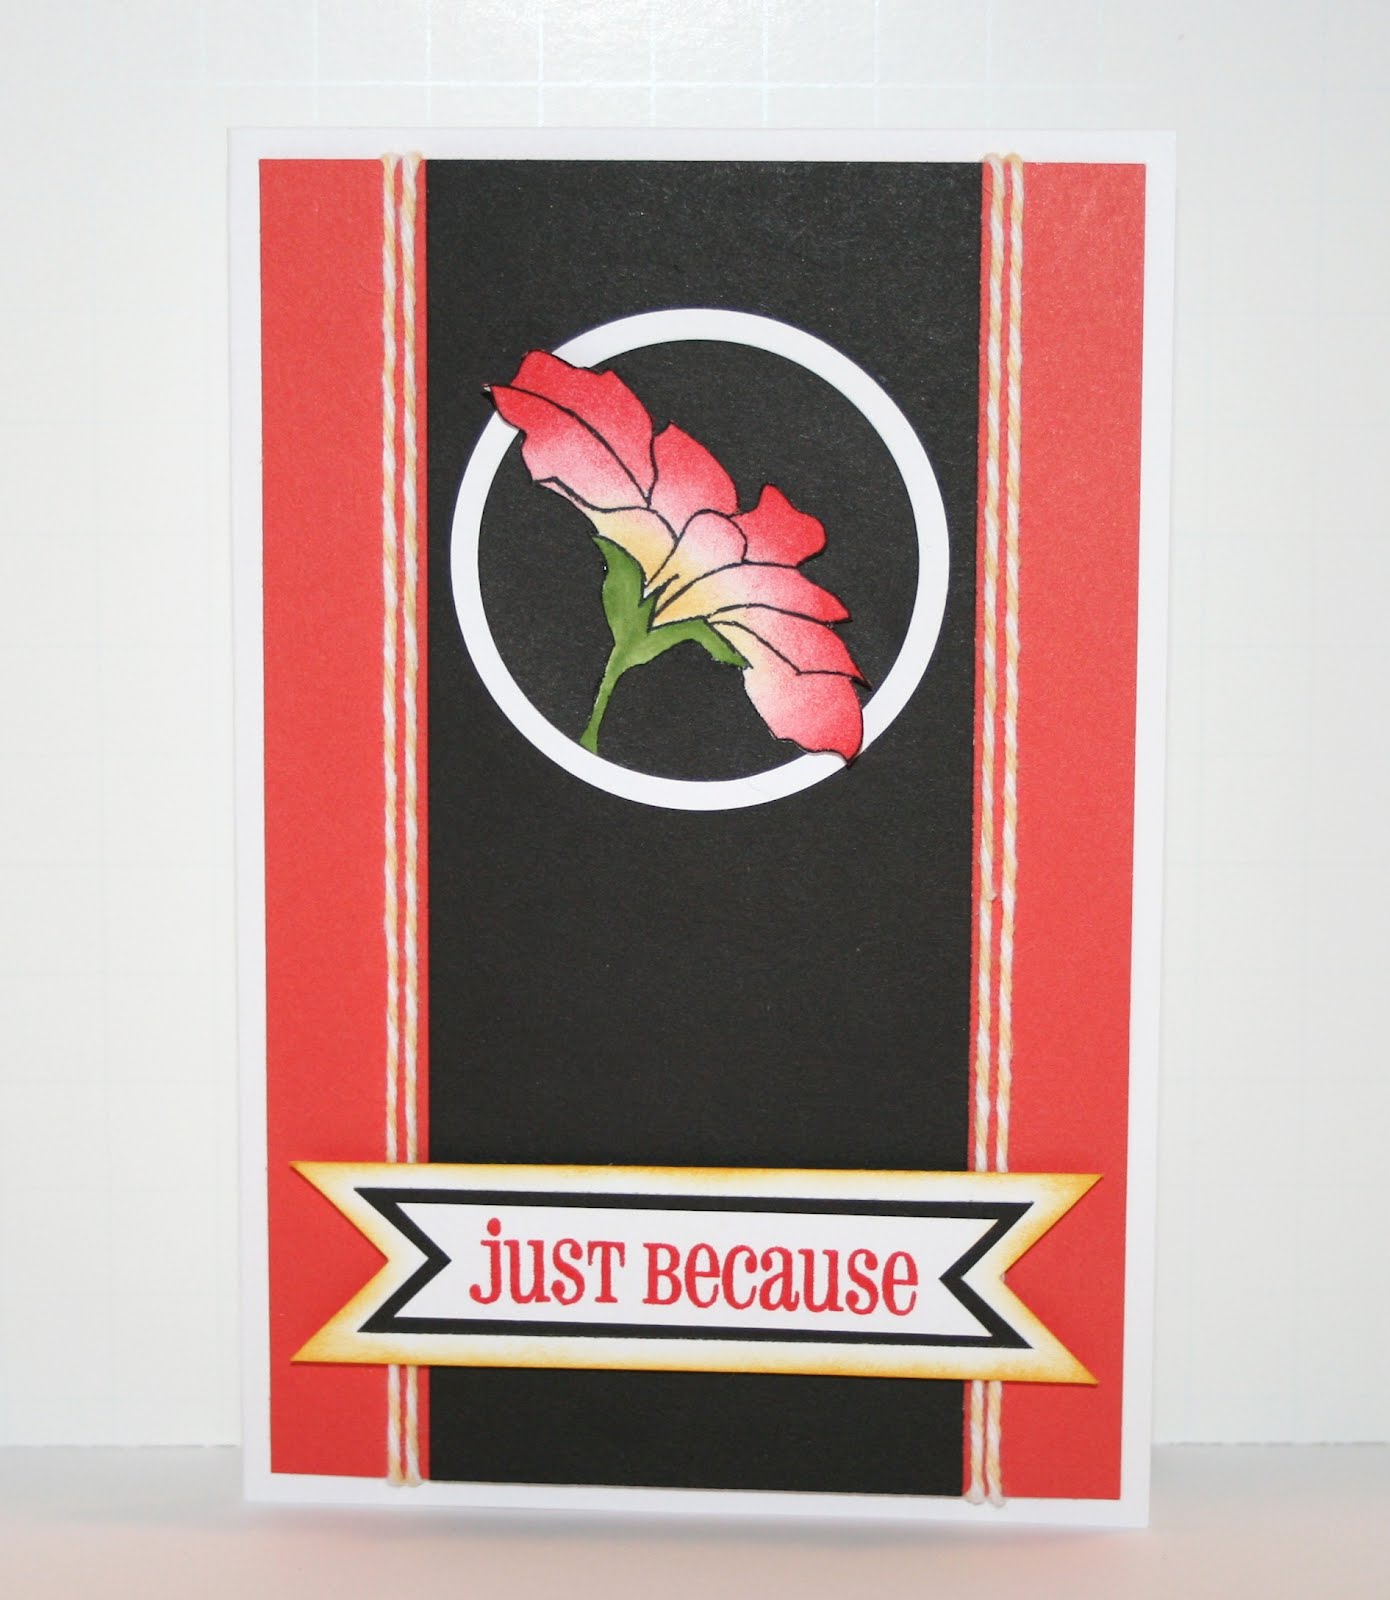
For this card (4x4) I used the solid red along the bottom of the card. All of the stamps are from the Pemberley workshop on the go set, which I love. Black ink, three stamps, a bit of washi tape, and there you have it. So easy (unless you're like me and manage to leave a big black smear on your first take and have to do it again, in which case it's still easy, but you're annoyed that you wasted a perfectly good piece of cardstock because you were careless...AGAIN).

But, I digress, the moral of the story is, do some stamping/crafting for the sheer joy of it and not because you have an end goal in mind, go to Target, and try and be a little neater. Now, I am off to do the projects that I have to get done....

Have a great night!

Supplies Used
Cardstock: White Daisy
Stamps: Pemberley workshop on the go set
Ink: Black
Other: Washi tape from Target

Monday, April 9, 2012

Viva la Verve April - Week 2


Here's my second Viva la Verve card for this month. This one uses CTMH Roxie papers and Verve's Psalm 121:1-2 Plain Jane. This verse/Psalm has a special meaning to me. When each of our daughters was born, I picked a few passages to learn/recite to them each night as I was putting them to bed. This is one of the passages that I learned for Carina.

For the background portion of the card I pretty much stuck to the sketch. On the front piece I deviated a little. I offset the oval (mine were cut using the CM custom cutting system). I really love the swirls/flourishes on the patterned paper for the front of the card, so I traced the large one and that little flourish at the bottom of the oval so that they would fall in front of the oval. Originally, I was going to have that large curved piece lie flat against the card, but I kind of like the height/dimension it adds, so I left it popping up.


For the trim piece, I just used a strip of black cardstock, and then I cut four pieces of hemp. I grouped them two and two, and then hooked them together.


The little tag that is hanging down is actually a button. I strung a piece of twine through one hole and tied it to create a large loop. To make the small loop through which the tag is strung, I just tied a knot/bow using some twine. Then I cut a little circle of Desert Sand cardstock, stamped one of the small flowers from the Happy Clusters stamp set, and inked around the edges. I adhered it to the front of the button using a 3L Dodz. It was fun to create my own embellishment, and I'm going to link this up to Moxie Fab World's DIY Embellishments Challenge.

Hope you had a good start to your week and a wonderful Easter. I'm home tomorrow to do taxes....ugh....

Supplies Used
Paper/Cardstock: CTMH - Roxie Level 2 Paper Packet; Black and Desert Sand Cardstock
Stamps: Verve - Psalm 121:1-2 Plain Jane; CTMH - Happy Clusters
Ink: CTMH - Black, Desert Sand, Tulip
Other: CTMH - Sponge Dauber, Craft Knife, Hemp, Kraft Button; The Twinery - Cappuccino twine; CM - Custom Cutting System ovals; Scrapbook Adhesives by 3L - Dodz; Crafty Foam Tape

Sunday, April 8, 2012

One of Those Days - An Easter Contemplation

Today (Saturday) was one of those days. You know, when your kid wakes up, and five minutes later you realize that it's going to be one of those days because she is already in the middle of a full blown tantrum? It seemed like every question turned into an argument/debate with a full complement of whining, foot stomping, tears, and angst. The fact that I was just exhausted didn't help the situation.

But at some point, I stopped and thought about what God must feel like. I certainly am not any better than a 4 1/2 and 1 1/2 year old when it comes to life sometimes. I do what I'm not supposed to, I'm whiny, ungrateful, selfish, and unkind. And yet, God sent his only begotten Son to suffer for me.

This (fairly obvious) realization gave me pause to think, and to be grateful, and to more wholly appreciate the joy of this day, when we celebrate Christ's victory over death, and rejoice in a new day, and in each new day that his sacrifice affords us; days when we can begin anew, wipe away the old, be forgiven of our past transgressions, and make his sacrifice worthwhile.

So, on this most holy of Sundays, I wanted to share one of my most favorite quotes with you:

"It means," said Aslan, "that though the Witch knew the Deep Magic, there is a magic deeper still which she did not know. Her knowledge goes back only to the dawn of Time. But if she could have looked a little further back, into the stillness and darkness before Time dawned, she would have read there a different incantation. She would have known that when a willing victim who has committed no treachery was killed in a traitor's stead, the Table would crack and Death itself would start working backwards."

Happy Easter!

He is risen indeed!

Saturday, April 7, 2012

Two 'Let's Go Fly a Kite' layouts


You probably think I'm going to share some great spring layouts, right? Wrong. I am always months behind when it comes to scrapbooking and this is actually from this past Christmas.

So what's with the springy colors and titles for these layouts? Well, winter wasn't exactly wintry here in Virginia this year. There was pretty much no snow, and the temperature was well above normal for most of the season. So, on December 23rd when I found myself home with the two girls and it was so nice and sunny, and warm (even though they have their winter coats on) we ended up outside playing with sidewalk chalk.


At some point the girls ended up sitting on the steps and Ellie broke out into song. No Christmas Carols here, instead, she decided to belt out (I'm sure everyone in a two block radius who was outside heard her) Let's Go Fly a Kite from Mary Poppins, which she had recently seen for the first time.

Carina, who at that point was saying pretty much nothing intelligible, sang along, loudly.

Just another little moment in our lives.

Back in the old days I probably wouldn't have bothered with a layout to document this event, but this year I'm trying to do a better job of documenting the everyday, the little moments, the precious seconds. And I find, that I am really enjoying that process, that it allows me to not move from one holiday season/momentout event to the next, but to stop and appreciate the moments in between. It's fun, and it's good for me, and I hope will be good for the girls when they look back on their books later on in life.

In case you're wondering, the kite shapes/insides were drawn free hand and cut out. I attached some twine for accents. Other than that, these layouts were pretty simple. I don't like to do exactly the same layouts for the two girls, so even here where it's the same event, I like to mix it up a bit. I'll often use the same papers/embellishments to save time, but I like to see what the photos want to do on the page.


I also took the opportunity to work on my lettering. This is something I want to be better at, to be as comfortable in writing out my titles as I am when stamping or using stickers. Since I'm still working on it, I used a pencil to sketch out the letters first, and then went over them with marker. On Carina's layout I added some pink accents with my blending pen and Sorbet ink.

Hope you are having a wonderful Easter weekend!

Supplies Used:
Paper/Cardstock: Mayberry Level 2 Papers; Colonial White and Hollyhock Cardstock
Ink: Sorbet
Other: Dimensional foam tape, Blending Pen; EK Success Black Zig Marker; The Twinery Lemondrop and Pink Sorbet twine

Tuesday, April 3, 2012

Viva la Verve April - Week 1


I've been wanting to play along with the Viva la Verve for a while now, but I always seem to run out of time, so this month I figured I would get an early start, and hopefully I'll be able to complete each week.

For this card I used Verve's Blue Skies stamp set and papers from Echo Park's Times and Seasons collection. Originally I was going to use two different patterned papers, but I really like how using the same print with the black mats makes the card pop.

The Blue Skies set has some great flourishes. I used one of the medium sized ones around the border of the center circle and a larger one on the backgroud piece. As luck would have it, when I went to assemble the card, the flourishes on the rectangular background piece and the round circle just seemed to line up....I love it when happy coincidences like that occur!

Supplies Used
Paper/Cardstock: Echo Park - Times and Season collection; CTMH - Black and Colonial White cardstock
Stamps: Verve - Blue Skies
Ink: CTMH - Black

Monday, April 2, 2012

Ellie's Fall Festival/Petting Zoo Layout


I know that I have mentioned it before, but I'll say it again....I LOVE FLIP FLAPS! How else can you cram 12 full size (or nearly full-size photos) onto a layout and still have plenty of space for journaling? Flip Flaps are the answer. You can take the layout above, and turn it into the layout below:


And while I love being able to include more pictures in my layouts (it takes me a long time to cull through my photos....I hate 'rejecting' any), the other thing I love about Flip Flaps is that it makes my layouts interactive. I can use them to do a better job of telling a story through a progression, showing a series of photos, and involving the viewer.

The papers in this layout are from the Pemberley Level 2 paper packet, and while they are not particularly fall-like, they are so pretty, and I have really been wanting to use them.

I'm using two Flip Flaps on this layout, and since they really don't photograph that well, this time I'm photographing them outside the page protectors/flip flaps. The first is the small 4x6 size on the left half of the layout, and the second is a 6x12 one on the bottom of the right half of the layout.

I'm lucky enough to work just 10 minutes from home, and even closer to where the girls are in daycare, so I can slip out when there are special events at school to help out/volunteer/take pictures. It's always interesting to me to see how Ellie is when she's in a group without me. She's always been very clingy (last year I didn't even attempt to attend this event because I figured that my being there would only end in tears when I had to leave), so I like to try and kind of sneak in and capture her in her more natural form before she sees me and starts acting all goofy.

I think most folks print photos in the 4x6 size, so my goal with this layout was to make it accessible. All the photos are either uncut or 4x4. There are 12 photos in total and two spots for journaling, but you could always convert that last 4x4 space to another photo if you needed. And really it just depends on how many photos you have. If you wanted to include more, you could use more of the full length Flip Flaps. You get an assortment of 4x12, 6x12 and 8x12 sizes Flip Flaps in each package.

The title letters were cut using the Cricut Art Philosophy cartridge and then I ran those as well as the hexagons that I cut out through my Xyron. I used a sponge dauber to add a little extra color to the letters which is really easy to do when you use the Xyron because they are stuck to adhesive sheet, so they don't move around on you.

This is actually the layout we'll be completing at my workshop this month. If you are in the Northern Virginia area and would like to attend, please contact me. Hope your week is off to a great start!

Supplies Used:
Paper/Cardstock: Pemberley papers; Desert Sand, Colonial White, and Outdoor Denim cardstock
Ink: Honey
Other: Flip Flaps, Cricut Art Philosophy Collection, Sponge Dauber, Xyron 5" Creative Station

Saturday, March 31, 2012

A couple more cards for the Craft's Meow Birthday Celebration


A couple cards to share today for The Craft's Meow's birthday bash.

This first card is for the sketch challenge.


I used one of the free digital stamps that Karen Baker designed for this card, but opted to use only a portion of the image, the large bloom. I printed the digital image multiple times, so I had an extra. I cut out an extra stem to use as a mask. Then using sponge daubers, I added Honey and Holiday Red ink to the image. Once I had the color intensity where I wanted it, I cut the image out.

The lines didn't print as crisply as I expected, but this could be because I don't actually have photoshop (I just inserted the .jpg into powerpoint and printed it from there), so I went over the lines with a black marker and also added some definition along the cut edges. I knew that I wanted to curve up the edges of the flower for some extra dimension, so I used the sponge dauber to add the Holiday Red to the back edges of the flower also. I colored the stem in using my blending pen and Topiary ink.

The rest of the card is pretty self explanatory. I'll list all the supplies I used at the end of this post.

My second card is for the Birthday Celebration Challenge. Here is the inspiration photo:


I was really inspired by the colors and the banners in the photo, and I just love how the card turned out. Can you tell what stamp I used for the banner? It's one of the Christmas trees from The Merry Best set. I have lots of fun papers, and could have die cut the banner pieces, but I love being able to get more bang for my buck with my Christmas stamps.


This was an easy card to put together. I knew I wanted to layer/overlap the banners, so I actually freehand stamped the two that are in the background. I used second generation stamping for this card to get a softer effect. The string that holds the banner together in those two background banners is drawn on using a blending pen.

For the banners in the foreground, I stamped more trees and pieced them. The row on the bottom was adhered directly to the card, and I used Lemondrop twine from the Twinery to string it together. I popped out the banner at the top using dimensional foam tape and also added some twine to that one. The sentiment is from the Elemental Workshop on the Go kit (kind of perfect for the occasion, right?) and was stamped in first generation.

Thanks for stopping by. Hope you like the cards and are having a great weekend!

Supplies Used

Sketch Card
Paper/Cardstock: Black, White Daisy, and Holiday Red Cardstock
Stamps: TCM - Grateful Flower free digi; CTMH - Say it in Style
Ink: Honey, Holiday Red, Topiary
Other: EK Success Black Zig Marker; CTMH - Sponge Daubers, Dimensional Foam Tape, Bonding Memories Adhesive; Tombow adhesive; The Twinery - Buttercream twine; Creative Memories - Custom Cutting System, Circles

Birthday Celebration Card:
Stamps: TCM - The Merry Best; CTMH - Elemental Workshop on the Go set
Ink: CTMH - Goldrush, Twilight, Sorbet
Other: CTMH - Blending Pen, Dimensional Foam Tape, Bonding Memories Adhesive; The Twinery - Lemondrop Twine