There's a new release at Simon Says Stamp, and I've got a few cards to share today using the new Scattered Stars stencil. This is one of those stencils that you're going to reach for over and over again. It's perfect for all sorts of occasions, and just the right size to add a little texture to any background.
As soon as I saw it, I knew I wanted to make some Christmas cards.
For this first card, I created a festive starry background by simply inking the stencil three times over a panel of kraft cardstock using three different ink colors: Altenew Evergreen and Ruby Red, and WPlus9 white pigment ink. Each time I inked, I rotated/shifted the stencil.
The card was finished off with red mat and a simple joy stamped/die cut sentiment from Concord and 9th's Joyful Tiles stamp set that was popped up with foam dots.
Next, I created an ombre look on a panel of kraft cardstock using a couple of Dylusions Ink Sprays, London Blue and After Midnight.
Once my panel was dry, I placed the stencil over top and applied Wendy Vecchi embossing paste and set the panel aside to dry.
When I came back, I realized that because the Ink Sprays are water reactive, the color seeped into the embossing paste (this wasn't readily apparent when I first applied it).
I love the look, but it wasn't reading Chirstmas to me, it was reading patriotic. I added a simple matted sentiment from Altenew's Land of the Free set. And that's how a Veteran's Day card ended up here in the middle of my Christmas cards.
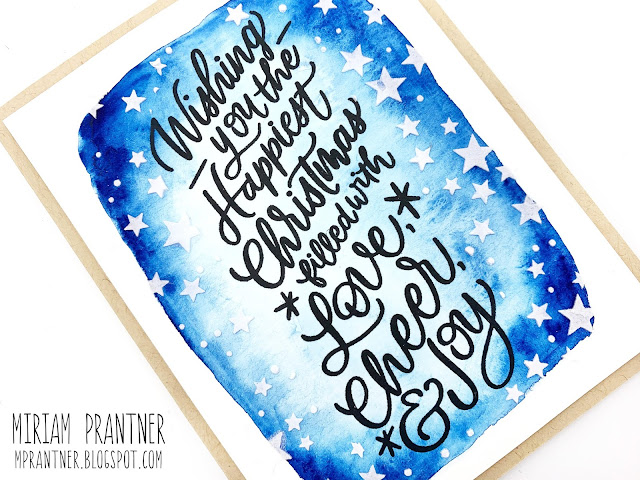
Last up, a super simple Christmas card.
I started by free hand watercoloring a rectangularish focal point. I used a lot of water on the area, added very saturated color to the edges, and let the panel air dry to get this look.
Then I stamped the sentiment, from Simon Says Stamp's Holiday Greetings Mix I set in Versafine.
Next, I cut a mask to cover up the sentiment, and very very carefully applied embossing paste to the stencil. I was being careful because I wanted to add stars all around the sentiment/panel, but I didn't want any too close to the edge of the panel.
I'm really happy with how this one turned out, and am thinking I'll create a few more of these before the season is over.
That's all for me today. Be sure to stop by and see the rest of the release over at Simon Says Stamp!


No comments:
Post a Comment