*This post contains affiliate links to Simon Says Stamp.
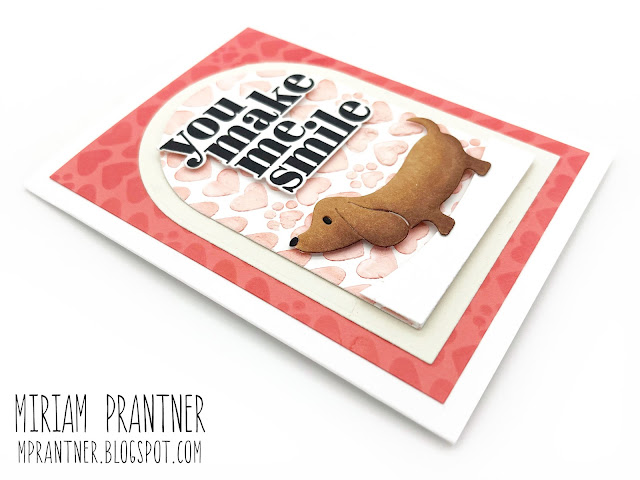
Hi all! For today's projects, I wanted to create some tags featuring the Puppy Love stencil from Simon Says Stamp's new Smitten release.
What started out as tags ended up becoming a couple sets of coordinating tags and cards where I was able to translate my tag design into card format.
I started by inking up my stencil using Paprika ink over red cardstock.
From my inked cardstock, I was able to cut two arched shapes from one of the dies in the Nested Domed Arches set. I added a bit of white paint splatter to these pieces for a bit of contrast.
Next, I die cut two additional dome shapes from soft gray cardstock using the next largest die from the set, and adhered my stenciled piece to it.
When I looked at my stencil, I noticed there was a lot of residual ink on it, and decided I should put that ink to good use. I placed the stencil over a piece of white cardstock, and spread white embossing paste through the stencil. When you do this, the white paste picks up the color of the ink from the stencil. It's not a super even blend, but I like the variation for this technique.
Once the paste had fully dried, just as with the red tags, I die cut two domed arches, adhering them to larger arches cut from soft gray cardstock.
I thought the Lil' Critters Dachsund die was perfect to go with my stenciled tags. These were die cut from white cardstock and then colored with Copics. I used E23, E25, and E27 for the dog itself and colored the nose and eye with black. The nose and eyes are separate pieces, so I used bits of washi tape on the back of the die to adhere them to my dog.
I also die cut a white 'ground' piece by die cutting the bottom of the smaller arched dome from white cardstock and then using one of the dies from the Layered Hills set to create the curved ground line.
Both the white ground piece and the dogs were popped up over the tags with foam tape.
For the actual tags, I used a sentiment from the All About You set, stamping it with Black Versa Claire on white cardstock and then die cutting it with the coordinating die. These were also popped up with foam tape.
I then punched a hole in the center of the tag and added some twine.
For the cards, I created a patterned paper mat by using the stencil to create a tone on tone background.
For the red version, I used white pigment ink on black cardstock.
For the pink version, I used Cherry ink on pink cardstock.
I also went with larger/bolder sentiments on the cards using the Thinking of You sentiment from the Big and Bold set, and the You Make Me Smile sentiment from the All About You set. As with the tags, these were die cut with the coordinating dies and popped up with foam tape.
These definitely took a bit of time to make as there were numerous steps involved, but by using like design, I was able to make a number of projects with not a lot more effort.
Hope that this gives you some ideas for creating similar pieces!


No comments:
Post a Comment