Showing posts with label Large Kaleidoscope Background. Show all posts

Thursday, November 10, 2022

SSS Holiday Sparkle

 *This post contains affiliate links to Simon Says Stamp


Happy Thursday!  The Holiday Sparkle release is now available at Simon Says Stamp, and it's definitely been helping me get my Christmas cards done!

I love the idea of mass producing cards, but I get bored making the same card repeatedly.  Today's cards are a solution to this boredom.  They follow a recipe, the same products are used in each, but they are all unique in their own way.

The focal point for these cards were created using the new Sweater Weather embossing folder/dies as well as another new product, Luxury cardstock.  This cardstock has a soft brushed feel that reminds me of fabric/leather.

I started by die cutting my Sweater Weatherr pieces from the soft brown/gray color.  There's a hat, a stocking, and two mittens.  There is also a die for the pom pom on the top of the hat, as well as the cuff of the stocking.  I cut those secondary pieces from the white Luxury cardstock as well as the bottom portions of both the mittens and hat because I wanted some contrast there.


Each of the pieces was then placed in the embossing folder and run through my die cutting machine.  For those bottom pieces, I just trimmed the piece down to create the 'cuffs' for the mittens and hat.

To really bring out the pattern of the embossing, I ran my white pigment ink pad across each of the pieces.  Don't they look so lifelike?

Because I knew I was going to pop these pieces up, and the Luxury cardstock is a little softer/less sturdy than normal cardstock, I also die cut pieces from cardstock to use as a base, and adhered the luxury cardstock pieces to those.

For my backgrounds, I stamped three different backgrounds onto red cardstock using Cherry ink, trimmed them down, and then added some white splatter.

For some extra pop, texture, and interest, I die cut the Harmony Snowflakes from white cardstock to use with each card.


The stocking card features the Dimensional Quilt background.  To ground my stocking, I cut the Large Rounded Tag die from a soft gray, added some twine, and adhered it directly to my background.

The snowflakes were adhered over top, and then the stocking as well as a sentiment from the Reverse Love Peace Joy sentiment strips were popped up with foam adhesive.


The hat card features the Large Kaledoscope background (currently unavailable).  The snowflakes were adhered directly to the background, and the hat and sentiment were popped up with foam adhesive.

This one looked a little stark, so I added a few clear sequins.


This final card features the Soft Plaid background.  This time I used two sets of snowflakes in the top left and bottom right corners, and also added a bit of twin connecting the mittens.

Just like with the other cards, the embossed pieces and sentiment were popped up with foam adhesive.


These were really fun to make!

You'll want to hop over to Simon to check out the whole release, which includes my latest Printmaking design, Printmaking Pines:


Be sure to swing back tomorrow as I'll be showing off this new set as part of Day 2 of the Holiday Sparkle blog hop.

See you then!

Thursday, September 16, 2021

More Large Kaleidoscope Background

*This post contains affiliate links to Simon Says Stamp

I felt like doing some coloring, so I pulled out my Large Kaleidoscope Background.

Backgrounds are a lot of fun to color, although it's often a lot of coloring.  What I love about this background is that it goes pretty quickly because the parts are on the larger side.  Also, because it's a grid, you know exactly where you can start/stop coloring which speeds up the process.

I used two different groups of colors:  B24, B26, B29, and B39 for the blues, and BG32, BG13, BG15, BG49 for the teals.

Just some basic shading.  These days I tend to shade going from dark to light.  

For my initial stamping, I used Gina K Black Amalgam ink.  

Once my coloring was done, I placed my piece back into the stamp platform and stamped again, this time with Versafine.  Then I clear embossed to really make the lines pop.

I cut out the section that I was using, and added a black mat as well as a sentiment from the Reverse Magical Wishes Sentiment Strips.

That's all for me today, thanks for visiting!

Wednesday, September 8, 2021

STAMPtember Large Kaleidoscope Background

*This post contains affiliate links to Simon Says Stamp

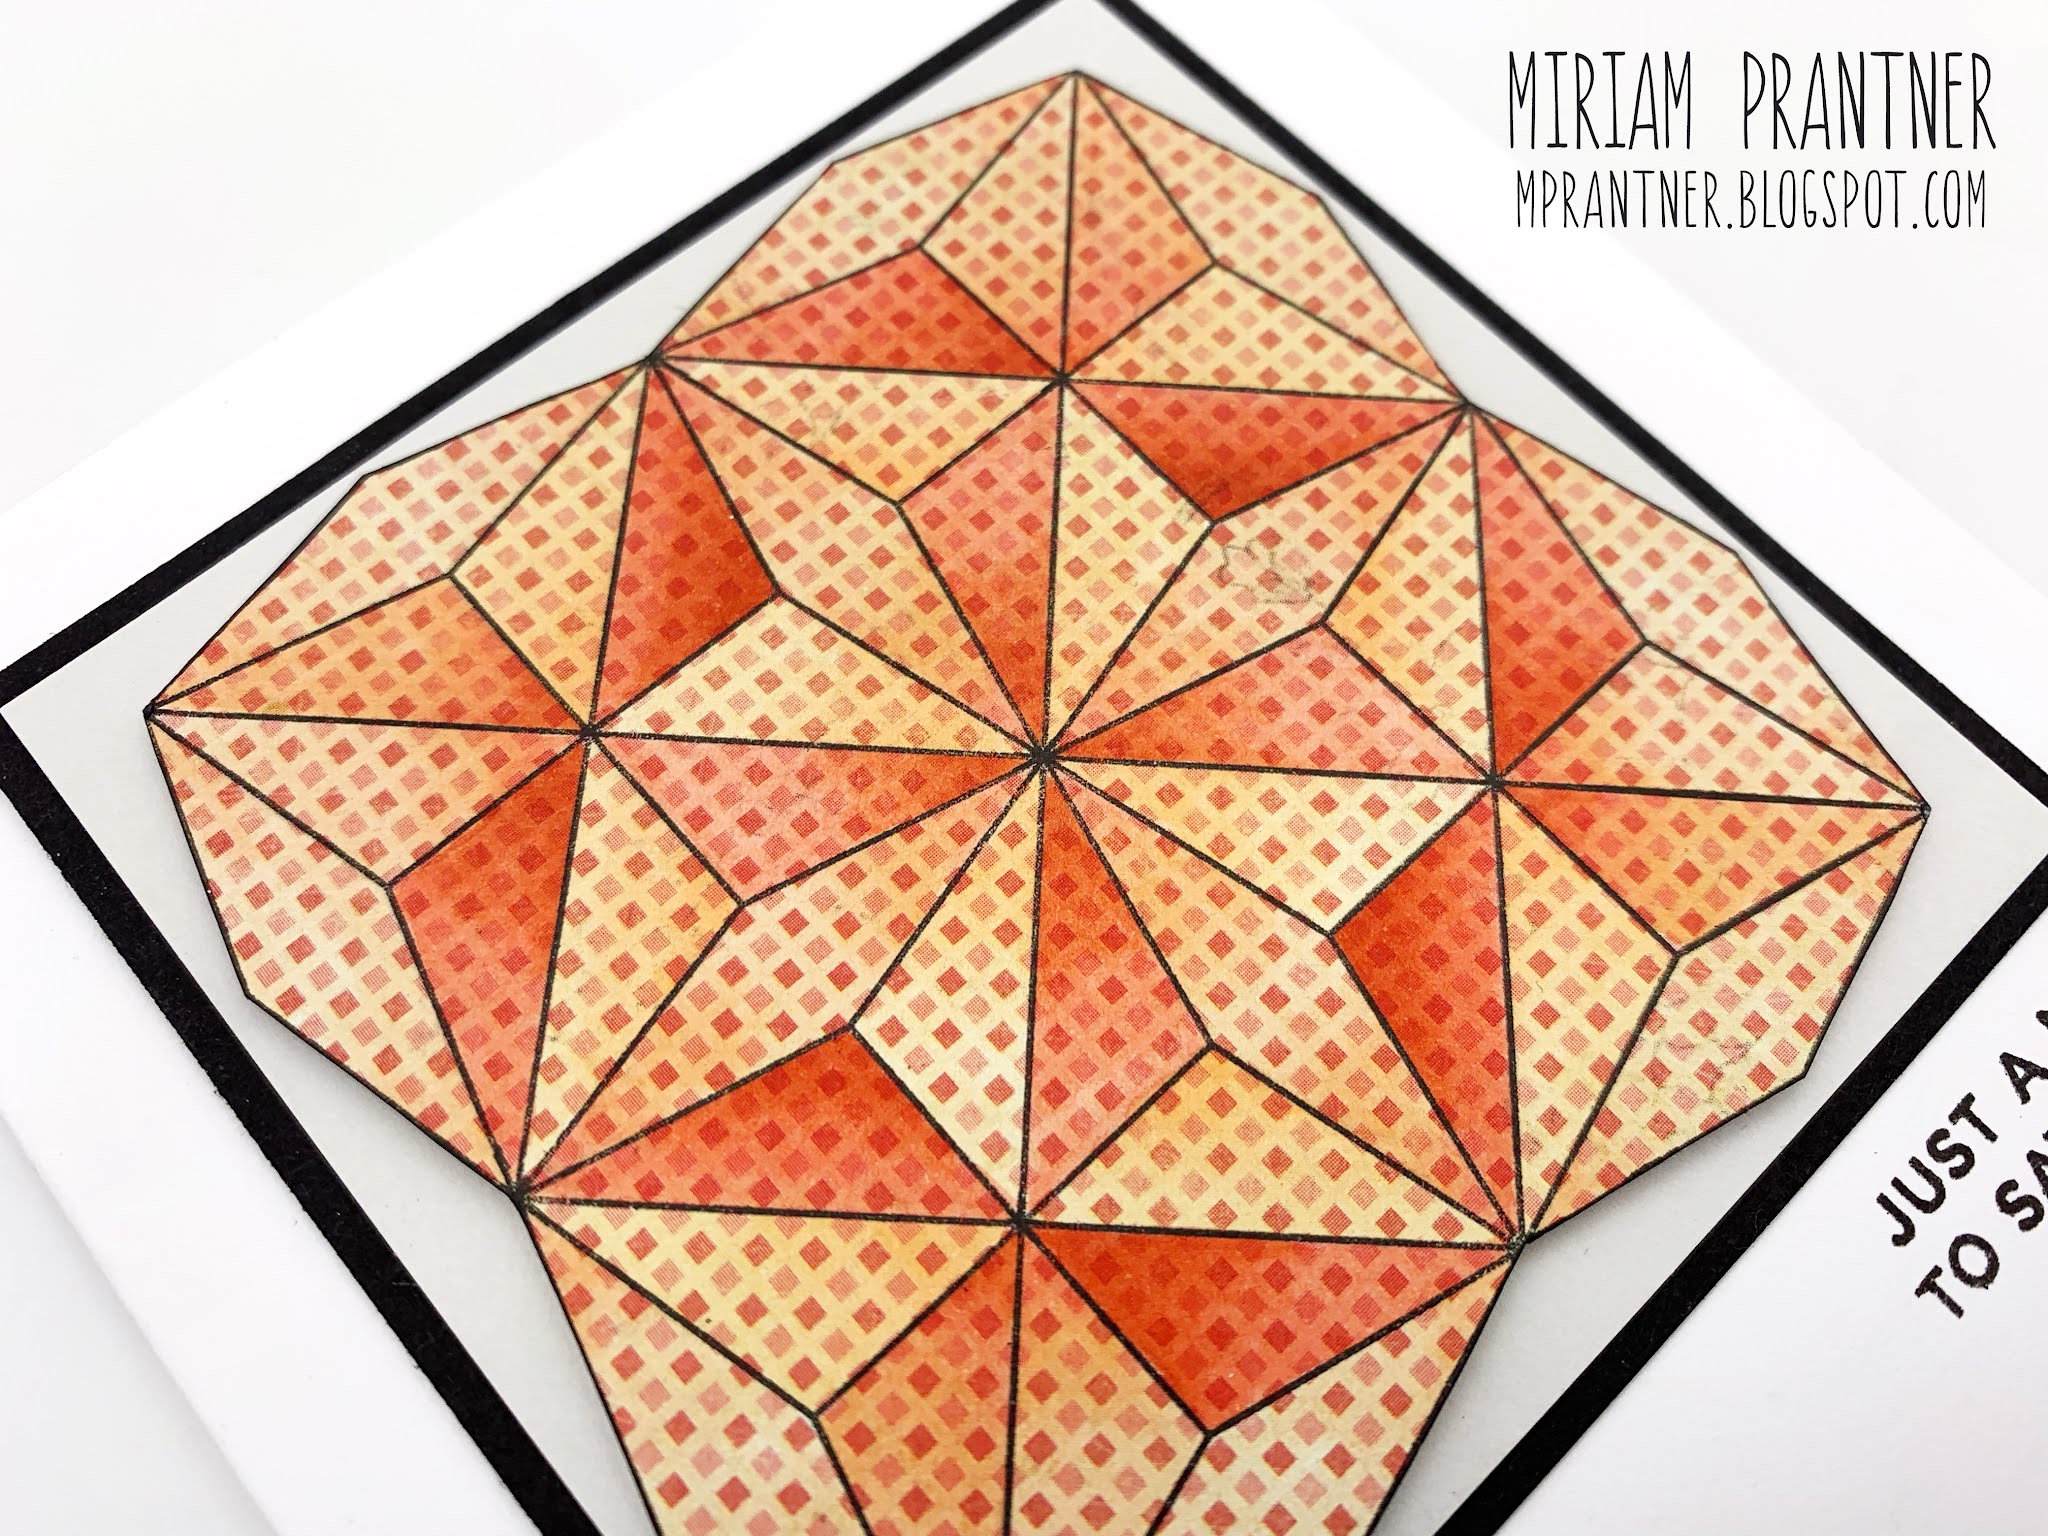
Today I'm sharing a couple cards created using the Large Kaleidoscope Background.  I thought it would be fun to use just part of the background and show off two very different looks.

For my first card, I wanted to color the background.


To add some more texture to the image, I stamped it on a piece of patterned paper, and cut out this squarish portion.  Then it was colored with a variety of peachy red shades:  E00, E01, E02, R00, R02, R05, R08, R22.  Nothing too dramatic, just some basic shading to add dimension to the image.


The finished piece was popped up over a couple of mats and I added a small sentiment from the Silhouette Sentiments set to finish it off.

Next up, piecing.


I went through my patterned paper stash, selected an older 6x6 pad, and picked out five different patterned papers from the pad.  When I am piecing something that requires a lot of different prints I'll often try and pull them from the same pad since some designer with better credentials than I have has already done the hard work of putting together coordinating prints.

The background was then stamped on each of those prints and I fussy cut the individual pieces to create this quilted look.  This can be quite time consuming, but also doesn't require a ton of thought once you know which pattern you're using for which particular pieces.  


A couple tips/tricks:  1) I try and cut on the 'inside' of the lines so that the pieces will fit together more easily, 2) I do go around the edge of each of the pieces with a black felt tip marker so that you don't see white peeking out in the lines of the design, and 3) after creating a large pieced panel like this, I will run it through my die cutting machine to make sure everything is adhered and nice and flat.

For this card I didn't want to cover up that quilted piece at all, so I popped it up over a couple of panels of patterned paper and then added a sentiment to the inside of my card.

OK, I have some giveaway winners to announce!

The winner of the Printmaking bundle from IG is: @mistioblander 

The winner of the Background bundle from IG is: @madebymeghank 

The winner of the Waves and Raindrops bundle from IG is:  @claires_card_on 

The winner of the Coffee bundle from the blog is: Karen Day

And my international winner from IG is: @not_magda

If you see your name here, congratulations!  Please shoot me an email at mprantner dot gmail dot com with your mailing address and I'll get this sent out.

And if you didn't win, don't worry, I have more designs in the queue at Simon so there will be more giveaways coming!  I'll be back with more STAMPtember inspiration tomorrow!