Showing posts with label Technique Tuesday. Show all posts

Friday, July 24, 2020

Technique Tuesday Christmas in July - Joyous Juniper


Hi friends!  Technique Tuesday has a Christmas in July sale going on right now.  You can 25% off everything in this Christmas category through Sunday with the code CHRISTMAS.

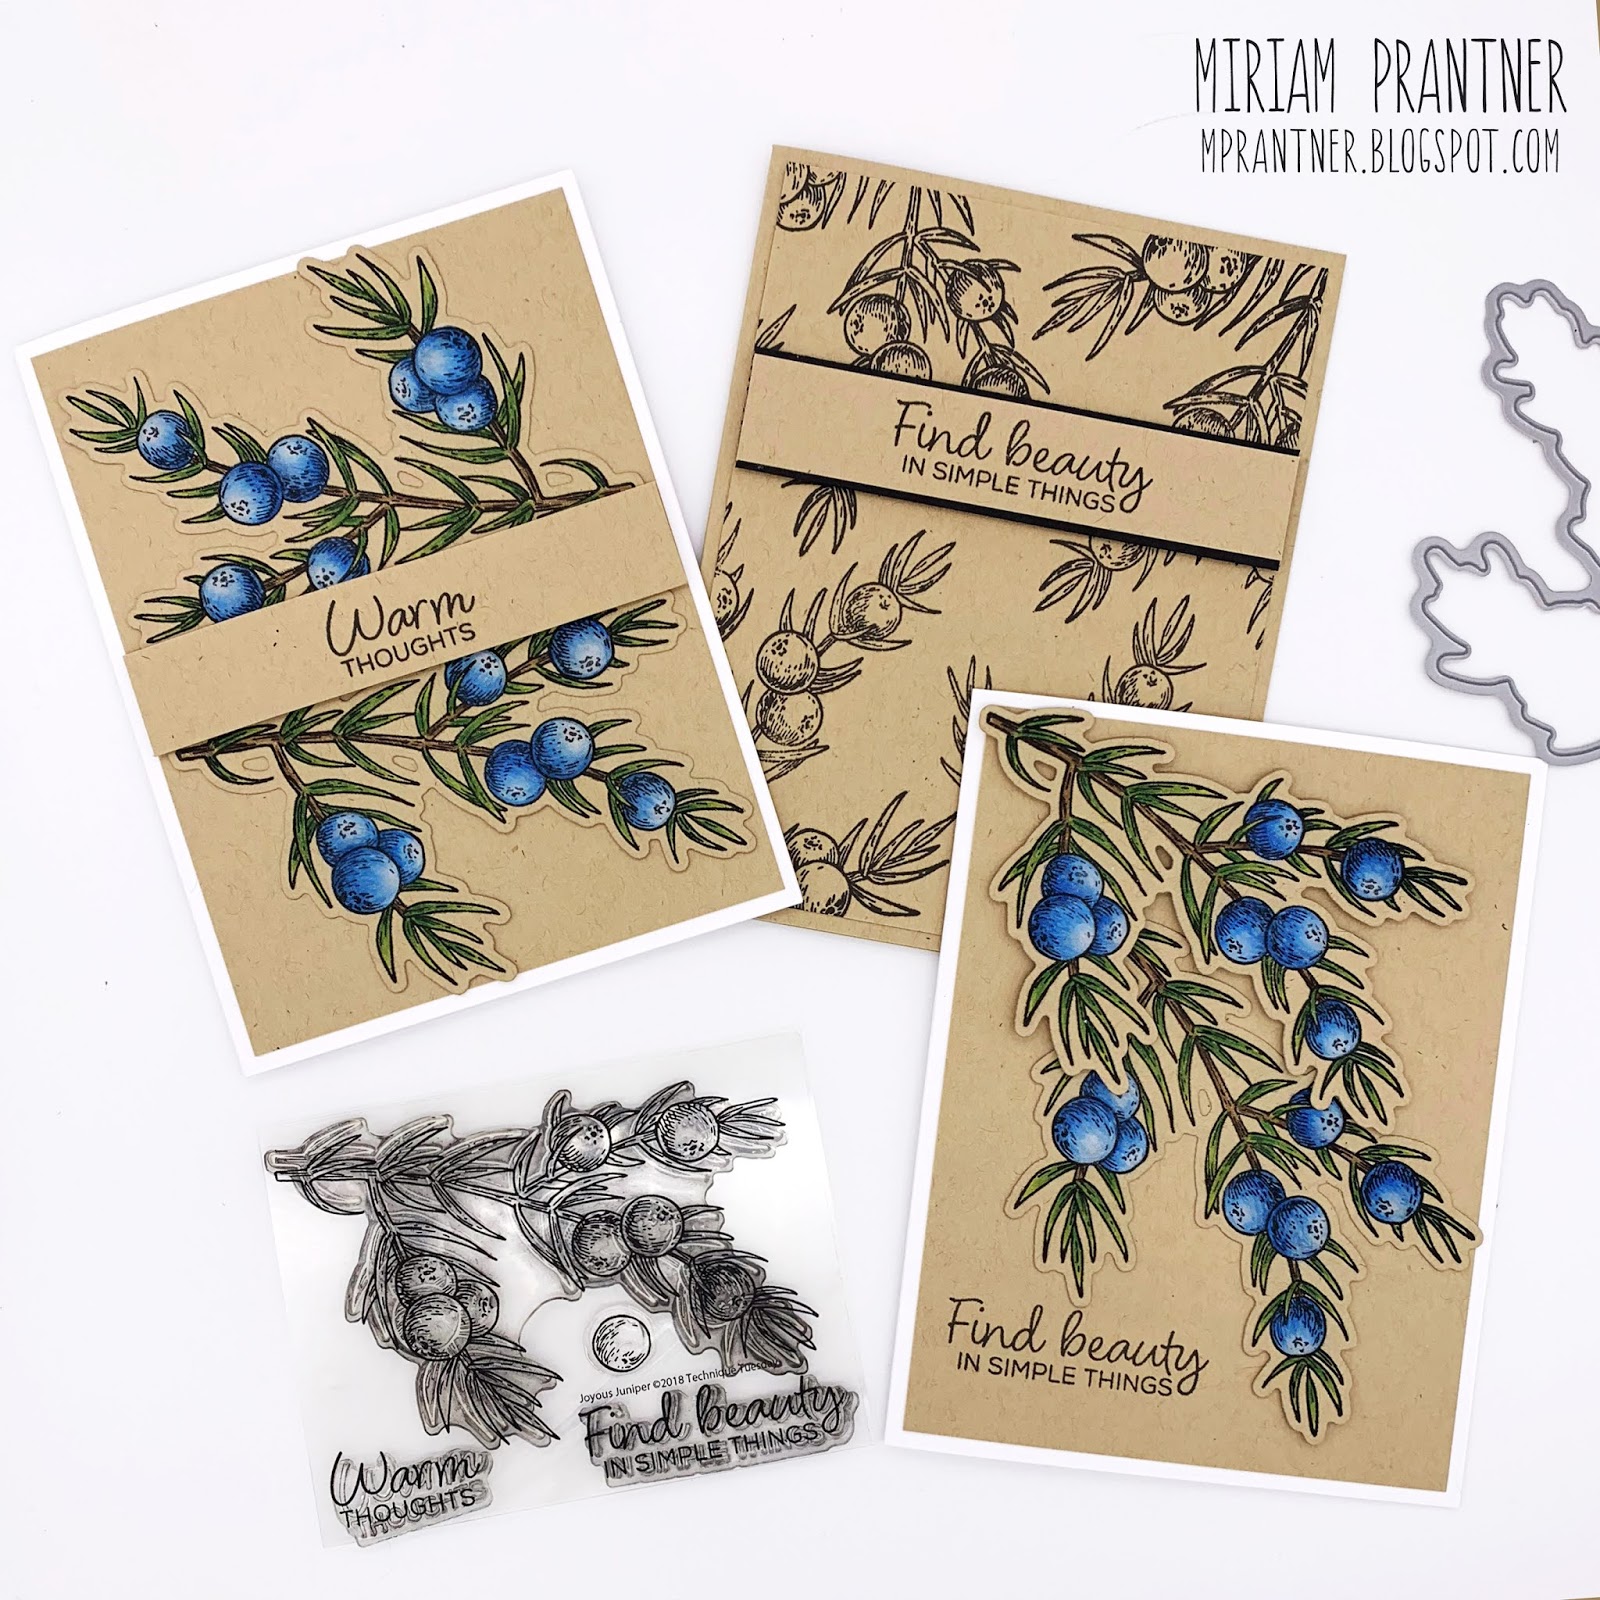
Today I'm showing off some cards created with the Joyous Juniper stamps/dies.  When I saw this set, I thought the image would be perfect to create some kraft cards.  I love the look of coloring on kraft, so I immediately thought of using colored pencils.


I started by stamping the image four times on kraft cardstock using Versafine.  I used my MISTI and simply rotated my cardstock to get the four stampings.  Because of the shape/orientation, I actually had to flip my cardstock piece over and stamp on both sides of it, but it worked just fine.

Then I proceeded to color the images.  I used four different shades of blue (my colored pencils are Prismacolor Premier).  The lightest shade was very light, close to white, which created a great foundation for the berries, making the coloring very bright and luminous.

For the leaves and stems, I used three shades each of green and brown.


Once the coloring was done, I put my cardstock piece back in the MISTI (I had left the stamp in place), stamped again with Versafine and then embossed with Ranger Frosted Crystal embossing powder.

I then die cut each of the images, and used them to create two cards.


The sentiments for each of these cards are from the Joyous Juniper set.


I also wanted to create a card with just stamping, so I cut another panel of kraft cardstock and created a randomly stamped pattern with the juniper image.


A simple sentiment strip and black mat finished things off.  This was so quick and easy!


Be sure to head over to Technique Tuesday to check out the Christmas category and take advantage of the 25% off sale (use code CHRISTMAS)!

And Merry Christmas in July!

Sunday, February 16, 2020

Technique Tuesday Friendly February


Hey everyone!

I'm here today helping Technique Tuesday celebrate Friendly February.  From now through February 20th, you can get 25% off all items in the Friendship & Inspiration category in the Technique Tuesday store using code TTFriend.  AND, as a bonus, any orders over $25 ship free in the U.S.

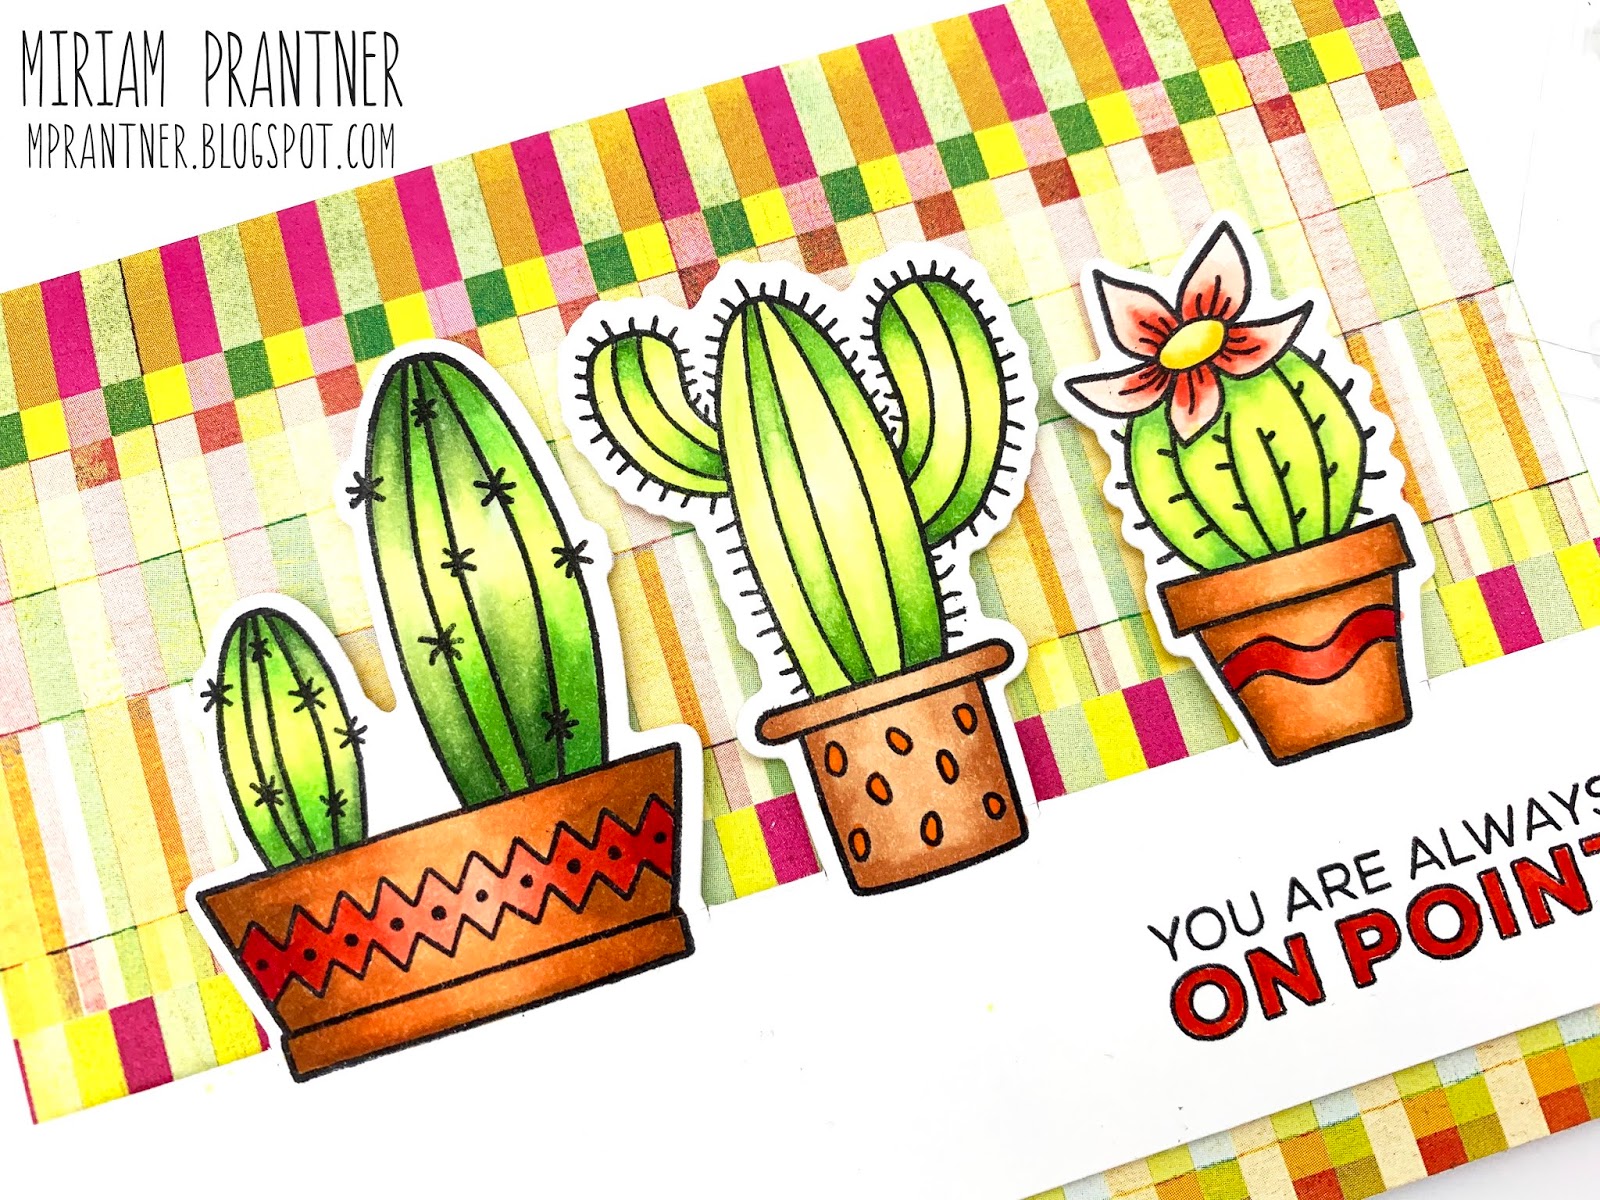
I'm sharing a couple cards created using the A Little Prickly Stamp Set and Dies.

These are basically the same card/layout, but created using very different techniques.

For my first card, I wanted to go back to a technique that I used to do a lot, and haven't in a while - paper piecing.


I placed my stamps in my MISTI, and then stamped a whole bunch of times using a bunch of different patterned papers - mostly greens for the cacti, but also that yellow for the base, and some other colors for the planters/flower.  This is a perfect technique for using up your patterned paper scraps.

Once the stamping was done, I fussy cut the different elements.  The emphasis was on the fussy as some of the pieces were very thin, but I think it's well worth the effort.

Once the pieces were cut, I went around the edges with a black foam tipped marker so that I couldn't seen any of the white core of the patterned paper.  This is definitely not required, but I think it gives the images a more polished/finished look.


Then it was a matter or adhering the pieces to my base patterned piece.  I used a Quickie Glue Pen for this step.

Originally I was going to just adhere that second piece of background paper for the ground line directly under the pots, but then I realized that because there was a bit of a curve to the bottom of the pots, it would look funny.  Instead, I trimmed that piece down so that it fell slightly above the bottom of the pot, stamped it with my MISTI (the cactic were all still in place), fussy cut the bottoms of the pots, and then adhered it to my background piece.

The sentiment was stamped directly onto that bottom piece, and I colored in the larger letters with a Copic marker.


For my second, card, I stamped a white panel of Neenah cardstock with my images (remember, they were all still in my MISTI).

Then I used the coordinating dies to partially die cut them, so just the bottoms were still attached, and used my paper trimmer to cut off the excess part of the panel.


I stamped the sentiment, and then the images and large letters were colored with Copics.

I normally don't use super bright/loud prints, but I thought that this print from an old BasicGrey collection was perfect for the images since the white in the panel provides a place for your eye to rest.

That's all for me today.  Would love to know which version of these is your favorite.

Be sure to stop by the Technique Tuesday blog to check out what the other designers created as well as peruse the Friendship & Inspiration section to see what's on sale.

Tuesday, October 22, 2019

Technique Tuesday Season of Thanks Sale


Hi all!  I'm sharing a couple cards today created with the Rhododendron Flower stamp set from Technique Tuesday.  This is one of a number of stamps and dies included in the Season of Thanks sale going on now through Thursday October 24th.  All thankful, grateful, and Thanksgiving themed stamps and dies are 20% off using code Thanks19, which means you can pick this set up for $7.99!

I really love the detailed stippling in the image, so wanted to keep things very simple.  For this first card, I stamped the image on a piece of white cardstock using GinaK Black Amalgam ink, and added some very light coloring with Copics.  The sentiment was also stamped with black Amalgam ink.

To finish things off, I just added a bit of white twine, and popped the panel up over a kraft card base.


For this second card, I just wanted to show how lovely this image is all on it's own.


The image was stamped in the corners of a subtle yellow patterned paper panel, and then one of the sentiments from the set was stamped in the center of the panel.


This was literally a five minute card!  You could definitely mass produce this one too, mixing my the colors of the patterned paper or sentiments to create a card set.

Be sure to stop by Technique Tuesday to check out the sale!

Saturday, June 22, 2019

WOW! Embossing Powder & Technique Tuesday Blog Hop and Giveaway


Hi friends!  I'm excited to be participating in a hop with Technique Tuesday and WOW! Embossing Powder.  It's a two day hop and today is Day 1.  The folks at WOW and Technique Tuesday sent me some great goodies to play with, perfect for the upcoming July 4th holiday, but first, some housekeeping...

PRIZES - No Blog hop is complete without a prize!

WOW! Embossing Powders has 6 powders of your choosing along with a WOW carry case to store your powders safely in.

Technique Tuesday is giving away 2 x $20 gift certificate to their store

The Winners will be chosen at random from the comments left on ALL THE POSTS on both days. We encourage you to leave comments on both days the more comments you leave the more chances you have to win these fabulous prizes.

To join this GIVEAWAY you must leave a comment on each blog post to have a chance at getting your hands on the prize. This hop is open internationally.

Here's the full list of participants today:
Technique Tuesday
Angelica Conrad
Verity Biddlecombe
Zsoka Marko
Jo Herbert
Ana Anderson
Raluca Vezeteu
Danielle Lounds
Jenny Colacicco
Elise Constable
Bev Grey
Karen Rwategui
Norine Borys
Miriam Prantner <--YOU ARE HERE
WOW! Embossing Powder <--YOUR NEXT STOP IS HERE

For this first card, I used the Stars on the Border craft die to cut two fancy borders for my white panel.  I stamped and embossed the sentiment from the Spectacular Memories set using Red Glitz powder.  


Then I die cut the border two more times from pieces of cardstock that I had embossed using Red Glitz and Pacific Wave embossing powders.

I cut a panel of dark blue cardstock, and after adding a bit of tone on tone stamping at the top and bottom borders using Versamark and the star border from the Spectacular Memories stamp set, popped my white die cut panel up using foam tape.  

I then randomly added my die cut embossed stars using foam tape.  I also added a few stars onto the white panel itself as well as on the dark blue background.  


For a bit of extra interest and texture, I stamped the card base with some of the fireworks images using Versamark before I adhered the blue panel.  Aren't those sparkly stars gorgeous?!

For my next card, I started by stamping and embossing the sentiment with Metallic Gold Rich embossing powder.  Then I used the different fireworks images around the sentiment, embossing them with Red Glitz, Pacific Wave, and Gold Metallic Sparkle.  These embossing powders have so much brightness and sparkle to them!

Then I used Chipped Sapphire Distress Ink to ink the background of my panel, lighter towards the center and darker around the edges.  It really makes those embossing powders pop don't you think?


You can get another glimpse of the sparkle and shine in this close up.


OK, you're almost done, your next stop is the last one:  WOW! Embossing Powder

AND, I have a special giveaway.  If you'd like to win the Technique Tuesday products I used on my cards (the Spectacular Memories stamp set and Stars on the Border craft die), head over to my instagram (@mprantner) and follow the directions there.  Good luck and happy hopping!

Sunday, November 4, 2018

Technique Tuesday Perfect Poinsettia - Progressive Sale


Hey everyone!  I'm continuing to plug away at my Christmas cards, so I was quite pleased when Technique Tuesday sent me their latest Greenhouse Society stamp set (just released on Thursday), Perfect Poinsettia.

It's a really lovely image that has a vintage feel to it, so for my first card, I wanted to create some vintage looking patterned paper.

I stamped the image on watercolor paper using Versafine, and then painted it with my Kuretake Gansai watercolors.  The background/negative spaces were painted a very light tan and then followed up with a light layer of gold.  For the flowers/leaves, I dulled the colors a bit with a soft brown wash as well.  I also went back in and added a bit of brown to the shaded places - where there are dashed lines/hatching on the flower.


The panel was machine stitched to my card base and then I added a thin strip of green paper and a sentiment also from the Poinsettia set which was embossed in white on kraft.

For my second card, I wanted to color the flower with Copics to get a more vibrant effect.


Once that was done, the image was die cut, and then set aside.  I picked out some older patterned papers from BasicGrey.  I really loved the papers together, but I thought the flower wasn't popping enough, so I added a bit of painting with white gesso.

Once that was dry, I adhered the papers together and then to the card base with some more machine stitching.


The flower was popped up with some foam tape and I added a few white and clear sequins.

The sentiment is included with the Perfectly Poinsettia die, and was cut three times from kraft cardstock.

I also wanted to let you know about that today is the first day of Technique Tuesday's annual Progressive Sale on retiring stamps and dies.  Here are the details:

· Nov 4 - Nov 10: Use coupon code SafeBet18 to take 40% off the prices on all products listed on these "Progressive Sale" pages
· Nov 11 - 17: Discount increases to 50% off with coupon code GoodLuck18.
· Nov 18 - 26: Use coupon code LongShot18 to get an astounding 60% off.


Things to remember:

· Inventory is limited. If you wait, you may get a bigger discount or the products you want may be sold out!
· To receive the discount enter the coupon code at checkout. No refunds can be issued if it is missing.
· Due to the large number of orders and holidays during this sale, please allow for some extra shipping time.

Thursday, September 13, 2018

Three Cards with Technique Tuesday's Lovely Lavender Set


My mom's favorite color is purple, and she really loves lavender, so I was really happy to see Technique Tuesday's latest Greenhouse Society set, Lovely Lavender.  The set has an image of a bundle of lavender and also several really great sentiments.

My first two cards use a watercolor 'cheat' technique.

Stamping with my MISTI, I colored the image with several shades of distress markers in the purple family (Shaded Lilac, Seedless Preserves, Dusty Concord, and Picked Raspberry). Then I 'watercolored' by wetting the stamped image with a waterbrush and kind of spreading/mixing the color.

The same thing was done to the stems using a couple of greens (Cracked Pistachio and Forest Moss).

The waterbrush actually provided me with a little less control than I anticipated, I had a hard time controlling the amount of water and so it ended up being a little more blobby than I wanted (very technical term). 


To add some of that definition back in, I repeated the process - coloring the image with markers and stamping it until I was happy with the result.

Then I stamped the sentiment with Versafine, and added a couple mats and stitching to complete the look.

I wanted to see if I could get a better result using just a regular paint brush, so I repeated the process on a second panel using a paint brush instead of a waterbrush.


It was a little bit better, but not a ton.  I thought for this one I would change things up and instead of stamping over top with the distress markers again, I used Versafine.


This time I opted for some slightly offset mats to finish things off.

For my last card, I decided to color outside the lines.  Literally.


The image was randomly stamped on a panel, and then I colored around it using my B99 Copic marker.  This was a little tricky as there are some very tight spaces in the image, but I only sliped a couple times and a strategically placed sentiment covers the worst of it.


I love this look - it reminds me of fabric, and I wanted the pattern to be the star, so I kept the sentiment simple adding just a thin strip of cardstock to ground it.

That's all for me today.  Would love to know which of the three you like best!

Tuesday, June 26, 2018

Technique Tuesday Strawberries and Giveaway


Hi friends!  Today I've got a card featuring the latest Greenhouse Society stamp set from Technique Tuesday. I just love strawberries, I have had them for breakfast everyday the last few weeks with my yogurt and granola.  

I started by stamping and coloring the image with Copics and then die cut it.

I love the fresh, summery image, and selected a couple of patterned papers that bring out the colors in the image as mats.  I also added machine stitching to give it a more homespun feel.


The thanks sentiment actually comes wired inside the coordinating die and was the perfect size/font to add to the card.  I cut it twice from dark gray cardstock and then layered the white over the top.  I think those dark layers help it to stand out a bit more.

I have a giveaway too!  The very generous folks at Technique Tuesday will send a stamp set and coordinating die set of their choice to one of my lucky blog readers.

To be entered, be a follower and leave a comment letting me know which stamp/die set from you would select.  You can see their full range here.

I'll announce a winner next week!

Tuesday, April 24, 2018

Technique Tuesday Iris - Card Within a Card


Hi all!  I'm popping in to share a card featuring a new April release from Technique Tuesday.  This is the April Greenhouse Society Iris stamp set.


If you're not familiar with the Greenhouse Society it's a series of stamps that comes out monthly featuring florals.  You can purchase these individually, or become a member and save 15% each month.

Anyway, this month's flower is the iris.  I recently picked up some new Copics, including several greens, and I wanted to try them out, so I opted for no-line Copic coloring the iris.  Of course I realized halfway through that my purples are very limited, so the flower was a little more challenging, but I think it turned out OK.


I colored the iris on a panel of white cardstock, and decided it would be fun to die cut the flower from the front of my card base so you could see through to the flower.


Because I then realized that this didn't leave much room for writing a message, I decided to create a card within a card, mounting the colored panel onto a small, top fold card from green cardstock.


The sentiment is from my So Many Sentiment set for Neat & Tangled.  I wanted to keep things pretty clean and simple and not cover up too much of the flower, and thought the thin black strip would work well.

That's all for me today!  Thanks for visiting!

*Affiliate Links Below