Showing posts with label Scalloped Dies. Show all posts

Tuesday, August 17, 2021

Found items and a Mish Mash of Companies


Hi all!  We're freshly back from vacation and I'm simultaneously digging out from being gone, and gearing up for school to start for the girls.  One of the benefits of my recent craft room cleanout/purge was that I found a bunch of items that I had previously stamped/colored/die cut, but hadn't used for one reason or another.  I decided I needed to put those items to use.  The first little guy to get used is this sweet squirrel that Elena Roussakis illustrated for Neat & Tangled a while back.

I decided to pair him with the retired Charmed set from Mama Elephant, they go together perfectly since Elena illustrated both.  It was around this time that I decided I would go ahead and create two cards using the same basic formula, so I stamped/colored/die cut two sets of the wreath, banner, and bow.


I knew I had used Warm Grays to color my squirrel, so I used more muted colors for the elements on this card.  The wreath was colored with G20, G21, G24, and G46, the little flowers in the wreath and bow were colored with R20, R22, and R24, and I used W0, W1, and W3 to add some shading to the banner.

I picked a simple pink print for the background and a frame using a couple of my go to dies, the large scalloped frame from the Neat & Tangled Scalloped die set, and a frame die from MFT with a great hash detail.

The sentiment for the banner was also from the Charmed set.


The wreath was adhered directly to my patterned paper, but everything else was popped up with foam tape, including the frame.  

For the second card, I decided to create a Christmas version since I need to keep building my Christmas card stash.


For my 'main character,' I picked this sweet little penguin from Neat & Tangled's Santa's Wonderland set.  He was colored with Cool Grays, and I used those to add accents to the banner also.  I went with some deeper/richer colors for the wreath and bow using G21, G24, G28, and G29 for the wreath and R32, R35, R37, and R39 for the reds. 

The card was assembled in the same way, but I used a red print for the background and kraft for the frame.  The sentiment is from Hello Bluebird.


It was fun to use some items from my stash and also get the Copics out.  I feel like I haven't done a ton of coloring lately, and I do enjoy it!  

Thanks for visiting!  I'm busy working on STAMPtember samples!  If you follow me on Instsagram you might have seen that I have started illustrating again and I have several new designs that will be available from Simon Says Stamp as part of the STAMPtember release.  I'm thrilled and so happy to be illsutrating again!

Thursday, November 19, 2020

More Oldies but Goodies

As promised, I've got a couple more Oldies but Goodies Christmas cards to share today.  This time I'm mixing and matching products from a bunch of different companies, but I've again stuck with the same basic formula for each of the cards.

I started by stamping my images on Neenah Solar White cardstock and coloring them with Copics.  Then I fussy cut around the top of the images, but left the bottom of the stamped image attached to the panel, kind of like faux partial die cutting.  Once that was done, I was ready to put together cards.

This first card features the Walter image from Purple Onion Designs.  He was colored with Cool Grays, and I used my trusty red combination (R22, R24, R29, and R39).  

I cut an arched frame from a piece of patterned paper using an MFT STAX die for the front of the card, and stamped/embossed some snowflakes on a panel of light blue cardstock using a stamp from Ellen Hutson's Abstract Paint Strokes stamp set.

The sentiment, from Neat & Tangled's Scandinavian Prints Christmas set was embossed on a banner from the Scalloped dies set.
The snowflake piece was adhered directly to my card base as was the little penguin, and the patterned paper frame and sentiment strip were popped up with foam tape.
The second card follows the same formula, but this one features an owl, Flora, also from Purple Onion Designs.  The owl was colored with Warm Grays and I used B32, B34, and B37 for the scarf, and E70, E74, E77, and E79 for the tree stump.

The snowflake were embossed on a piece of grout gray cardstock and instead of using patterned paper, I stamped a panel of kraft cardstock with The Stamp Market's Jumbo Plaid background using white pigment ink.
The sentiment for this one is from Neat & Tangled's Nativity Play set, and I used another of the banners from the Scalloped die set for it.

I still need a few more cards for the season, but I'm getting close to being done.  Still have lots of goodies in that stack of Christmas products that I pulled to work with and am looking forward to getting some more stamping done this weekend!

Wednesday, November 18, 2020

Oldies but Goodies, WPlus9 Holiday Hugs

Happy Wednesday!  Today I've got a couple cards featuring WPlus9's Holiday Hugs set.  This is one of my favorite WPlus9 images, and it's pretty easy to color.

These cards are basically the same design, but to keep things interesting, I switched up the color schemes  between them.

For my first card, I colored the bear with warm grays (W0, W1, W3), and the scarf/girl's outfit with R22, R24, R29, and R39.  I used E000, E53, and BV00 for the skin tone, and C5, C7, and C9 for her hair, and then die cut my image.

Embossing paste was spread through Simon Says Stamp's Falling Snow stencil on a piece of Cement Gray cardstock, and set aside to dry.

Meanwhile, I freehand cut a snowdrift, and stamped the sentiment on it.  

The dry stenciled piece and snowdrift were cut down to fit within a scalloped die cut panel, and adhered to the card base, and the colored image was popped up with foam tape.

For the second card, I went with cooler colors.  Instead of fully coloring the bear, I just added a thin line of color (N1) next to each of the stamped lines.  I used the same series of reds to color the bear's scarf, but the little girl's outfit was colored with B00, B12, B14, B06, and B18.  The skind was colored with E00, E21, and E95 and the hair with E13, E15, and E18.

The rest of the card was put together in the same manner as the first, but this time I used a light blue for the sky piece and a white scalloped panel.

The sentiment is from Neat & Tangled's Scandinavian Prints Christmas set.

That's all for today, but I have one more Oldies but Goodies post to share this week, see you tomorrow!

Thursday, November 12, 2020

Mama Elephant Whimsical Winter


This Whimsical Winter set from Mama Elephant is another one I pulled out the other day.  I really love the animals and the great pine tree in this set.  I created a bunch of cards last year using this set where I watercolored the images, but this time I thought I would pull out my Copics.  

The images were stamped with black Gina K Amalgam ink.  I used my MISTI to stamp them all at once, and then colored them while catching up on my DVR.  Then I created two groupings and set out to make them into cards using the same basic formula.  


This first card features a print from Lawn Fawn's Knit Picky 6x6 pad.  I also freehand cut snowdrifts into a scrap of white cardstock which I used for the bottom of the panel.  The images were adhered to the panel and then the entire panel was adhered to a scalloped die cut piece (from my retired Scalloped dies set).  


I finished things off with an embossed sentiment from Neat & Tangled's retired Nativity Play set.


The second card uses the same basic formula, except this time I used a journaling card for my patterned paper background.  I thought this journaling card was just perfect because that middle star becomes the tree topper.  I again cut a little snowdrift piece for the bottom of the card, this allowed me to essentially extend the card just a smidge so it fit in my scalloped piece better.  

The sentiment, from Hello Bluebird's Typed Christmas set was stamped directly on my snowdrift piece.


I added a simple green mat to set the panel off, and adhered it to another scalloped die cut mat.

Two more cards for my stack, and I've been coloring other cute images to put on Christmas cards which I can hopefully share with you next week!

Tuesday, September 15, 2020

Concord and 9th Pretty Poppies


Hi friends!  It's starting to feel a little cooler here, so I pulled out some fall colors to create today's card.


I'm using the Pretty Poppy dies from Concord and 9th.  I love the dimension you get from these!


There are two different sizes of petals and you cut two of each for each flower, plus the center, so five layers of cardstock.  I used a glue dot in the center of the die cut to adhere each of the parts of the flower, so there's plenty of movement and play with them.  I created three flowers, one each using PTI Pure Poppy, MFT Electric Red, and PTI Terracotta Tile.


The set also has three leaf dies which were cut using two different shades of green cardstock:  PTI New Leaf and Green Parakeet cardstock.


I wanted something a little softer and more feminine for a mat, so I used the largest frame from the Scalloped dies I designed for Neat & Tangled, and finished things off with a sentiment from Janes Doodles' You Got This stamp set.


These dies are so quick and easy to use.  I'm thinking I need to cut some from felt next!

Wednesday, June 3, 2020

The Greetery Harvest Home


I took advantage of the recent birthday sale at The Greetery, so while I wait for my new goodies to arrive, I thought I would pull out the Harvest Home set I purchased from them a while back, but shamefully hadn't had a chance to use yet.

I started by stamping the two leaf halves using Altenew Bamboo and Olive ink.  Then I realized that the leaf half dies were solid.  No biggie, I die cut the halves from a piece of white scrap cardstock, and then used those to line up the dies over the stamped leaves.

Since I had two white leaf halves from the masks I created, I figured I would go ahead and use those to make a second card.  I used a blending brush and Forest Glades ink to add color to the leaves, and then used two Copics (YG63, and YG67) to color the the accent strips on the leaves.

Then I stamped and die cut the house and barn using Ruby Red and Grapevine ink.  On the house, I used Pure Graphite for the roof, and on the barn, I wanted a lighter color since the roof would be in direct sunlight, so I used second generation Dark Chocolate ink stamping.  I also added a bit of shading with Copics to the roof.


Then it was time to assemble the cards.  For this first one, I used the stamped leaf halves and adhered them to the whole leaf that's included in the die set.  I added a couple of stamped fences on the top half of the leaf, and then tucked the barn behind the bottom leaf.  I added a bit of twine to the leaf stem, and then popped the entire leaf up over some patterned paper that was matted with a Scalloped panel from Neat & Tangled.


The sentiment is from Neat & Tangled's So Many Sentiments set and was stamped on one of Neat & Tangled's skinny strips and the popped up over the leaf.

For this next card, I adhered the leaf directly to a piece of very neutral patterned paper.


Just like the last card, I added the fences and then tucked the house in.  The sentiment is from Papertrey's Choose Joy stamp set.  I added a blue patterned paper mat to finish things off.


I just think this leaf design is so clever and I'm looking forward to using it some more, especially for fall cards!

*Affiliate Links below 

Tuesday, April 21, 2020

Paper Smooches Get Well Soon


I took advantage of the AMAZING birthday sale Kim at Paper Smooches had earlier this month.  One of the sets I picked up was this Well Wishes set.  I love this big sentiment which is perfect for coloring.  I ended up creating essentially the same card, but using two different coloring media - markers and pencils.

First up, Copic markers:


The sentiment was stamped with GinaK Black Amalgam Ink.  I used three different shades of color for each of the letters.  It's hard to see in the photos, but to finish things off, I went around each of the letters with a very light gray (C0). 


Next up colored pencils on kraft.

For this card, I stamped the image with Versafine on kraft cardstock, and then colored the letters in with Prismacolor pencils, using three shades of color for each letter, just like with the Copics.  


Once I was done coloring, I placed my panel back in the MISTI, where I had left the image in place, and stamped again with Versafine.  This covers up any areas where I might have strayed a bit with my pencils and sharpens everything up.  You can stop there, but I then embossed with Ranger Frosted Crystal Antiquities embossing powder.  It gives the image a matte, but slightly raised texture.

The panel was trimmed down and layered on a white scalloped mat created using Neat & Tangled's Scalloped dies.  

I really love the size of this sentiment/image and that it is kind of a one and done image.  It is super cute and easy to color.  Would love to know which version is your favorite.

Monday, February 4, 2019

Neat & Tangled February Release & Giveaways - Day 1


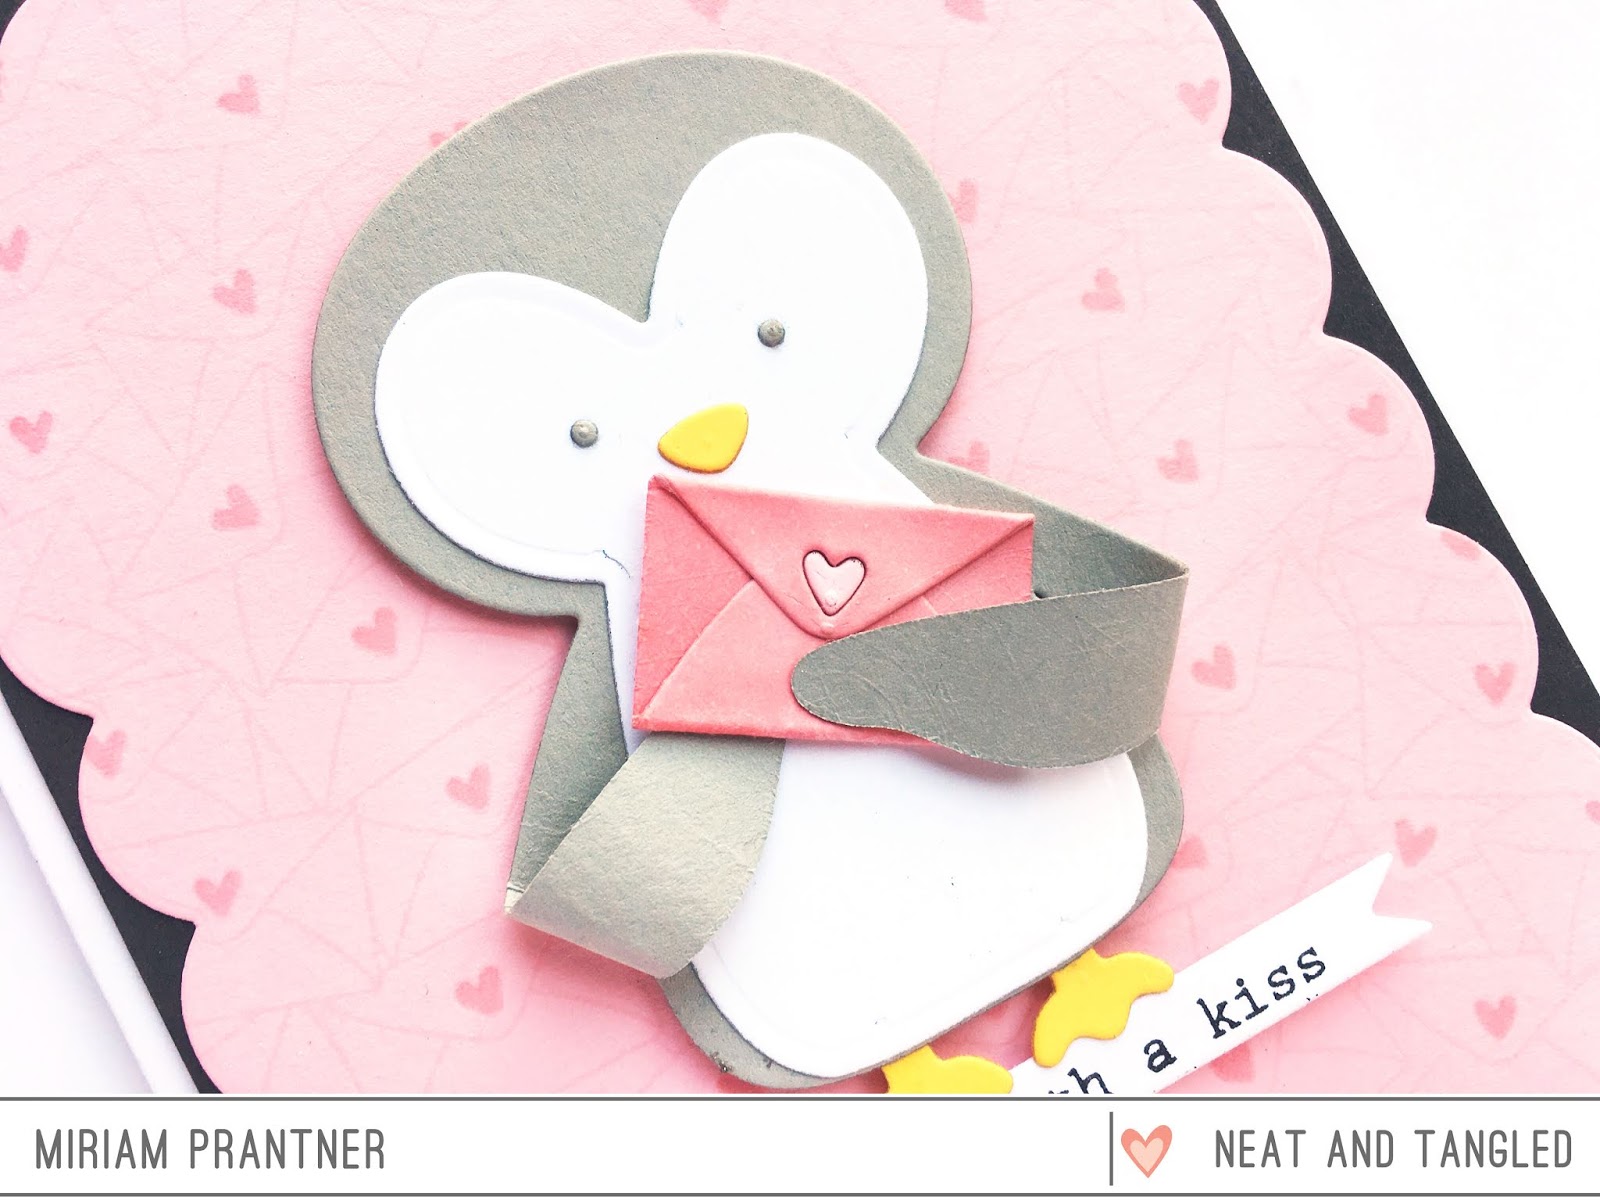
Hi friends!  It's the first day of this month's Neat & Tangled release week!  I've got several new products to share with you this week, starting with today's featured products, Mail Background and the Love Mail dies.  The Mail Background is also a new product type for Neat & Tangled - a red rubber background!

I started out by stamping the background in a very soft pink ink (Frosty Pink from Altenew) on a light pink cardstock.  The little hearts on the envelopes stamp just an outline, but I went in with a very light pink Copic marker (RV11) and colored them all in.  I then used the largest scalloped frame from the Scalloped die set to die cut the background piece, and adhered it to a dark gray panel to give it a bit of definition.

I knew I wanted to use the faux envelope die from the Love Mail set on my card, and I needed someone to hold it.  The Penguin Treat Holder die was the perfect candidate.  I cut the penguin from a light gray cardstock for the main body and used a lighter yellow for the feet and nose/beak.

Next, I cut the envelope from the same pink cardstock I used for the background, coloring the envelope with the same pink Copic I used to color in the hearts on the background (I left the heart uncolored).  Since this is a faux envelope, you just fold the top and bottom flaps in to create the look of an envelope, but it doesn't actually hold anything.  Once the envelope was assembled, I used glue dots to adhere the penguins wings and the envelope.


The sentiment is from a new set I have that you'll see later this week.  

Both the penguin and sentiment strip were popped up over the base.

That's all for me today, but be sure to head over to the Neat & Tangled blog to see what the rest of the team created.  You can also enter to win today's featured products there.

Leave a comment here as well.  I'll be selecting some commenters to win some of my new release products at the end of the week.  For extra chances, head over to my Instagram account (@mprantner) and follow the directions there.  See you back here tomorrow for Day 2!

Thursday, November 29, 2018

Joyeux Noel


I'm playing with some of the recent Neat & Tangled releases today.  I love the images from Elena's Nativity Play set (which incidentally is just back in stock).

My images were stamped, colored with Copics, and die cut.  I chose a couple pieces of patterned paper for the background, and framed the scene with piece of gray cardstock that was die cut using the largest frame die from the Scalloped die set as well as one of the ovals from the Card Front die set.

The framed piece was then dry embossed using the Cubic cover plate for some additional texture/interest.


The sentiment is from the Nativity Play set and was cut out using one of the banners from the Scalloped set.

Aren't these kiddos so cute?

Thursday, November 15, 2018

Warm Winter Wishes


So I actually made this card a while ago, but I've been waiting to share it because the Warm Winter Scene cover plate was sold out and I didn't want to make anyone crazy waiting for it.

This is one of those cover plates that can really do all the work for you.  I cut it using some woodgrain patterned paper, and then red, green, and cream cardstock.

The different pieces were then inlaid into the woodgrain panel.  The cream buildings were inlaid with the windows/doors still intact, and the red ones with the windows/doors removed.


The sentiment is from Flora and Fauna's Arctic Starry Night set.  It was stamped on one of the banners from the Scalloped set, and layered with another banner cut in green.  The ends were snipped off and then it was popped up over the panel.

Have a great Friday!

*Affiliate Links Below to Ellen Hutson and in text to Neat & Tangled