Showing posts with label Stepped Back Blocks. Show all posts

Tuesday, June 3, 2025

SSS, Grad Basics

 *This post contains affiliate links to Simon Says Stamp.


The new Grad Basics sentiment set came out just in time for me!  I normally have a few graduation cards to make each year, but this year my oldest graduates which means so do most of her friends, which means I need a lot more cards!

When I need cards in a hurry, stencils are my best friend.  I pulled out a few favorites to create fun, colorful backgrounds, and finished things off with a sentiment from the Grad Basics set.

For these first two cards, I tilted the Positivity stencil when putting it over my cardstock panel, and then inked with two colors: Pucker and Citrine for the card on the left, and Cabbage and Sky for the card on the right.  All my sentiments were stamped with Versafine Clair black.


For below left, I used the Dimensional Cube stencils with Bubblegum, Carnation, Violet, Orchid, and Sky.  The card on the right uses the Dimensional Rectangles stencils with Sky, Dusk, and Flannel (I used Sky twice inking one layer with a lighter hand than the other).


Next up. I used the Stepped Back Blocks stencil on the left, with Ocean, Mist and Raindrop, and 3D Box stencils with Sky, Dusk, Night, and Twilight, using several of those colors multiple times.


Finally, I pulled out the Giant Firework stencil, which is a good one to have in your stash just because it works for all celebrations.  For the card on the right, I inked Blush and Butter.


For the card on the left,  couldn't resist pulling out Stickles Solar Flare Glitter Gel.  In addition to the 'regular' sparkle, there are fun star shaped pieces in this gel which make is especially festive.  


That's all for me today.  We're off to graduation tomorow night!

Sunday, May 21, 2023

SSS Dear Friend Release Blog Hop

 *This post contains affiliate links to Simon Says Stamp.


Hi folks!  Today is Day 2 of a two day blog hop celebrating the latest release from Simon Says Stamp, Dear Friend.  As with any good hop, there are prizes to be won all along the way.  Simon will select one commenter from each stop on the hop to win a $25 gift card to the store.  You should be arriving here from Alberto Gava's blog, and I'll have the full hop list below for you.

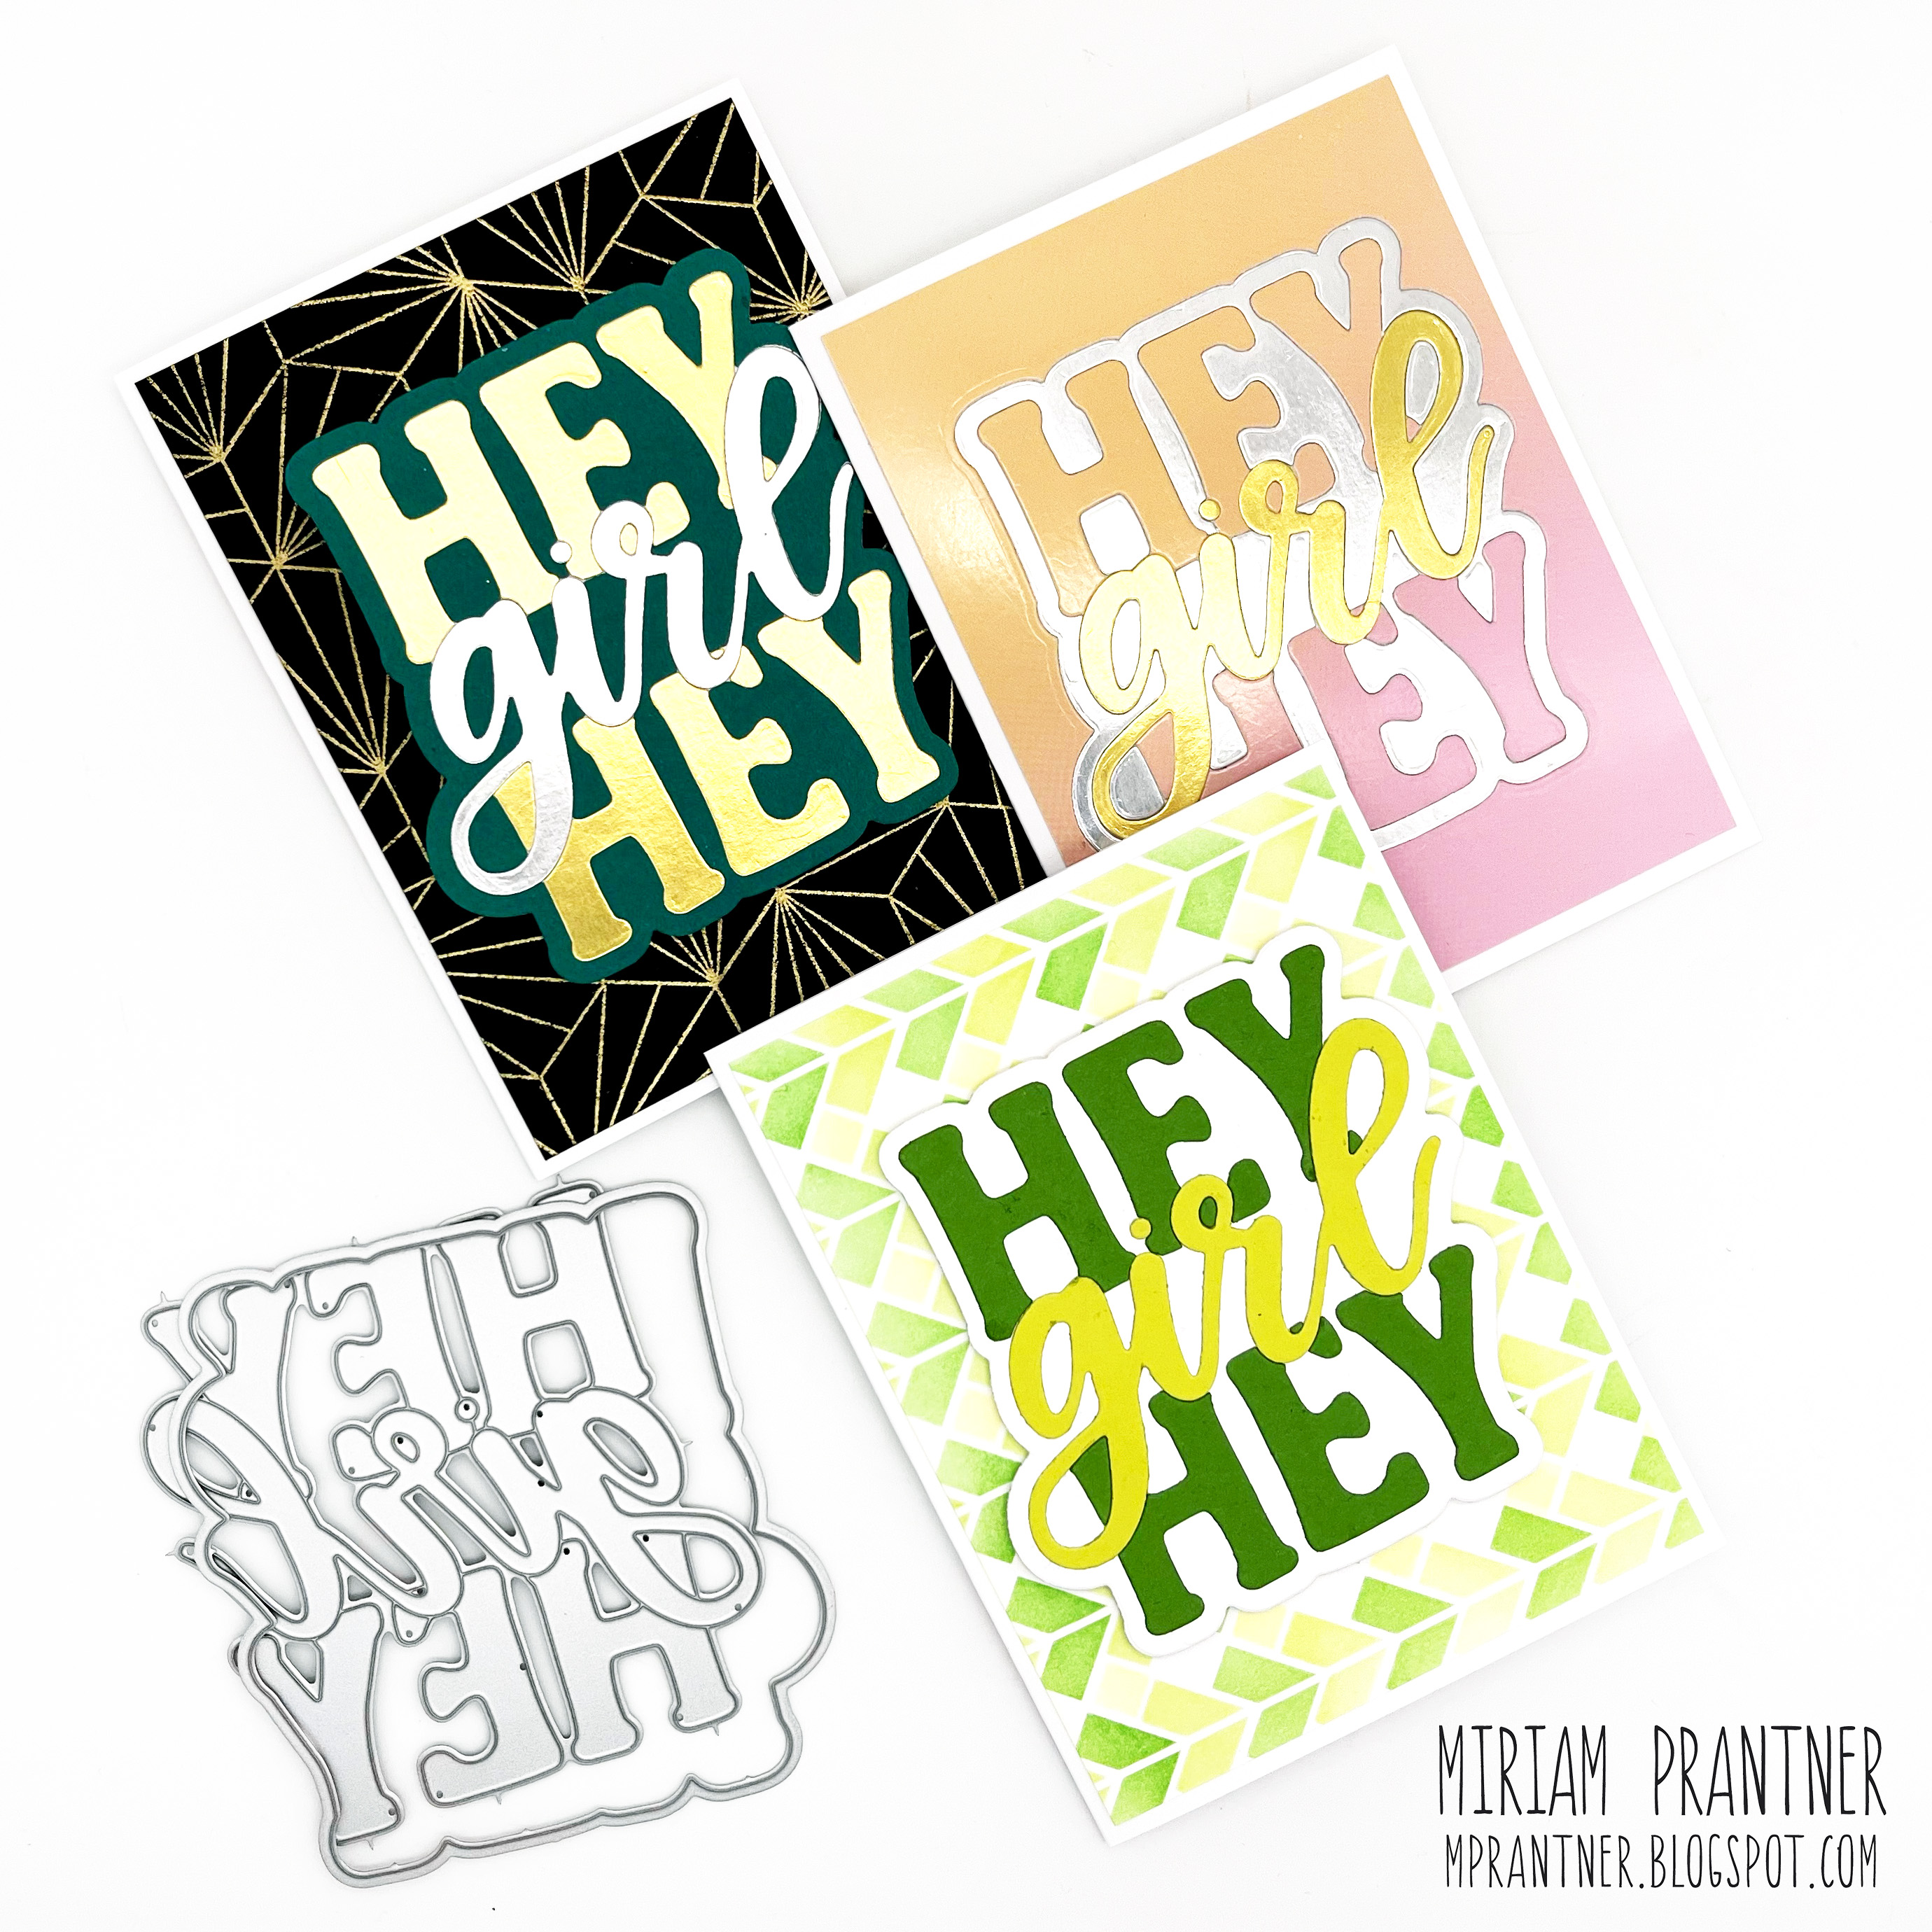
For today's cards I'm showing off my new Hey Girl die.


For this first card, I started by creating a background using my Stepped Back Blocks stencil.  There are four stencils in this set, but I used just two here.  The angled top of the block, and then the small block.  I used Celery for the angled tops, then shifted the stencil down and inked again with Pearfection.  For the small square I used Lemonade.  I only inked that one time rather than shifting down because I wanted a bit of white in the design.  


Then it was time for the sentiment die.  The shadow piece was cut from white cardstock, and then I used a dark and light green for the sentiment itself.  The entire piece was popped up over my background with foam tape.


Next up, I wanted to create a nice flat inlaid card.


I started with a piece of the Pastel Color Blend cardstock, diecutting the shadow piece from the center of my panel.

Saving that negative cut, the sentiment die was placed in the center of it, and I die cut again, saving the pieces that made up the two Hey words.

I then die cut the shadow piece from a piece of Matte Silver cardstock, and similarly die cut the sentiment itself from the center of the shadow piece, this time saving the negative space pieces.

Finally, I die cut the sentiment from Matte Gold cardstock, saving the girl pieces.


I ran a panel of printer paper through my Xyron to add adhesive to it, placed it behind the original panel of color blend cardstock, and then inlaid all the different pieces.

To make sure everything was well adhered in place, after placing a clean piece of printer paper over the top of the panel, I ran it through my die cutting machine.

I didn't want all those extra gold and silver pieces to go to waste, so I created another sentiment piece.  I really liked the inlaid look, so I cut the shadow die from some teal cardstock, and then cut the sentiment from the center of the teal cardstock.  I also die cut the shadow piece from printer paper and again ran that through my Xyron.  The die cut cardstock pieces were then inlaid together to form the sentiment piece. 


For the background I gold embossed the Hexagon Tile back over black cardstock, and the popped the sentiment piece up with foam tape.  I love the Art Deco look this card has!


That's all for me today, the next stop on the hop is Sandi MacIver, and the full list is below.  Don't forget to leave a comment to be entered to win.  And, if for a chance to win this die, swing over to my Instagram account (@mprantner) where I am giving away a Hey Girl die as well as a set of my new Modern Heart Quilt products.  Happy hopping!

Simon Says Stamp Blog
Laura Bassen
Nichol Spohr
Cathy Zielske
Barbara Tarayao
Mindy Eggen
Keisha Charles
Anna-Karin Evaldsson
Heather Ruwe
Alberto Gava
Miriam Prantner
Sandi MacIver
Barb Engler
Jennifer Kotas

Tuesday, December 21, 2021

SSS To the Moon Release Birds, Take 1

 *This post contains affiliate links to Simon Says Stamp

There are several bird dies in the new To the Moon release, and I'm completely smitten with them, so this week is 'bird' week and I'll be sharing a card featuring each of the new birds.

I think this Layered Owl might just be my favorite of the bunch.  I really like the folk art feel to him.  I die cut him from white cardstock, and then colored him with Copics using Warm Grays.  

I wanted a more subtle background that he and the sentiment would pop against, so I started with a piece of Soft Stone cardstock, inking it using my Stepped Back Blocks stencils.  For this background, I used just two of the four stencils, the one with the entire pattern, and the one with the small squares.  The entire background was inked first with Altenew Misty Morning ink, and the small squares with Cloudy Sky.

I added a gray mat and adhered the background to my card base.

The owl was popped up with foam tape as was the sentiment, from the All About You set.  This set was released previously, but there are coordinating dies now, and I'm SO HAPPY about that.  Also, if you aren't following me on Instagram, you might want to head over there (@mprantner) because I'm giving away this stamp set over there.

To finish things off, I dug way back into my stash of wood veneers.  These are Studio Calico hearts.  They are normally a little darker, but I thought they were a bit too dark, so I rubbed some white pigment ink over them to soften them up.

That's all for me today.  Come back tomorrow to check out another of the new bird dies!

Tuesday, September 14, 2021

STAMPtember Stepped Back Blocks

*This post contains affiliate links to Simon Says Stamp

Hi friends!  I've still got some STAMPtember projects to share this week.  Today's cards feature my Stepped Back Blocks stencil set.  It is currently sold out, but you can sign up to be notified when it comes back into stock.

This is such an easy set to use.  I loved how quickly these backgrounds came together.  There are a lot of great geometric building stencil sets out there right now.  This set is a little pricier because it includes four stencils.  There is one that has the basic design if you are in a real hurry, you can just use that one.  Or, you can use the three 'builder' stencils which build up that final design in three steps.  This isn't one of those stencils that you need to flip or turn, so for the basic design, you don't need to clean the stencil off between inkings.


For this first card I used Mustard Seed, Twisted Citron, Carved Pumpkin, and just built the design up in the normal way.  


The Betting on You sentiment (a gift from my sweet crafty friend Carrie) was then die cut and popped up over top.  I actually didn't have just the right shade of orange cardstock for the sentiment, so I used a lighter shade and colored it with a Copic (YR04) to get this color.

For this next card, I thought it would be fun to stretch the stencil design a little bit.


I started by building up the design in the normal way using Tumbled Glass, Salty Ocean, and Faded Jeans.

Then I turned the final stencil, with the smallest square, 180 degrees and stenciled a second small square using Evergreen Bough.


I again went with a die cut sentiment that was popped up, this time the Wish I Could Hug You die set.  

That's all for me today.  See you back here tomorrow!